Back to blog
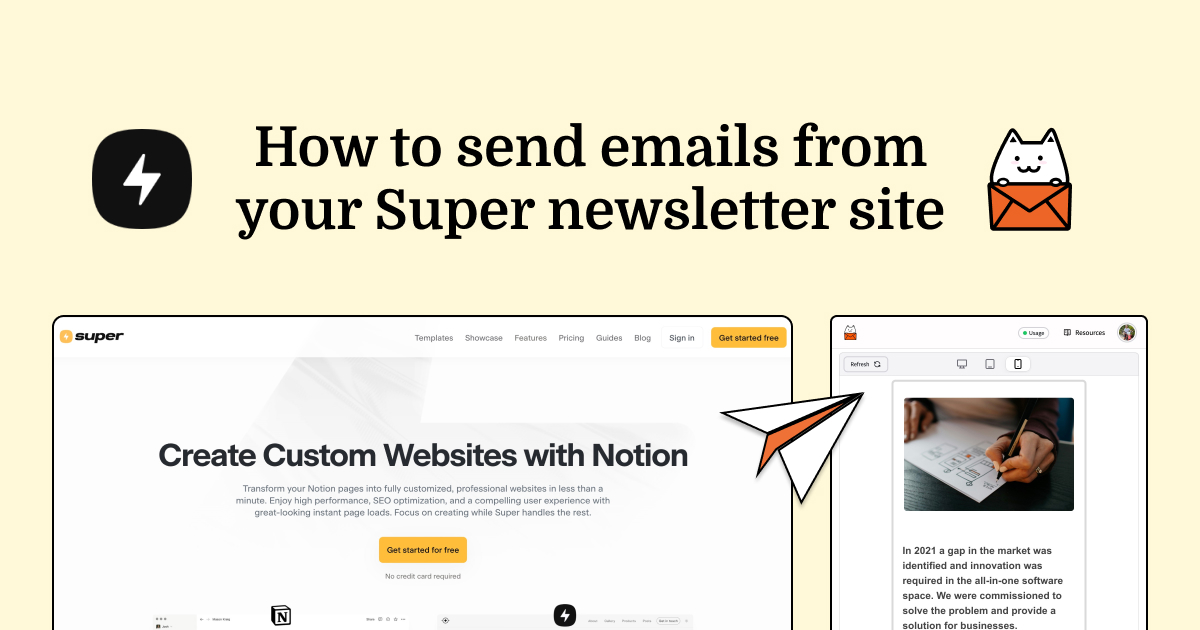
How to send emails from your Super newsletter site
This guide will show you how to send emails from your Super newsletter website.
Oct 12, 2024
Oct 12, 2024
Super is one of the most popular platforms to create Notion-based websites. A popular use case is to create a newsletter website where your audience can browse your newsletter’s past issues.
You might wonder if it’s also possible to send emails using the same Notion pages. And the answer is yes! In this guide, we will show you how you can send an email to your subscribers from your Super newsletter website.
We won’t go into the details of how to set up a newsletter site with Super here, but you can follow the a detailed article on the Super site for this here: How to create a newsletter website on Notion guide to get started.
Alternatively, if you prefer a quicker start, you can jump straight to duplicating the Narative template for newsletters by Super. Click here to get started.
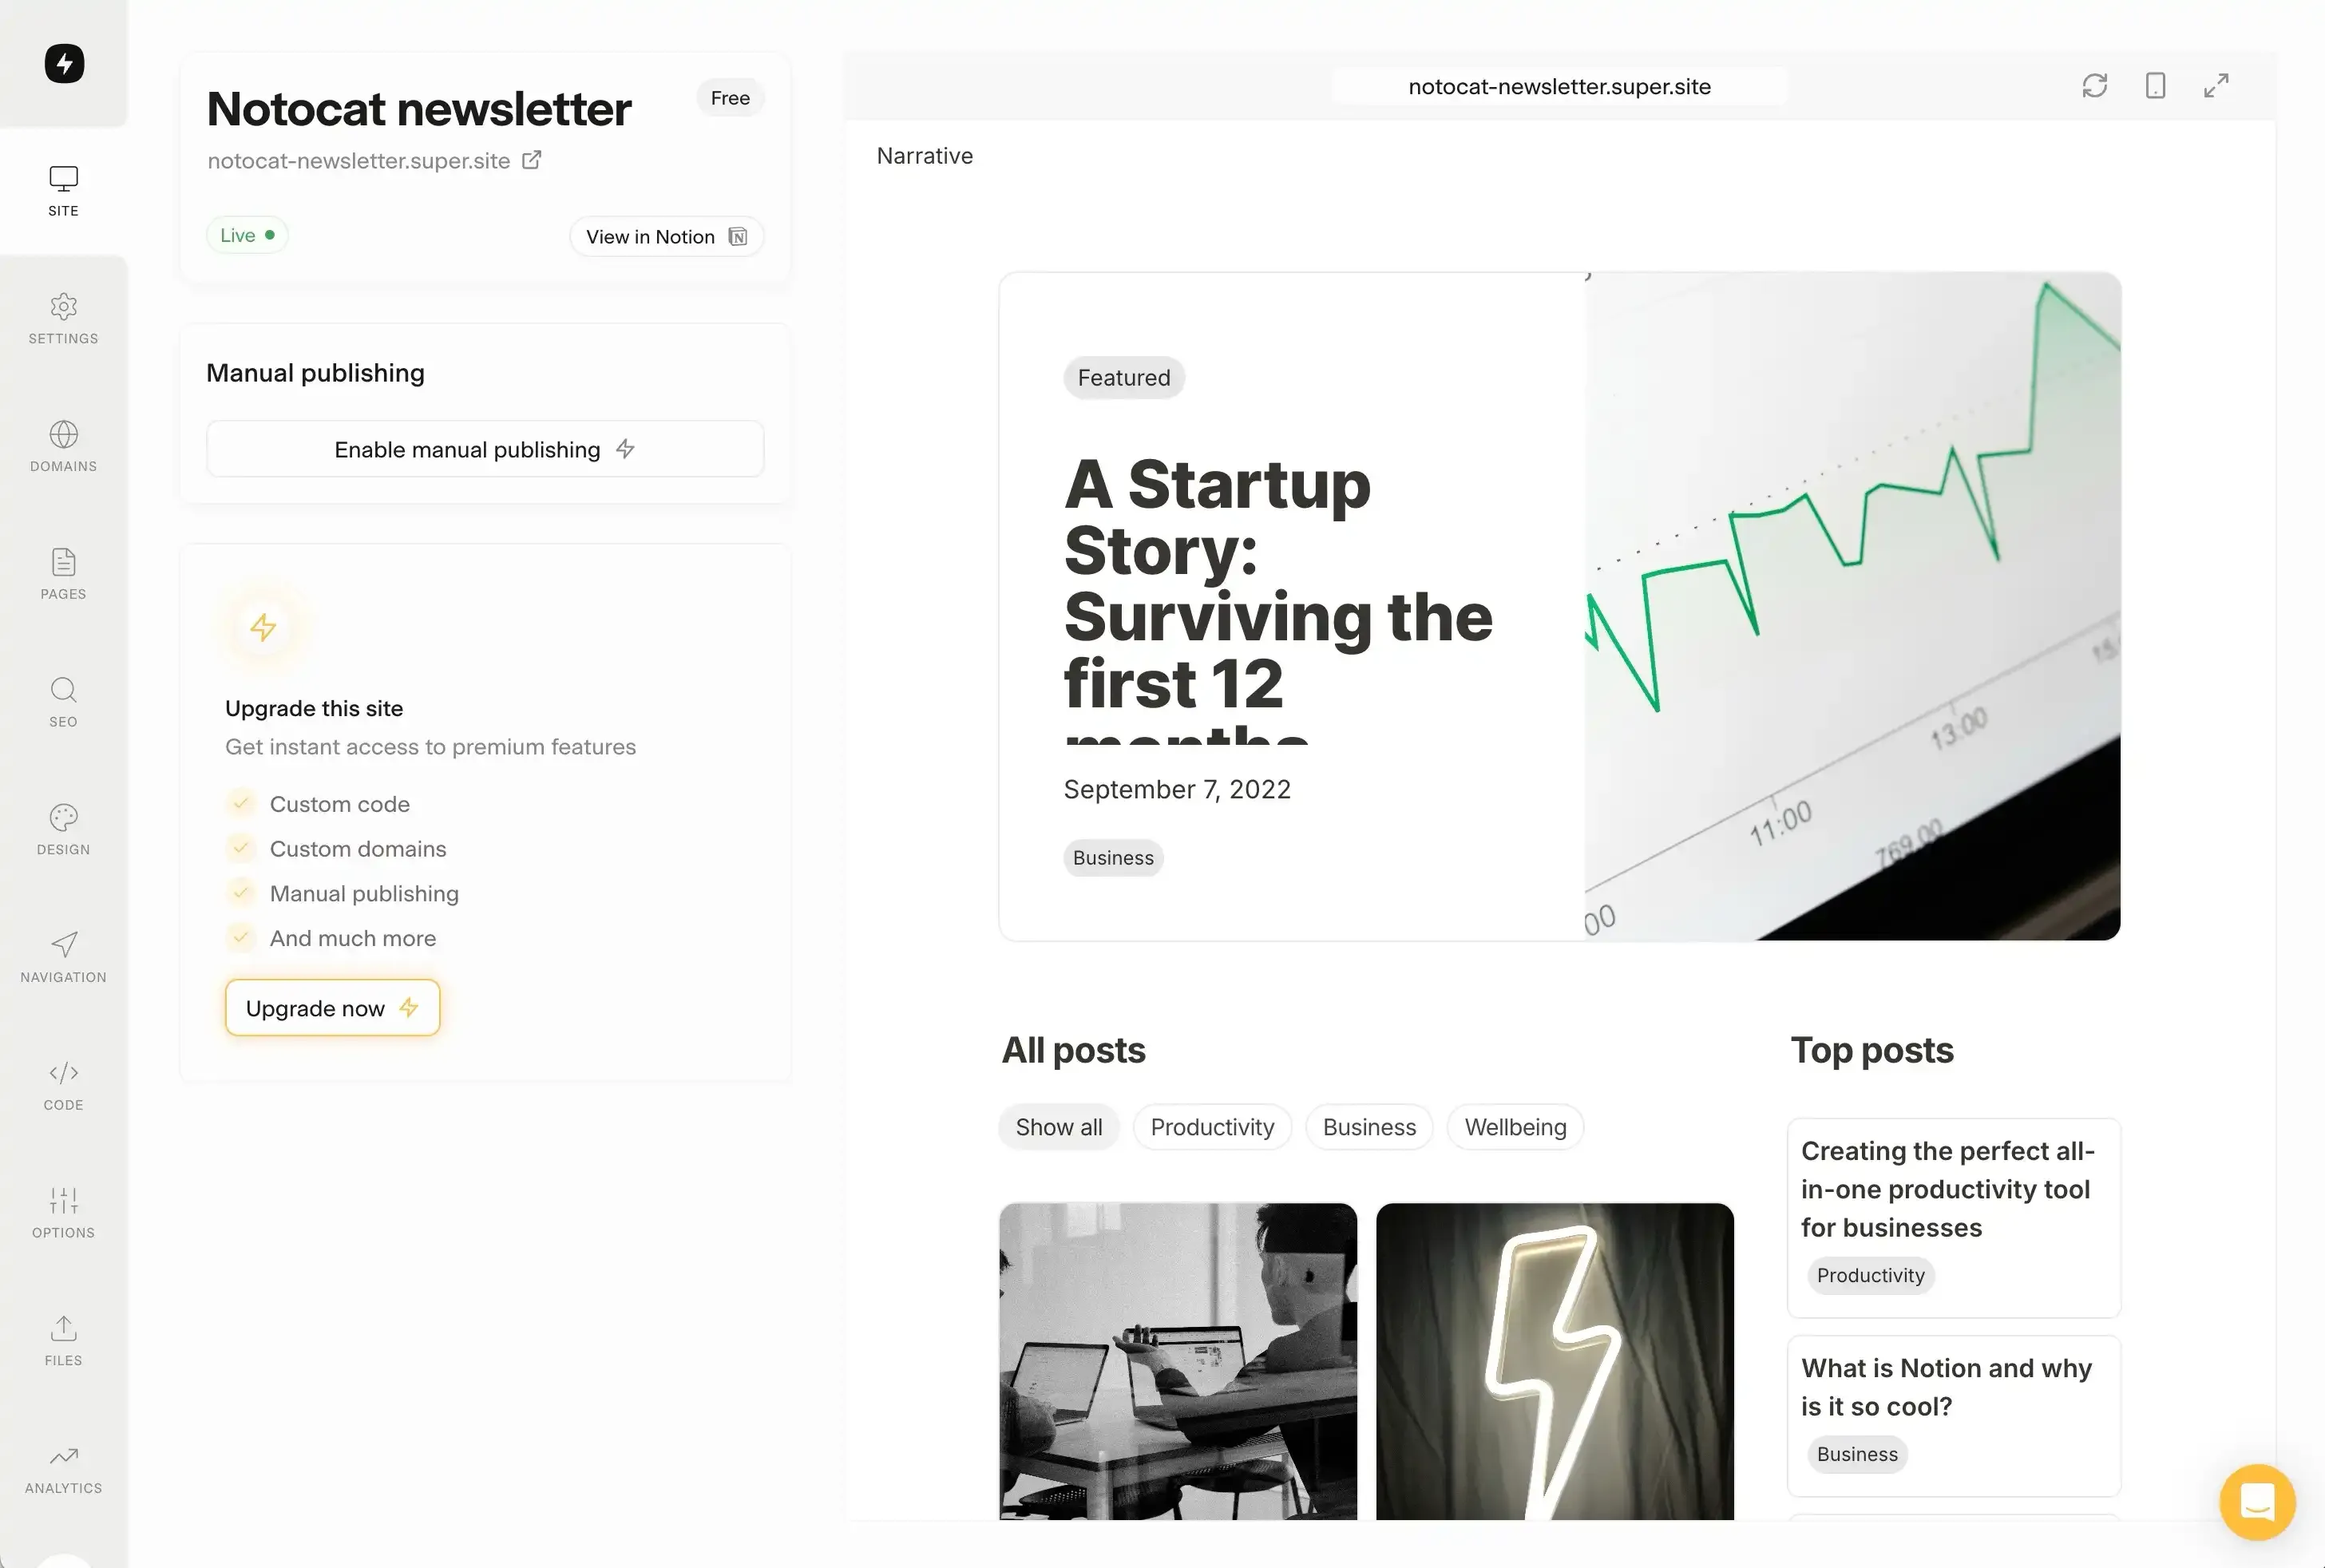
Now that you have your newsletter site created, you can create a newsletter in Notocat and connect it to the same posts database that your Super site is using. If you haven’t already, create a new Notocat account to get started.
Next up, you can create a new newsletter in Notocat and connect it to the posts database.
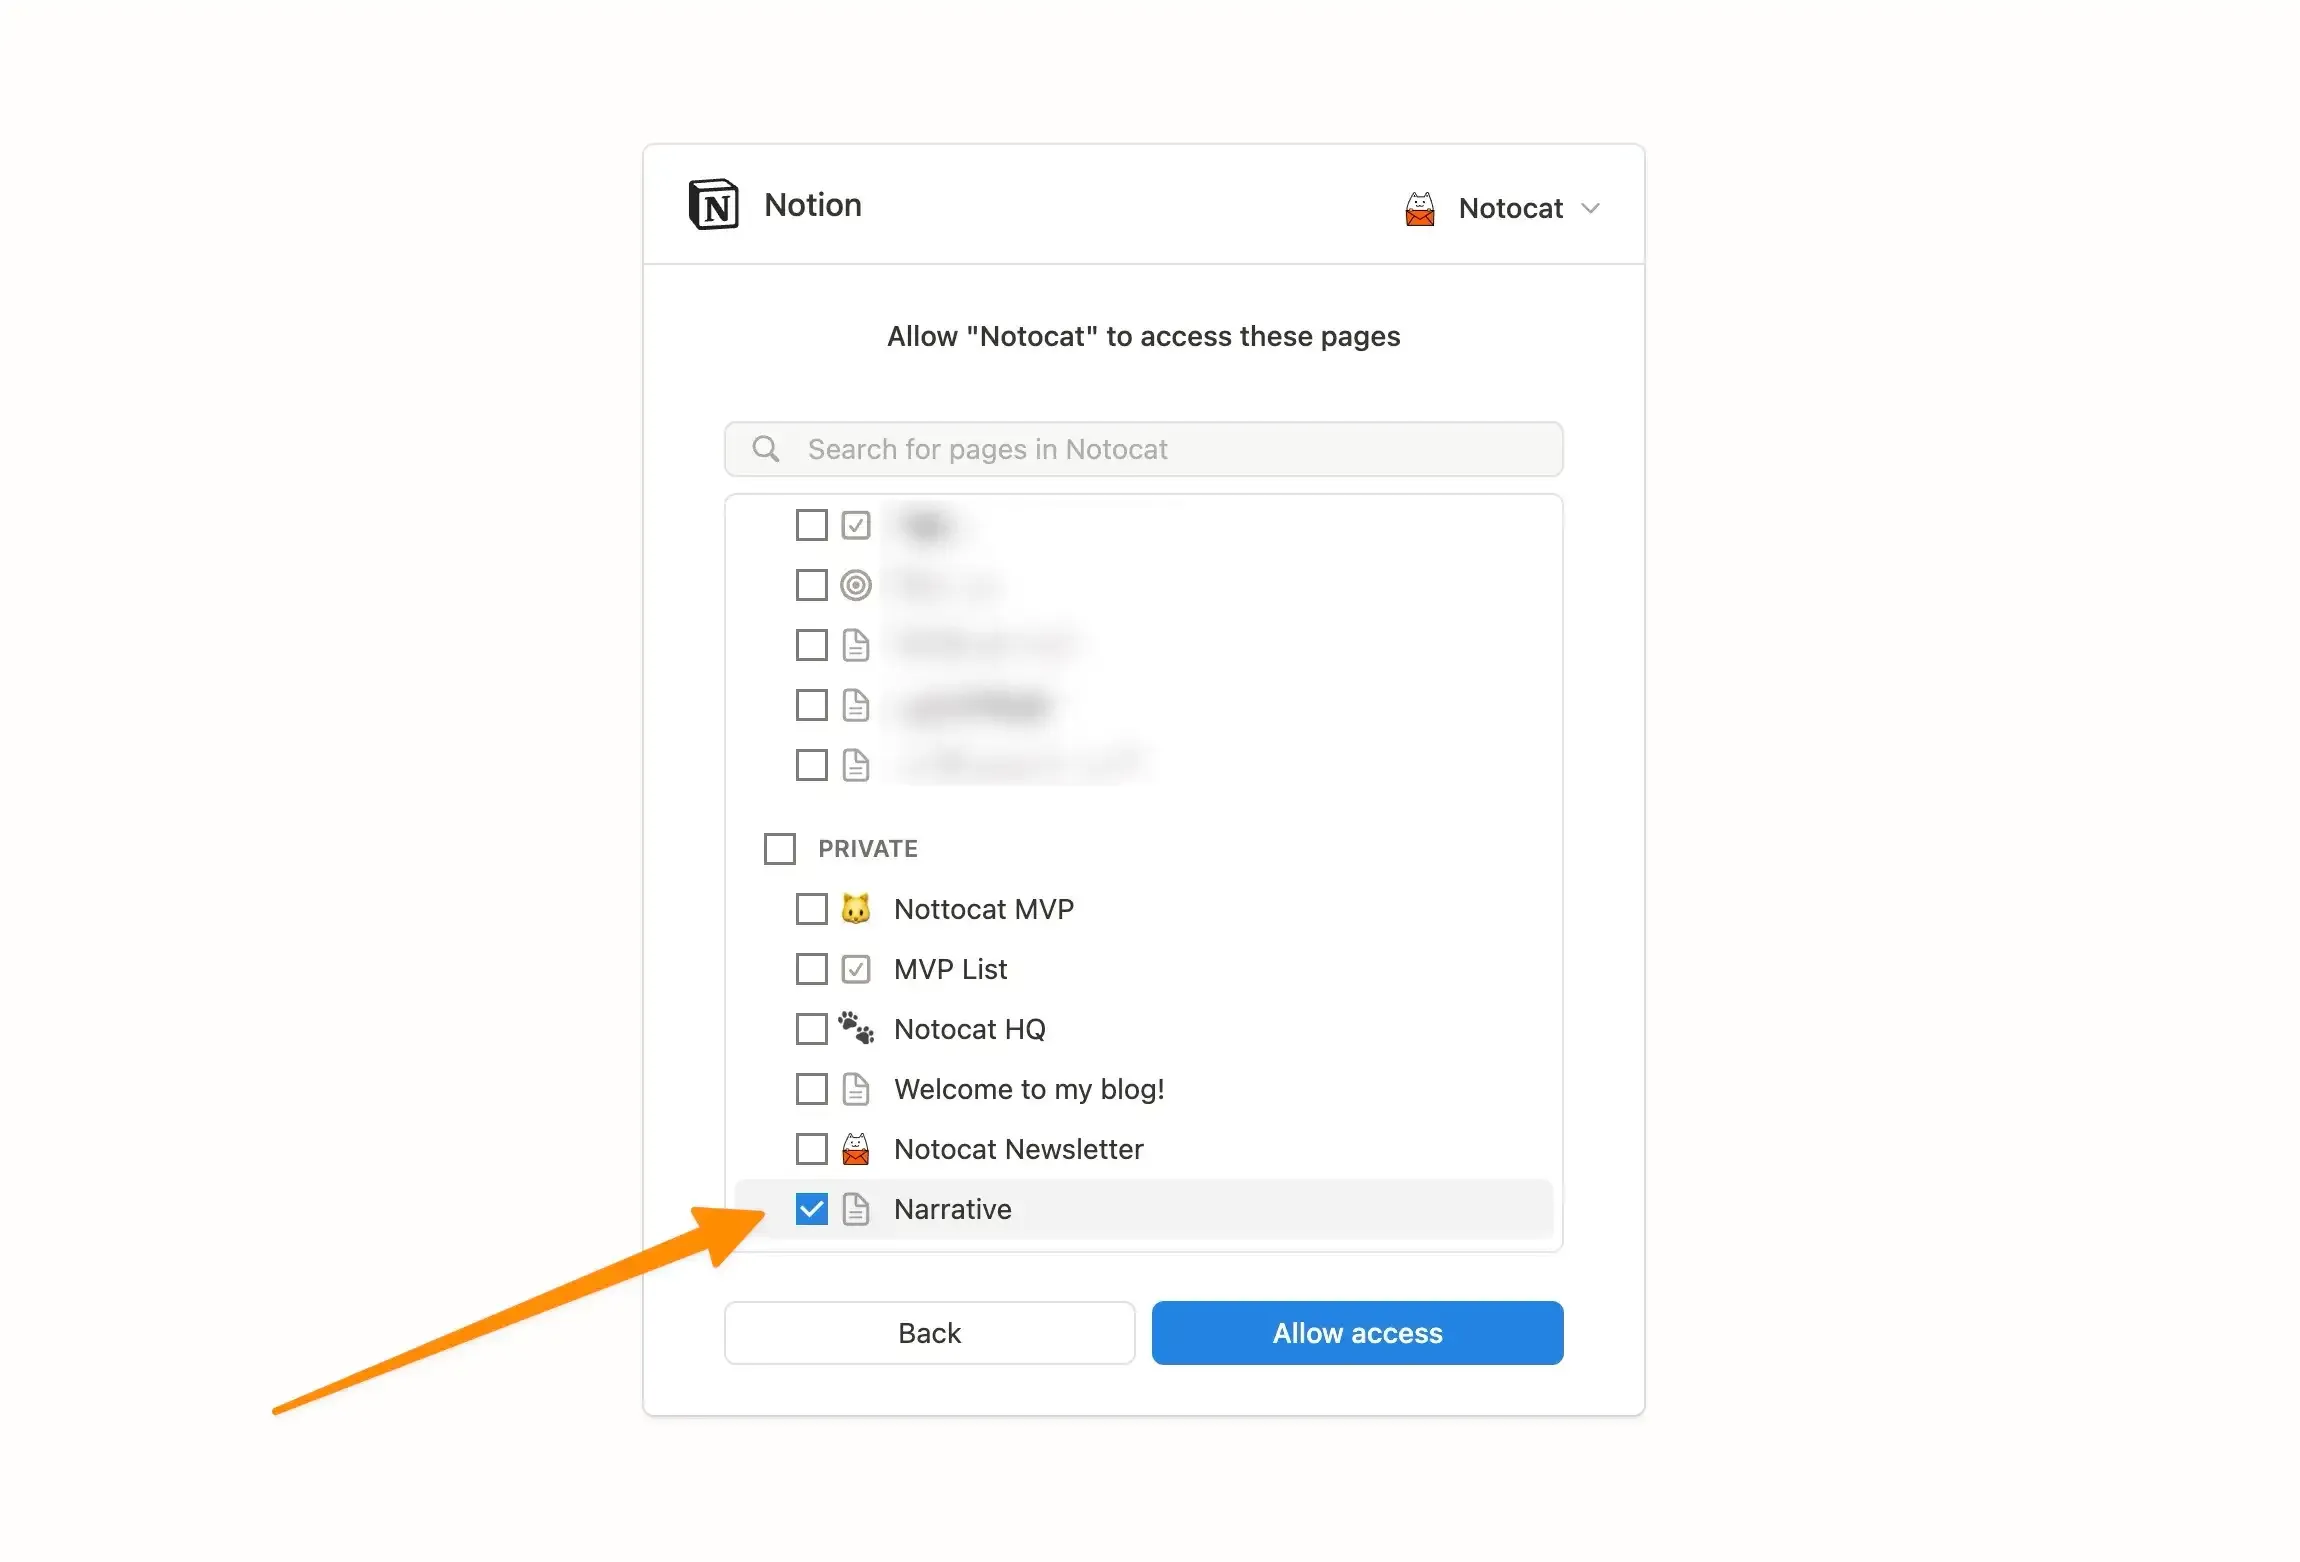
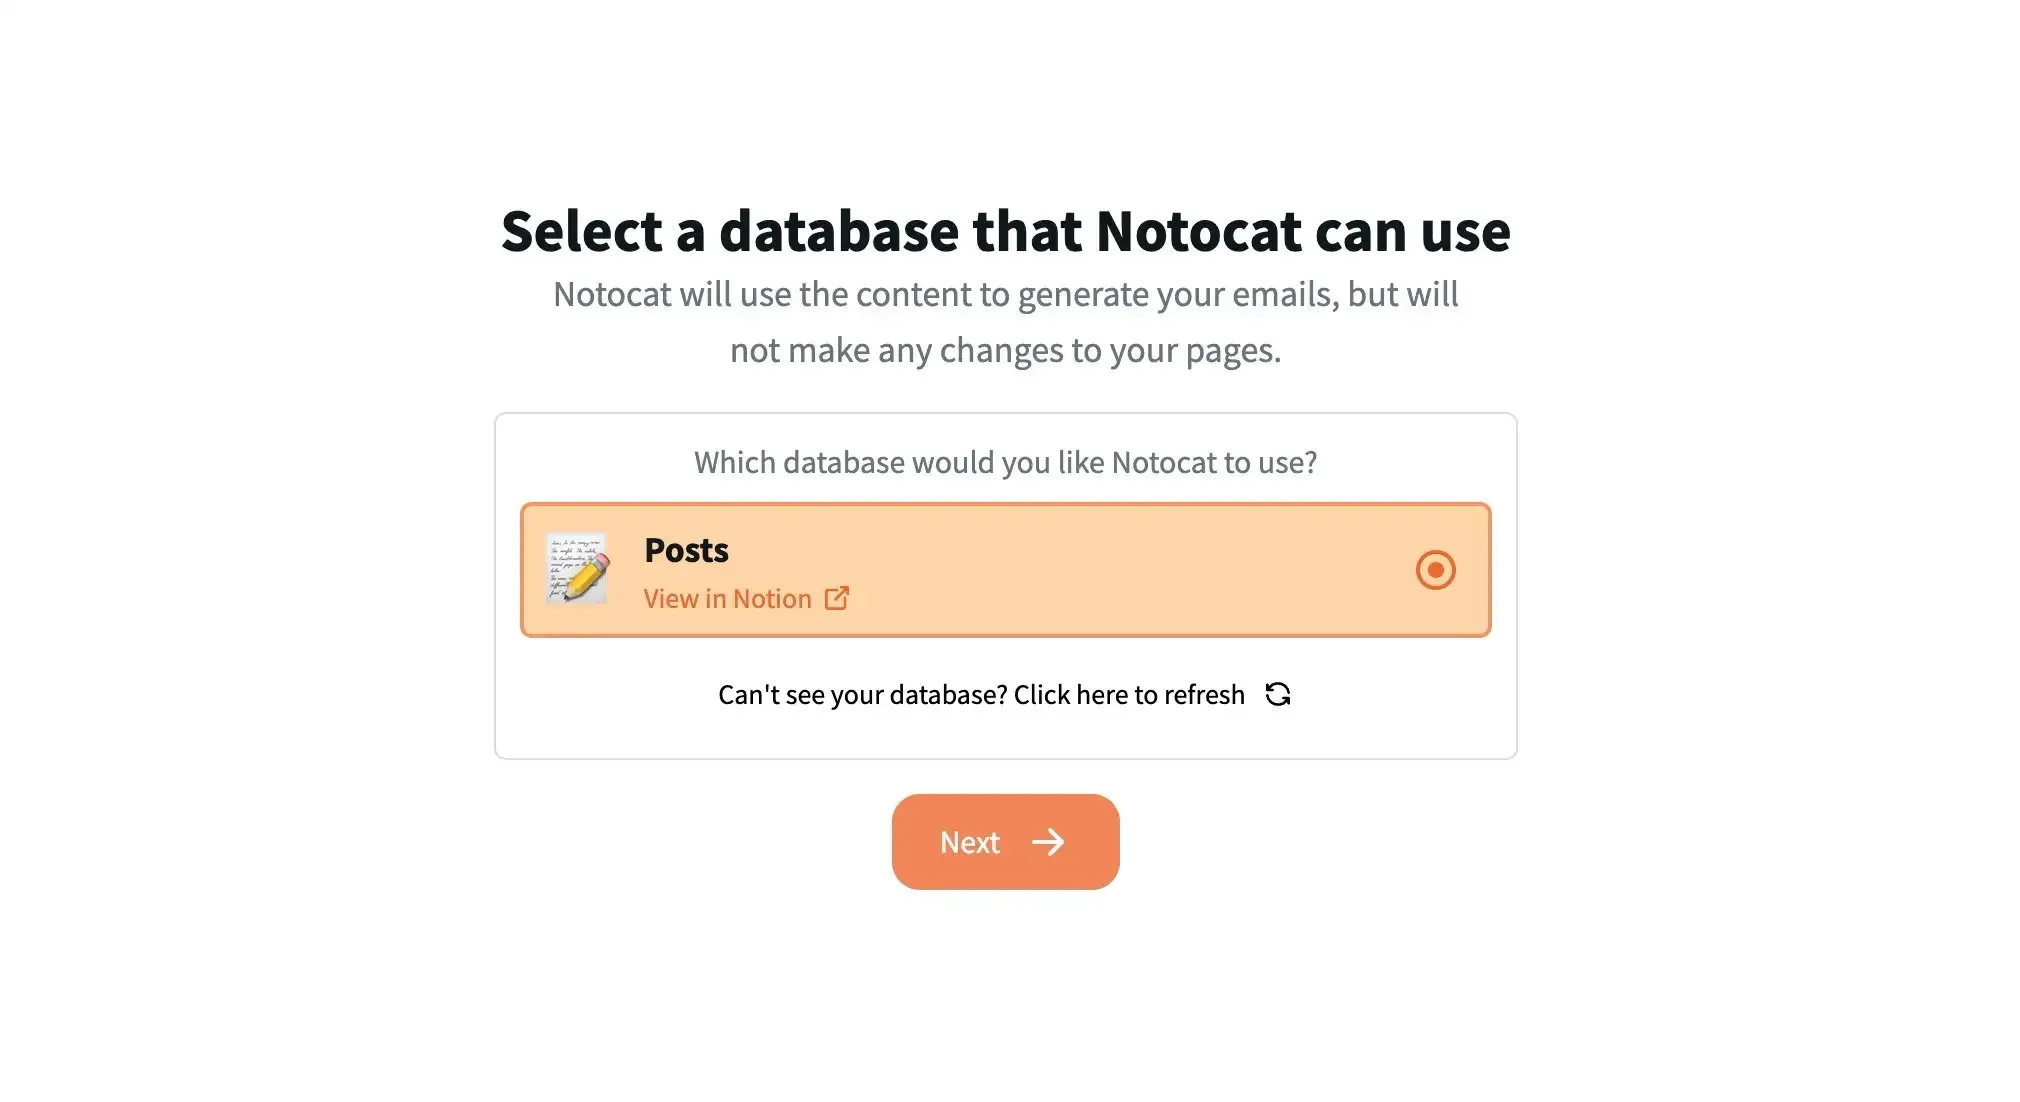
Once the authentication is completed, you will be redirected back to Notocat where you can select which database you want to use for the newsletter. Please bear in mind that the database can take a couple of minutes to appear in the list. Press the refresh button if you cannot see the Posts database in the list.
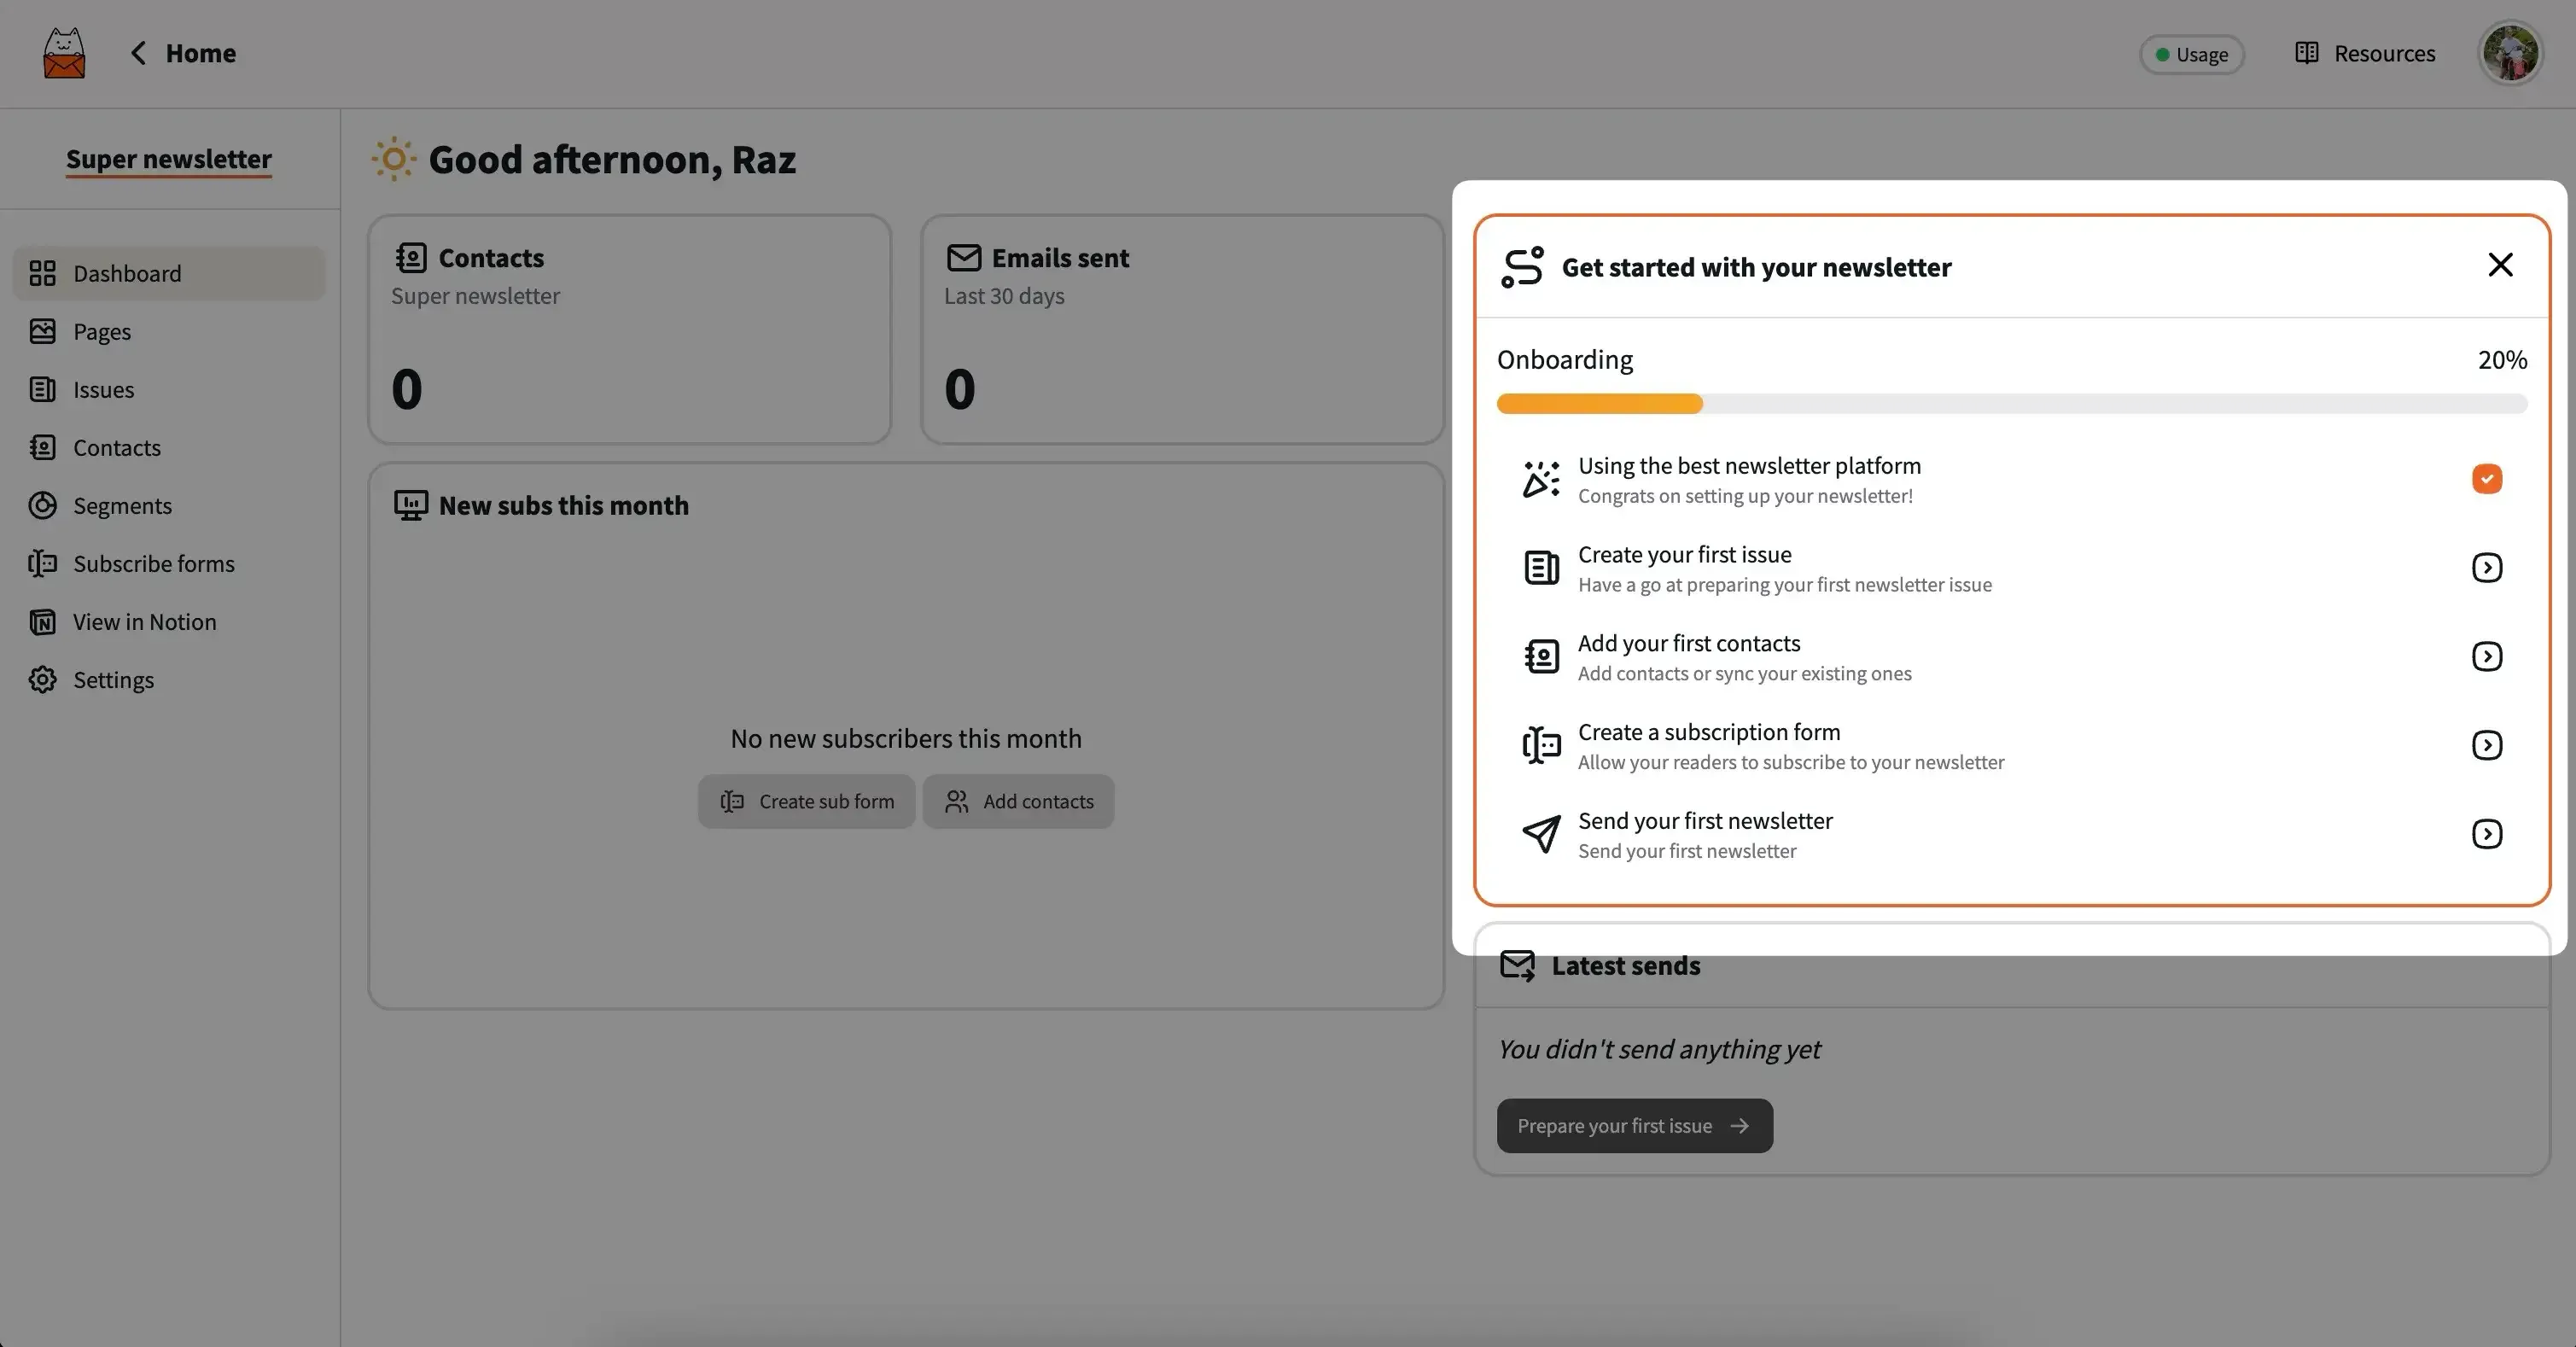
Continue with the next steps to add a name, image, and your email username to complete the newsletter setup. Once all this is done, you will be redirected to your newsletter dashboard. To get started, we recommend going through the checklist to create your first issues, add your contacts, and create a subscription form.
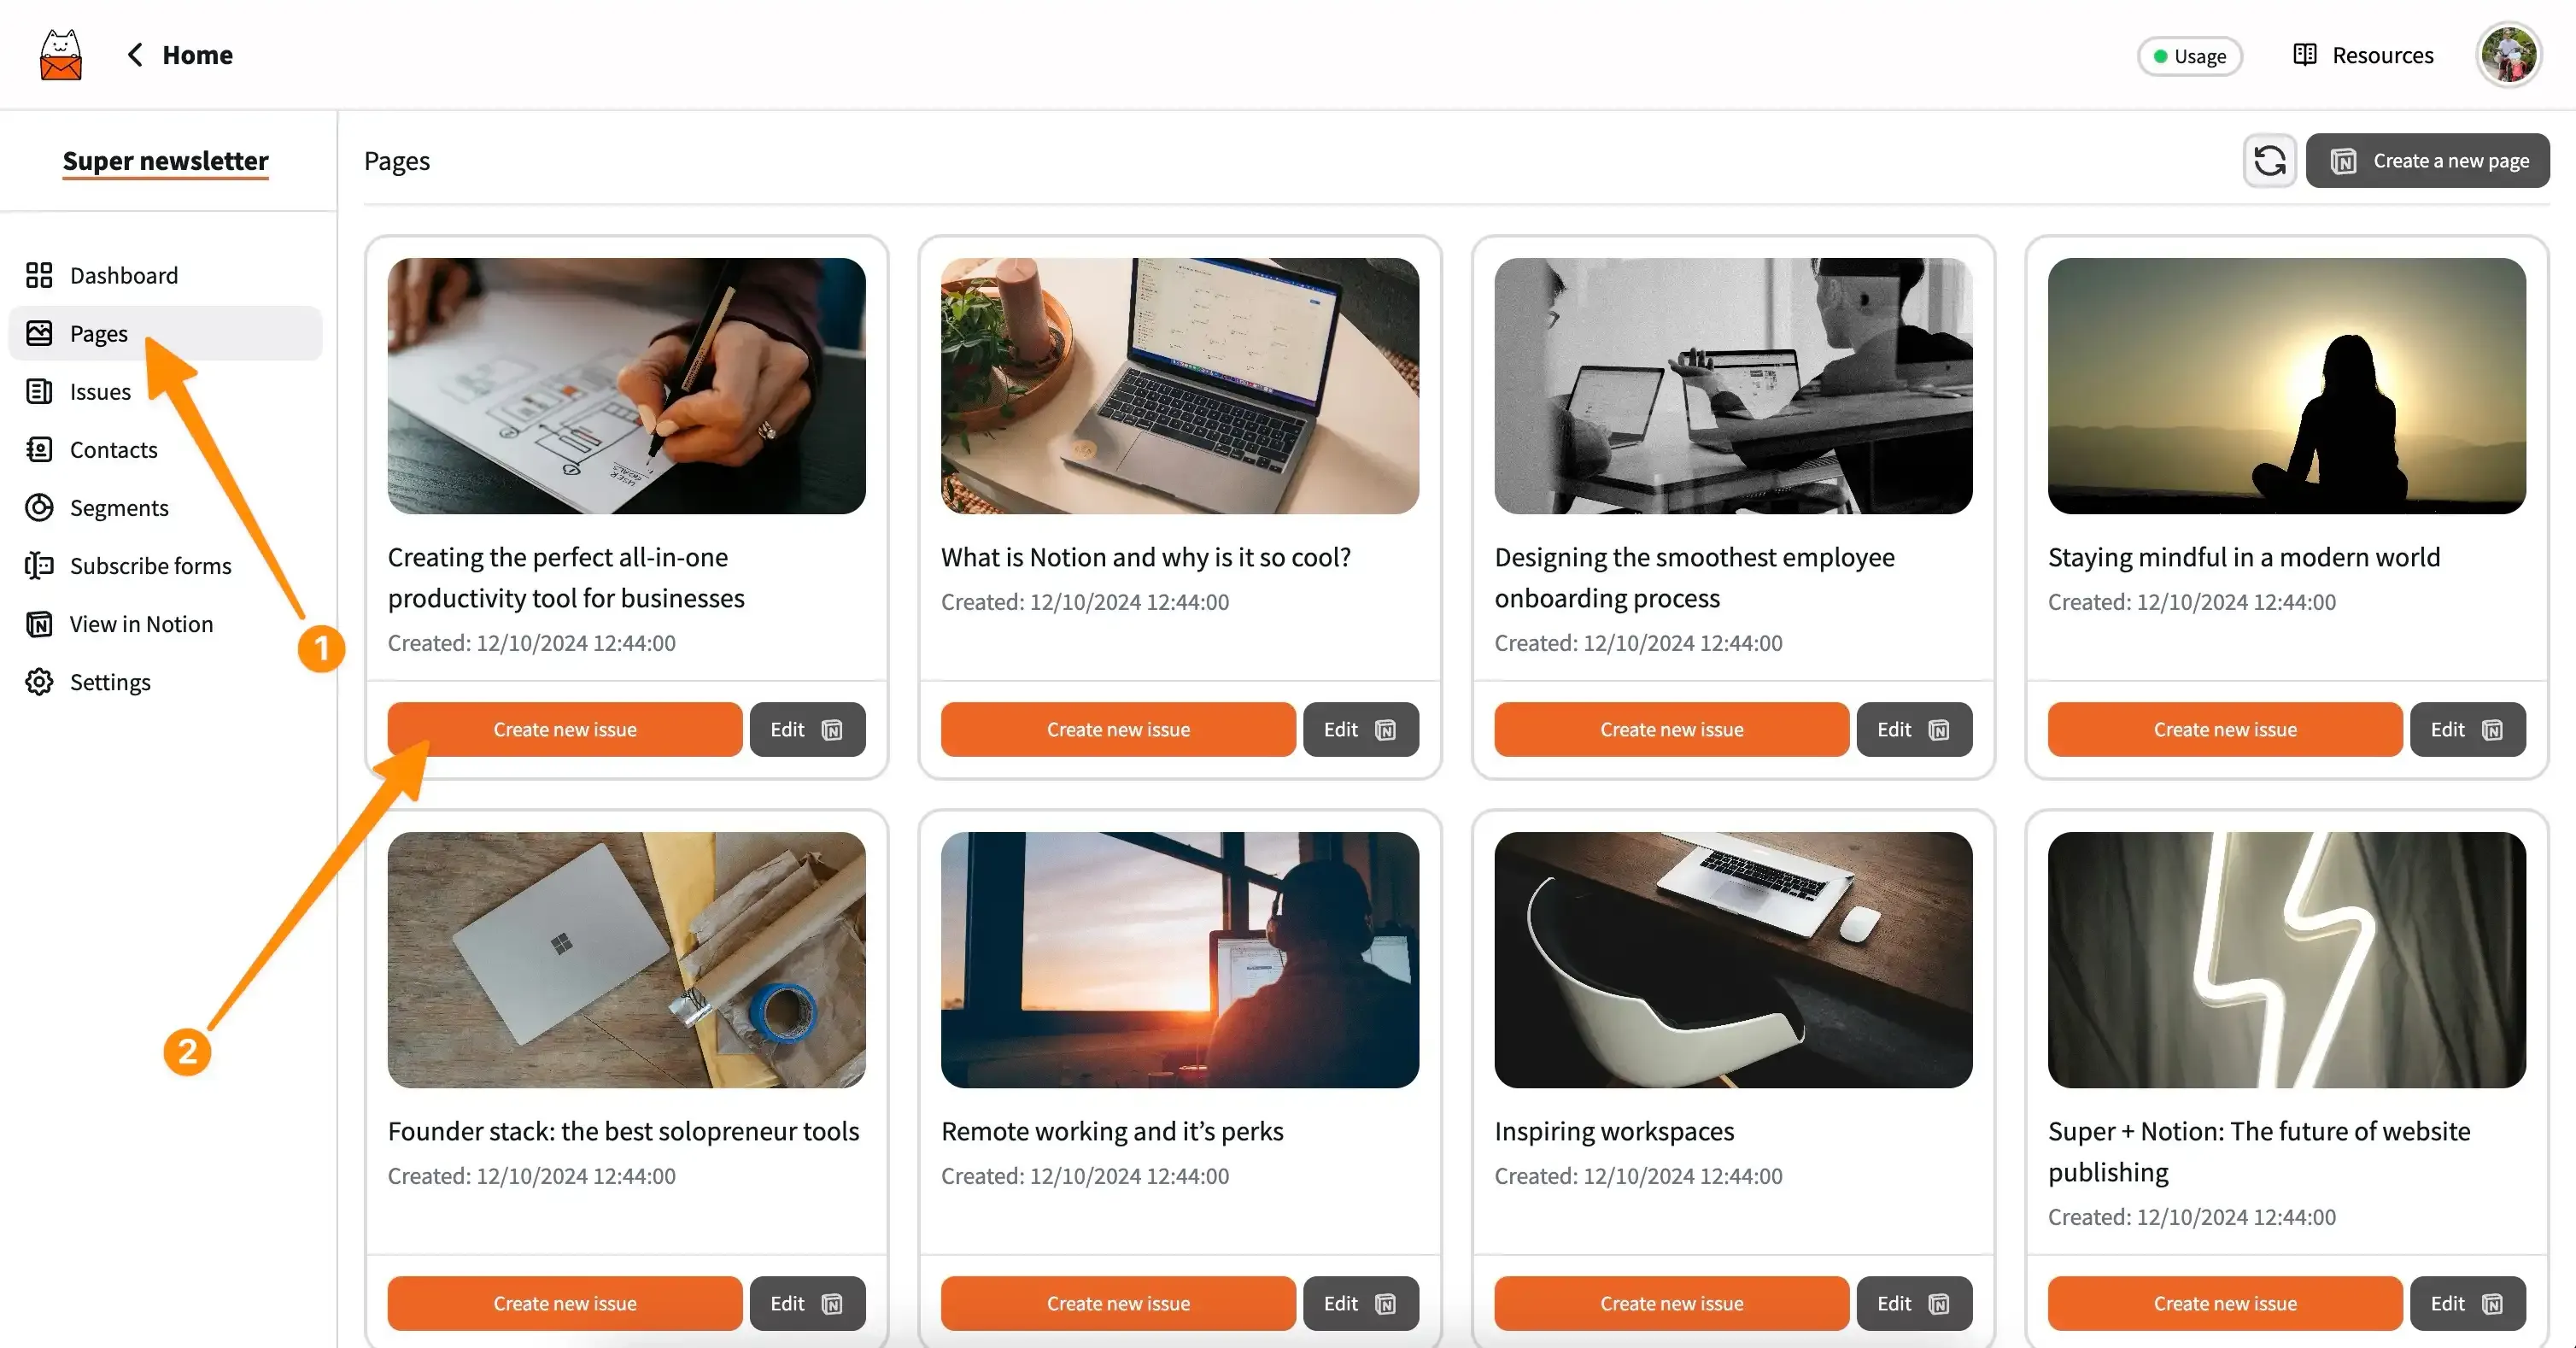
In Notocat, you can create a new issue from any of your pages in the Notion database. Navigate to the Pages tab to browse all your pages and select one to create a new issue.
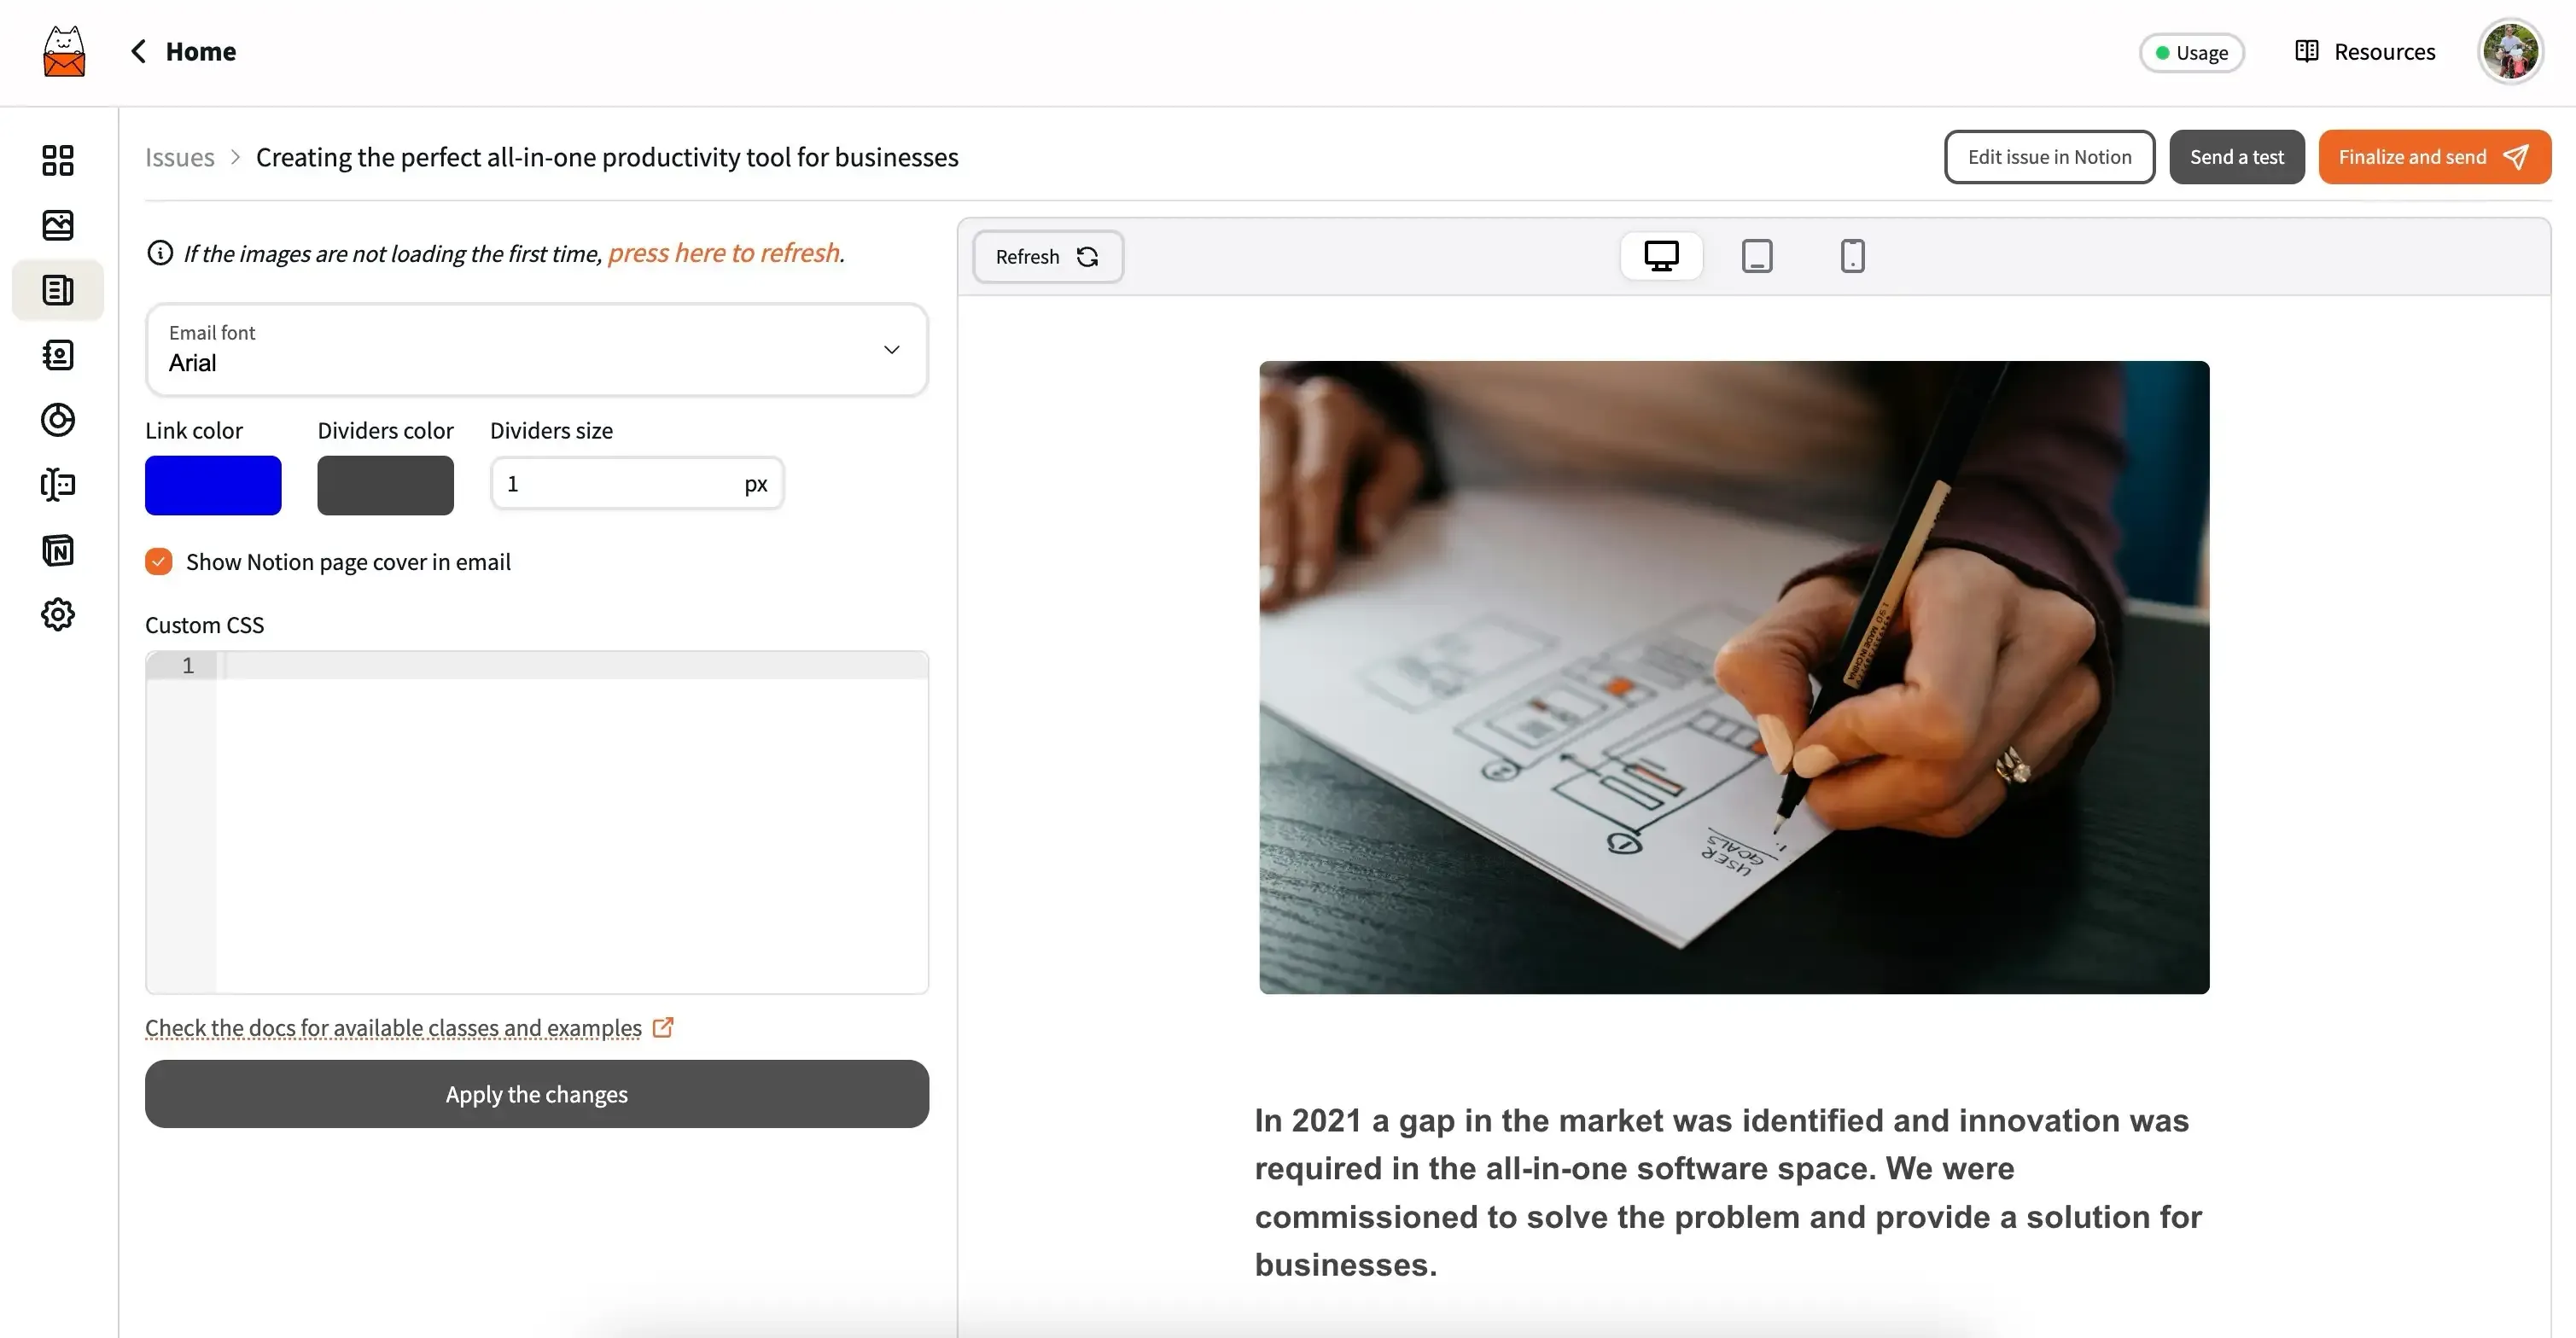
When you create a new issue, Notocat will take you to the editor where you can preview and send your newsletter. The first things you can do is to edit the appearance of your issue by changing the font, colors, and even add your custom CSS. You can then send a test email to yourself to see how it looks like.
By default, you will not be able to send emails because you’re account needs to be approved first. Follow the checklist on your Notocat homepage to get approved.
Before sending your newsletter, you have to add your contacts. Navigate to the Contacts tab in your newsletter dashboard and browse the list of possible ways you can sync your contacts. As of now, you can add contacts manually or sync them with our API, or import them from a CSV file.
With Notocat, you can create multiple subscription forms for your newsletter. You can style them in the same way you do with your newsletter issues, by changing the font, colors, and adding your custom CSS. Notocat will also keep track of where your contacts are subscribing from, so multiple forms can be an efficient way to segment your audience.
Let’s start by creating a new form. Navigate to the Subscribe forms tab in your newsletter dashboard and click on the Add a new form button.
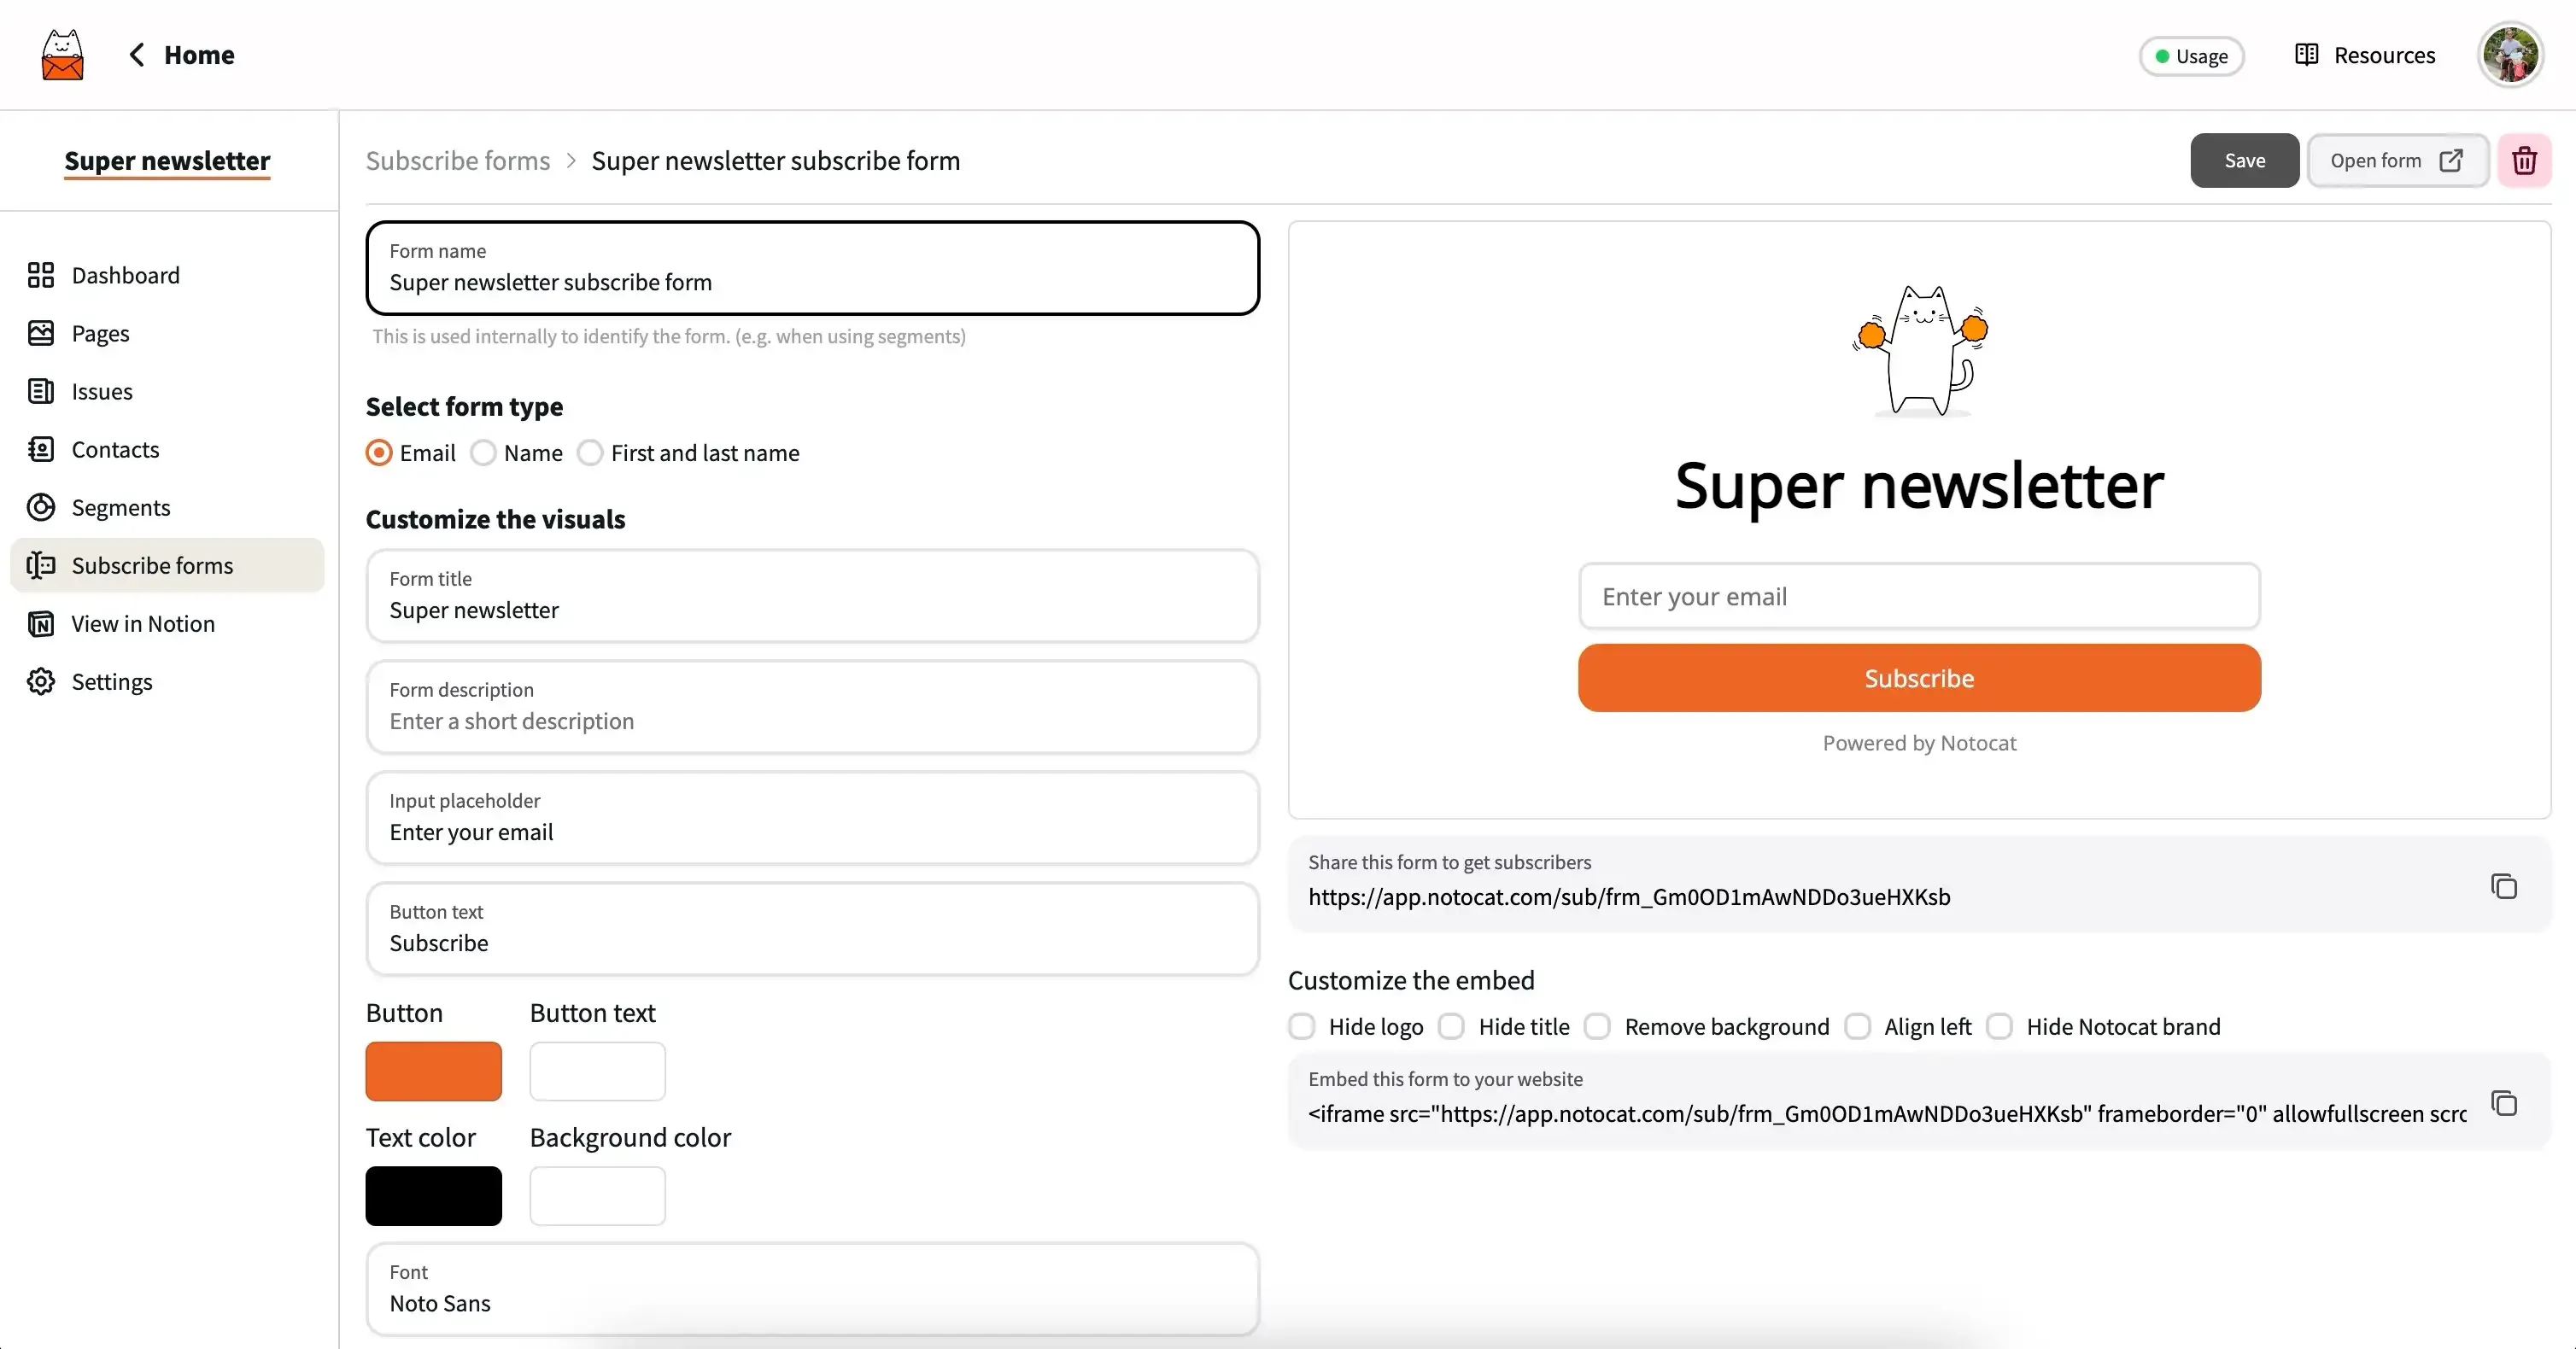
The great thing about the Notocat forms is that you can easily share them with your audience. You can share them by copying the link or embedding them in your Notion page. In this case, we will use the embedded code to replace the existing subscription form in the Super template on Notion. Notocat gives you the option to customize the embedded code to make sure it blends in with your newsletter design. In the example below, we hide the logo, title, and background color to make it look more seamless.
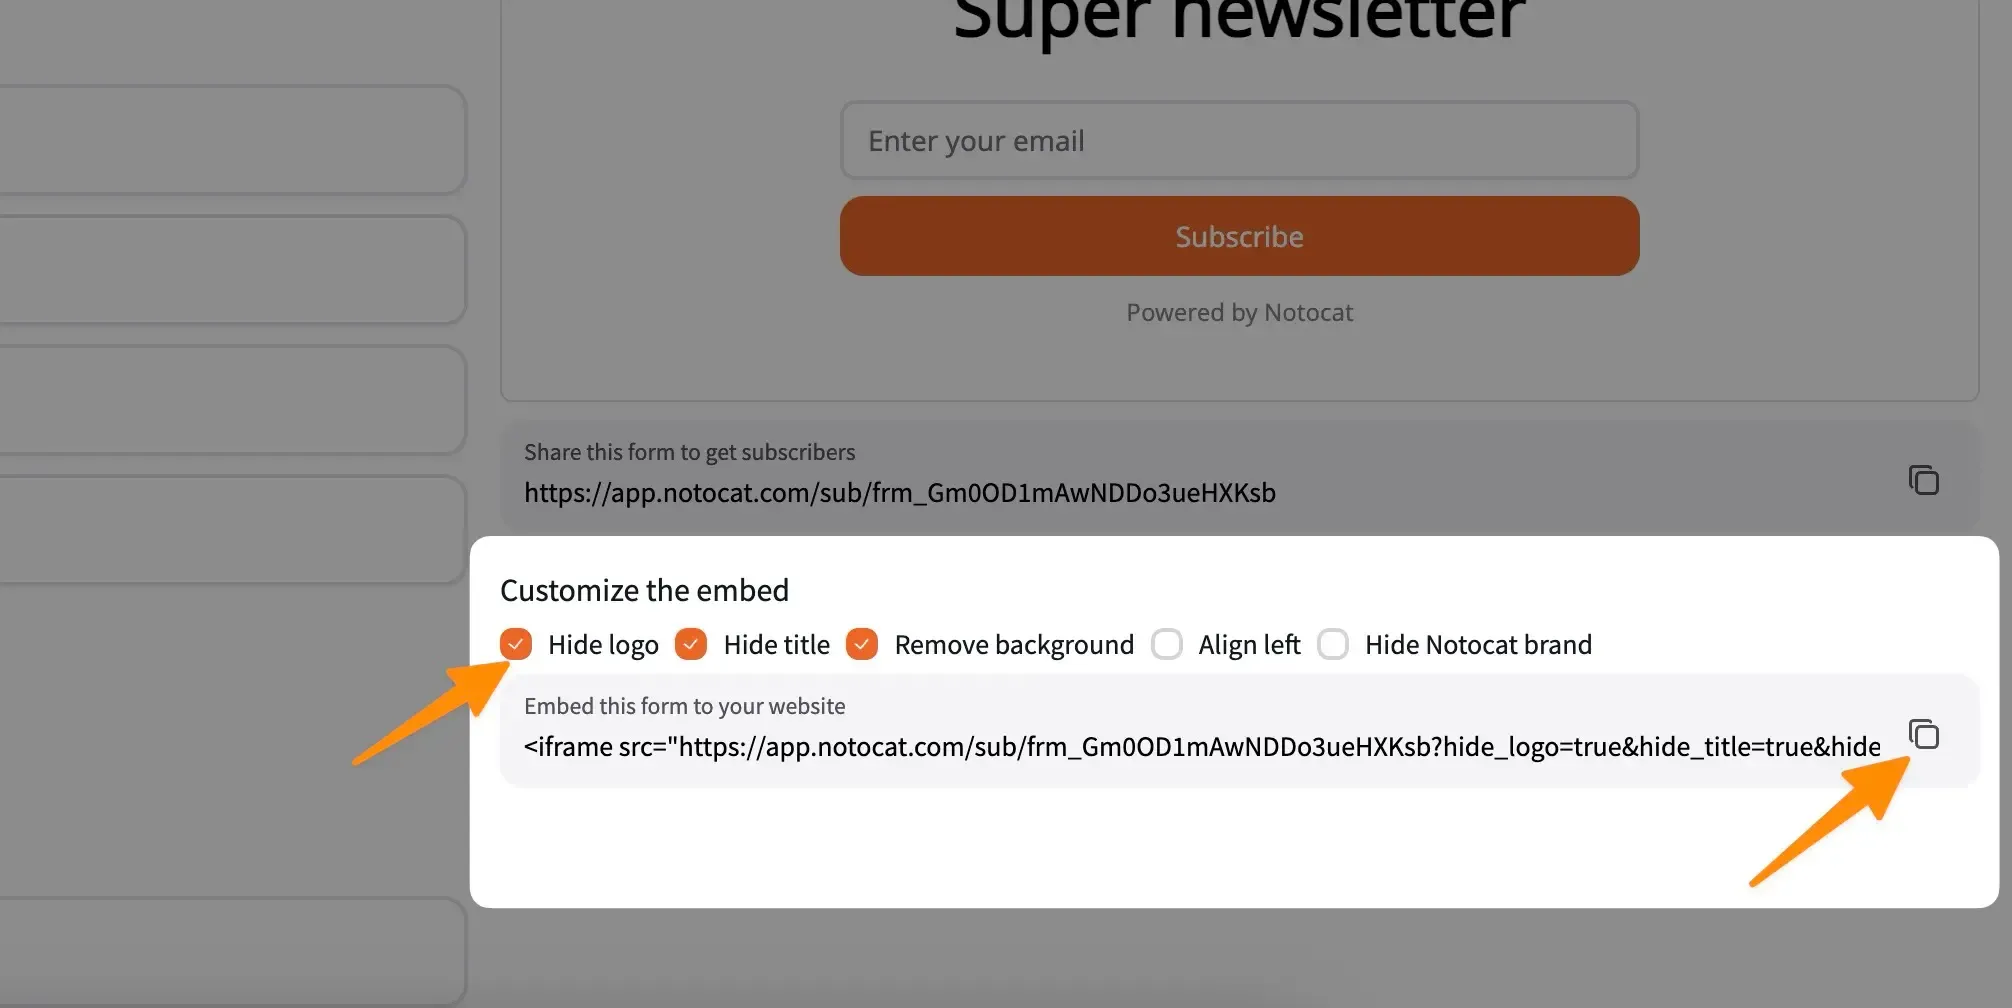
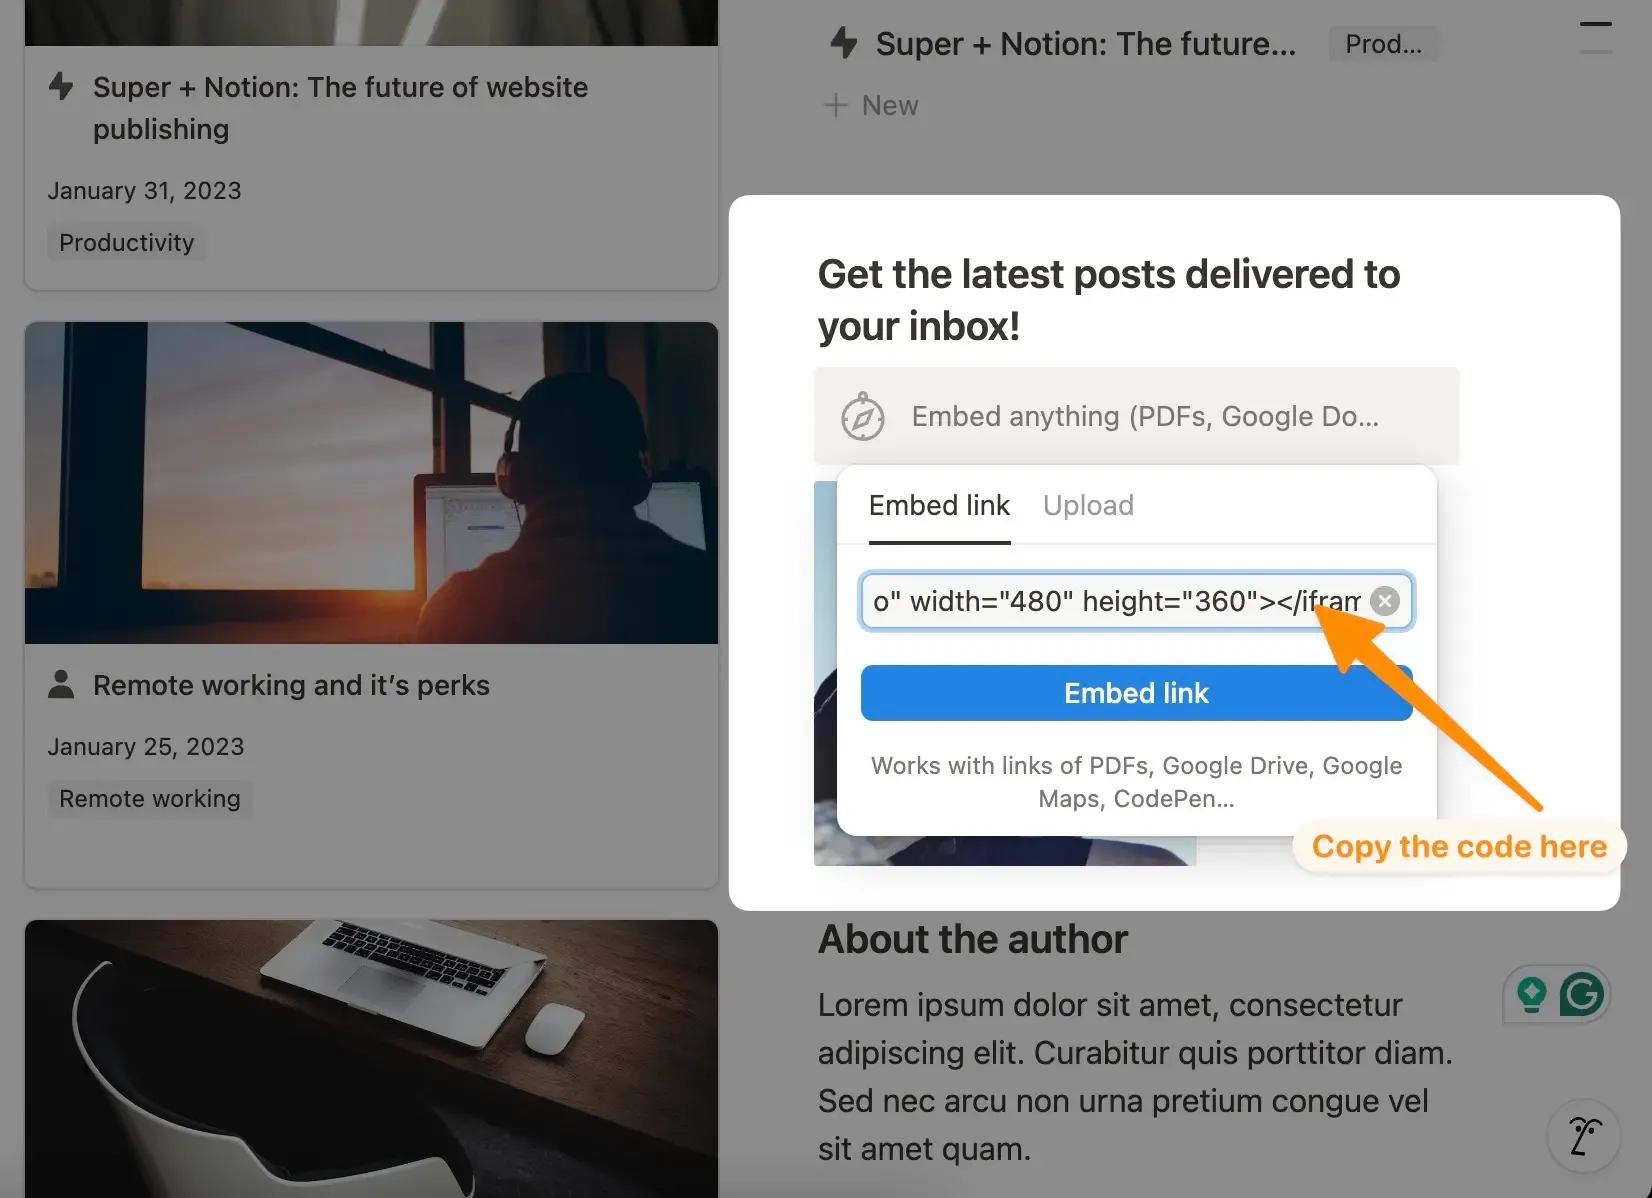
Copy the embedded code and paste it in an /Embed block in your Notion page. You can
replace the existing form with the new one. Notion asks for a URL when creating an
embed block, but you can copy the iframe code there instead.
Your audience can now subscribe to your newsletter and they will appear in your Contacts list in Notocat. If you head over to your Super site, you will see the new subscription form over there as well.

Next up, you can start building your contacts list and add your custom domains. Check out some of our other guides below:
Have any questions? Feel free to reach out to us at [email protected].
Happy publishing!

Razvan Ilin
Notocat founder
Create beautiful newsletters from your Notion pages with Notocat, an online newsletter platform. Easily send, track, and grow your audience.
We will contribute 1% of your purchase to remove CO₂ from the atmosphere.

© Copyright 2026, All rights reserved.
Have a question? 📧 [email protected]
