Back to blog
Adding DKIM and Return Path to Cloudflare
This guide will show you how to set up DKIM and Return Path with Cloudflare to prevent your emails from being marked as spam.
Sep 25, 2024
Sep 25, 2024
DKIM and Return Path are two important security features that you should have in place if you’re using a third-party email service like Notocat. They help prevent your emails from being marked as spam and improve the credibility of your emails.
This guide will show you how to get the DKIM and Return Path records from Notocat and how to add them to your Cloudflare DNS settings. Let’s get started!
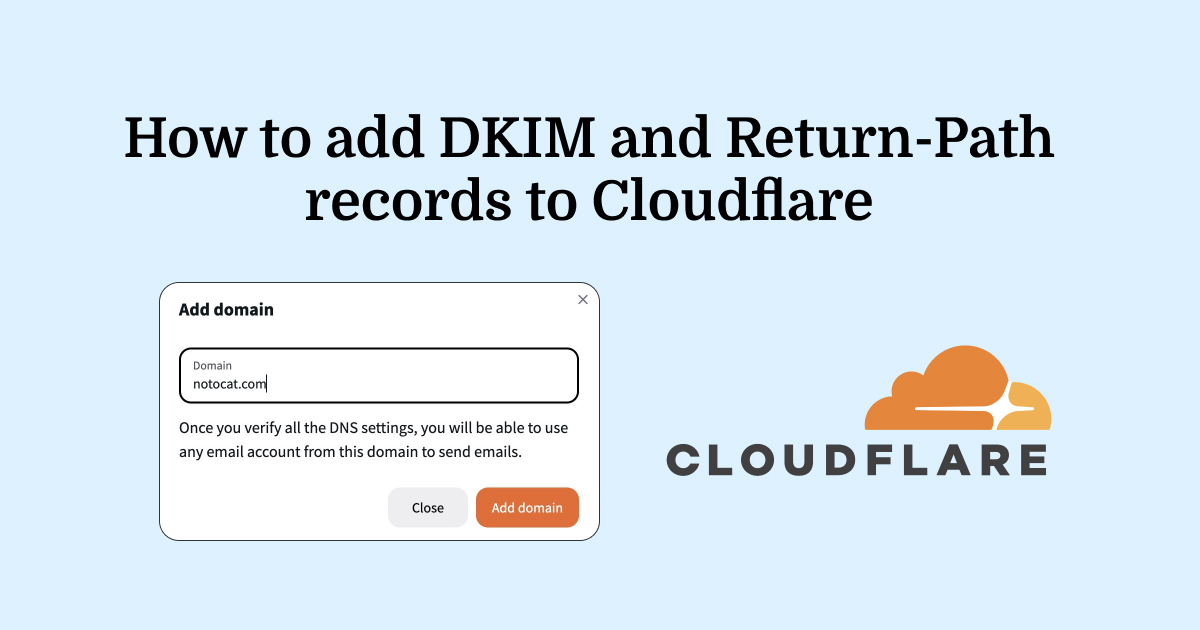
To get the records, you first need to add your domain to Notocat. You can do this by going to the email settings and clicking on the Add domain button.
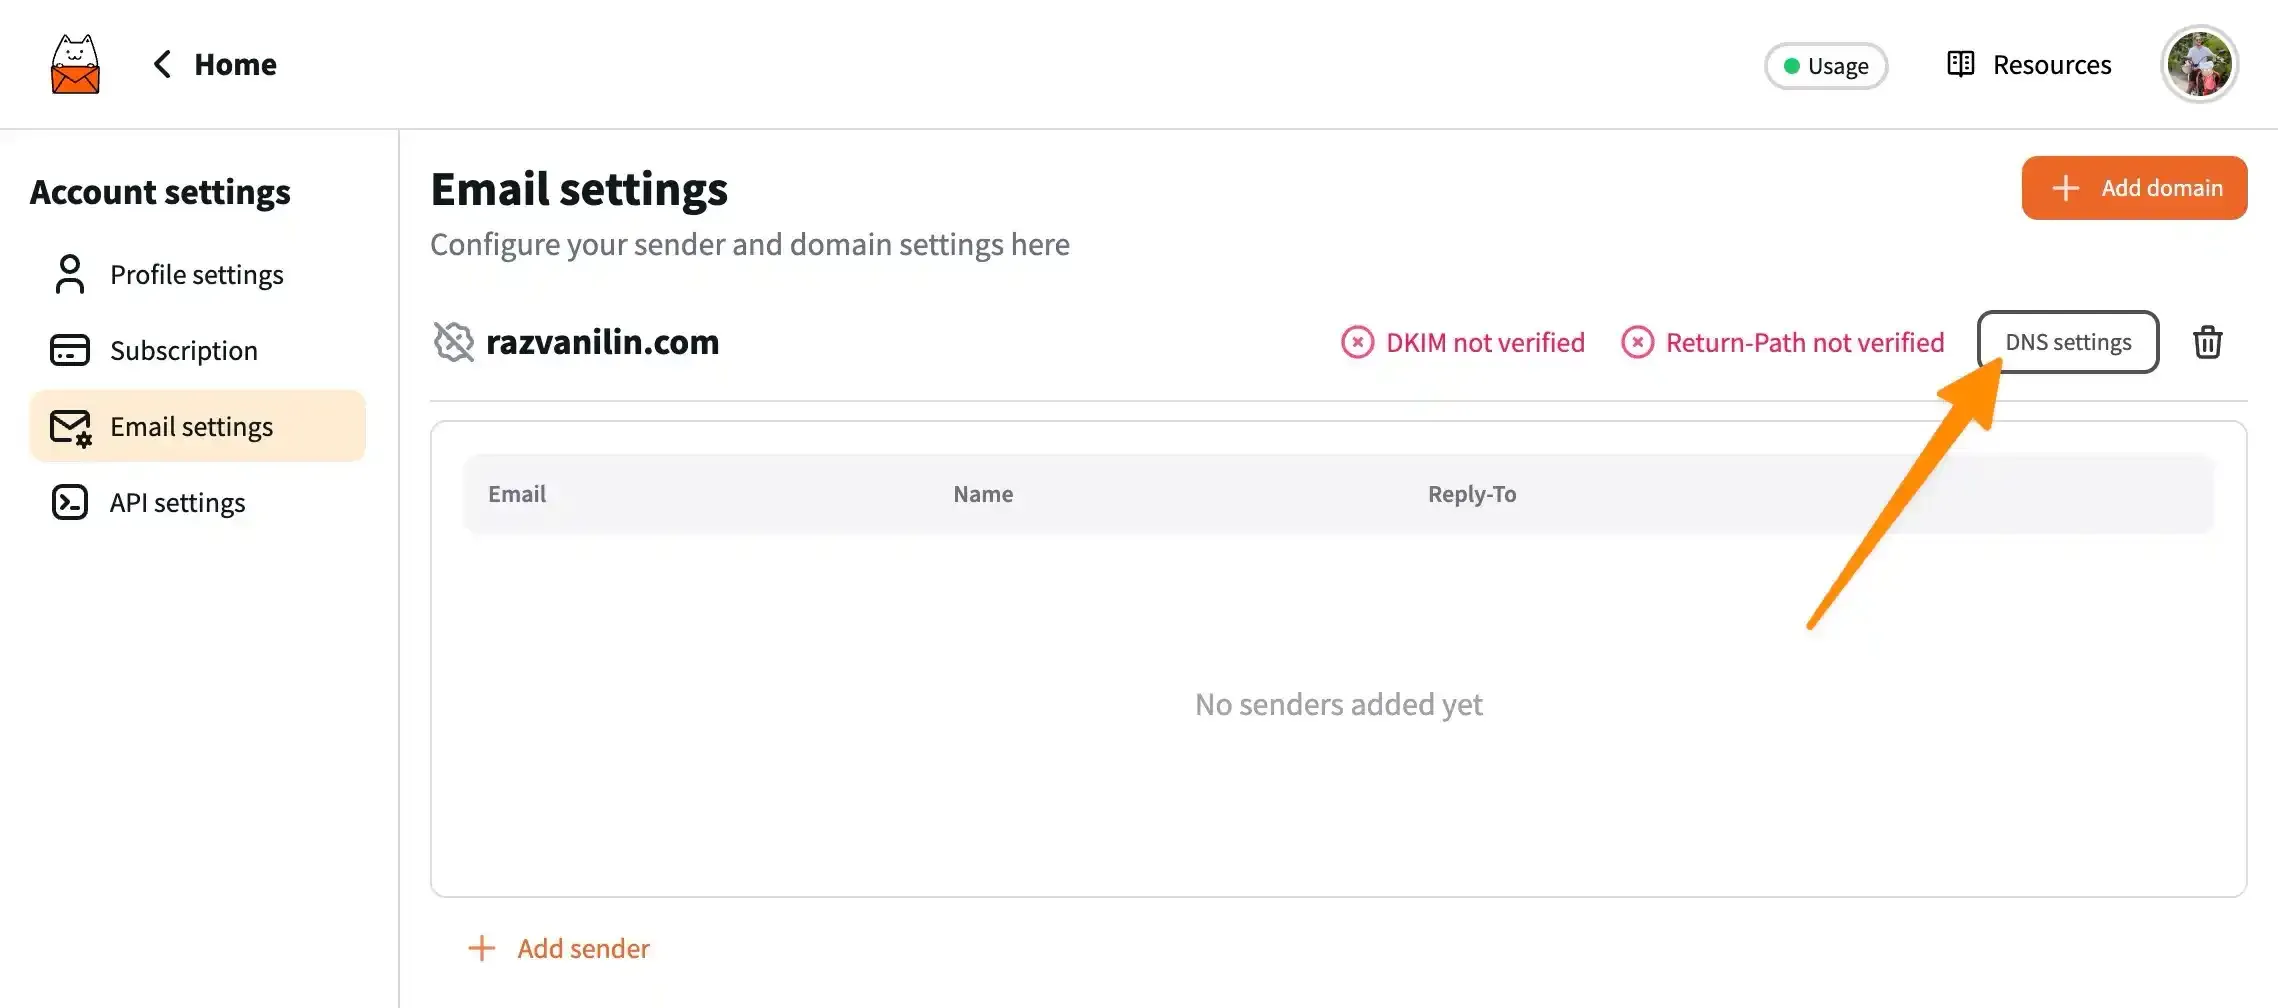
Your new domain will be added to the list and you will see that both DKIM and Return Path will appear as not verified. To start the verification process, you need to click on the DNS settings button.
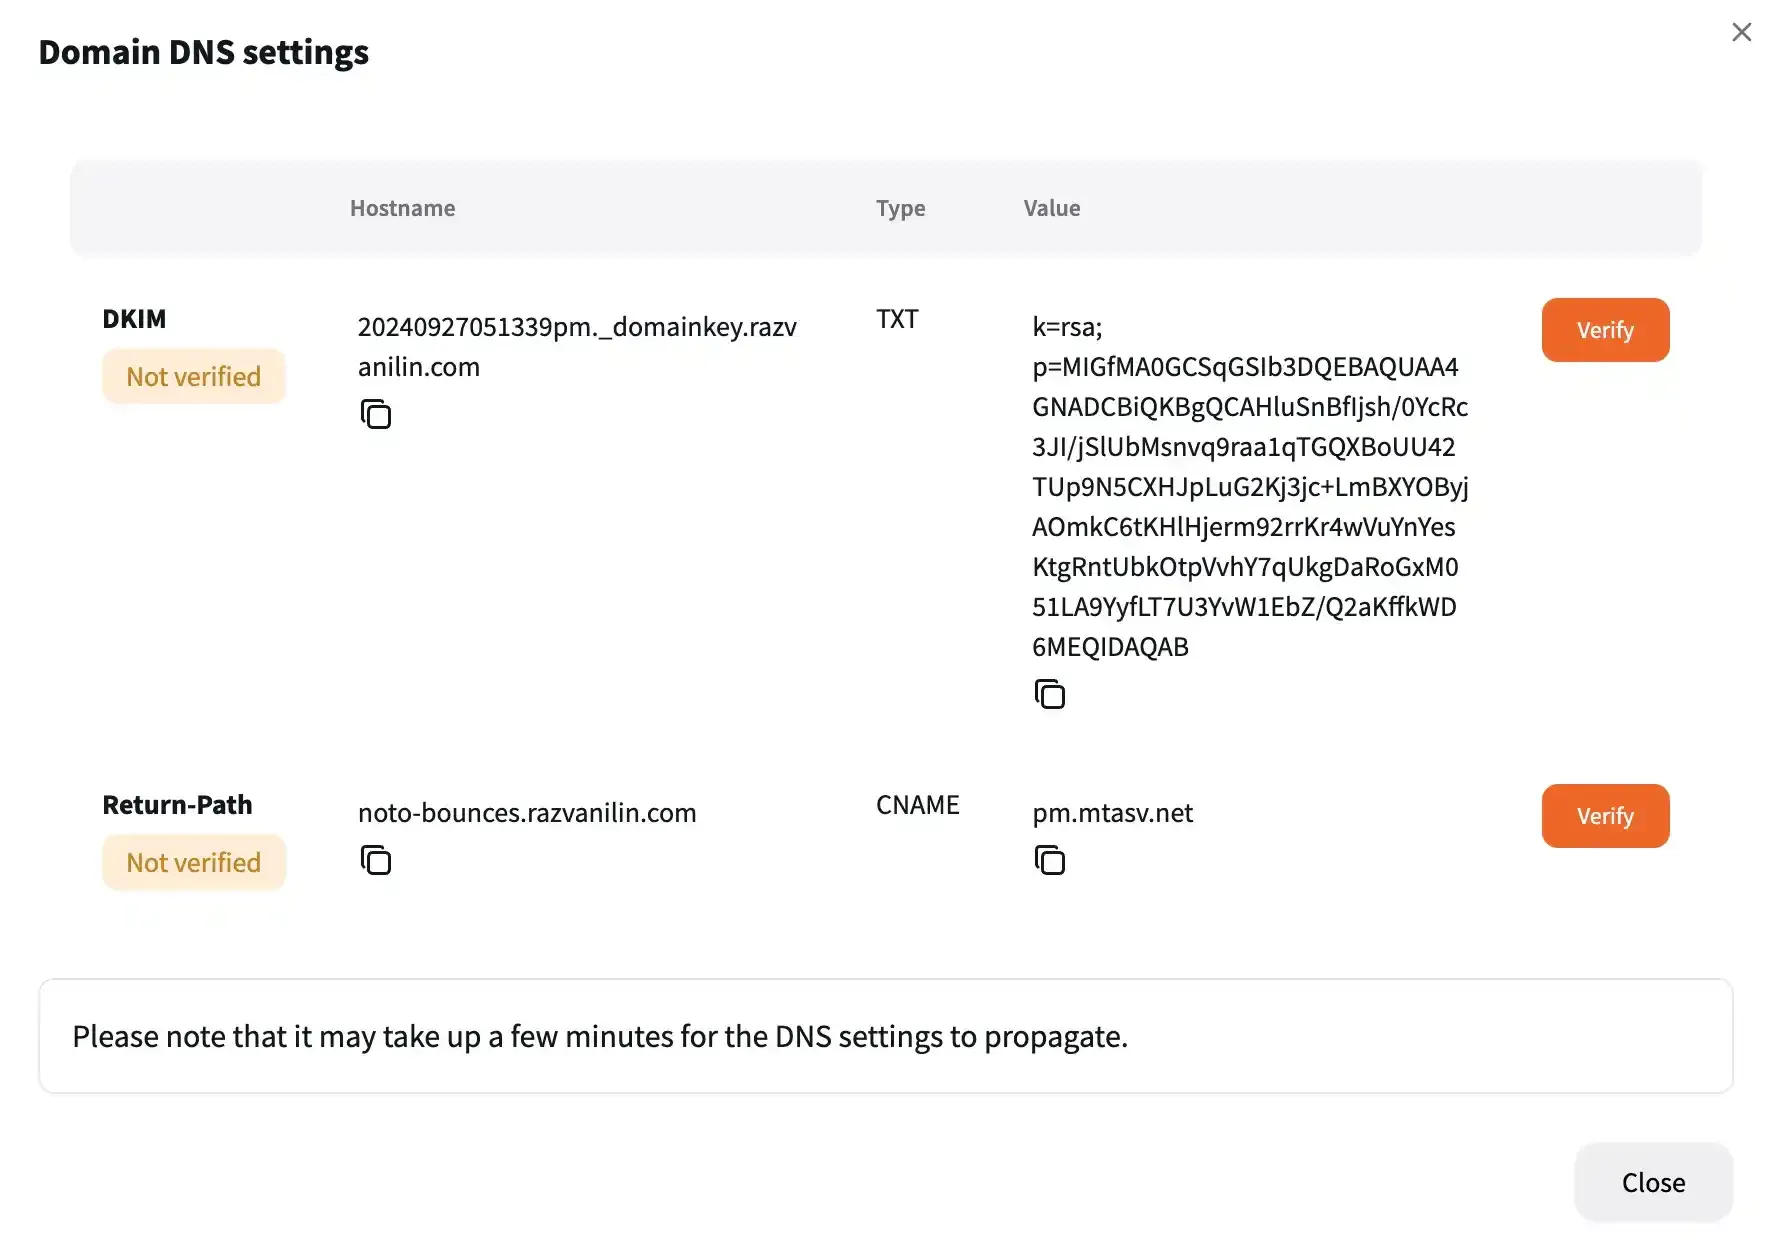
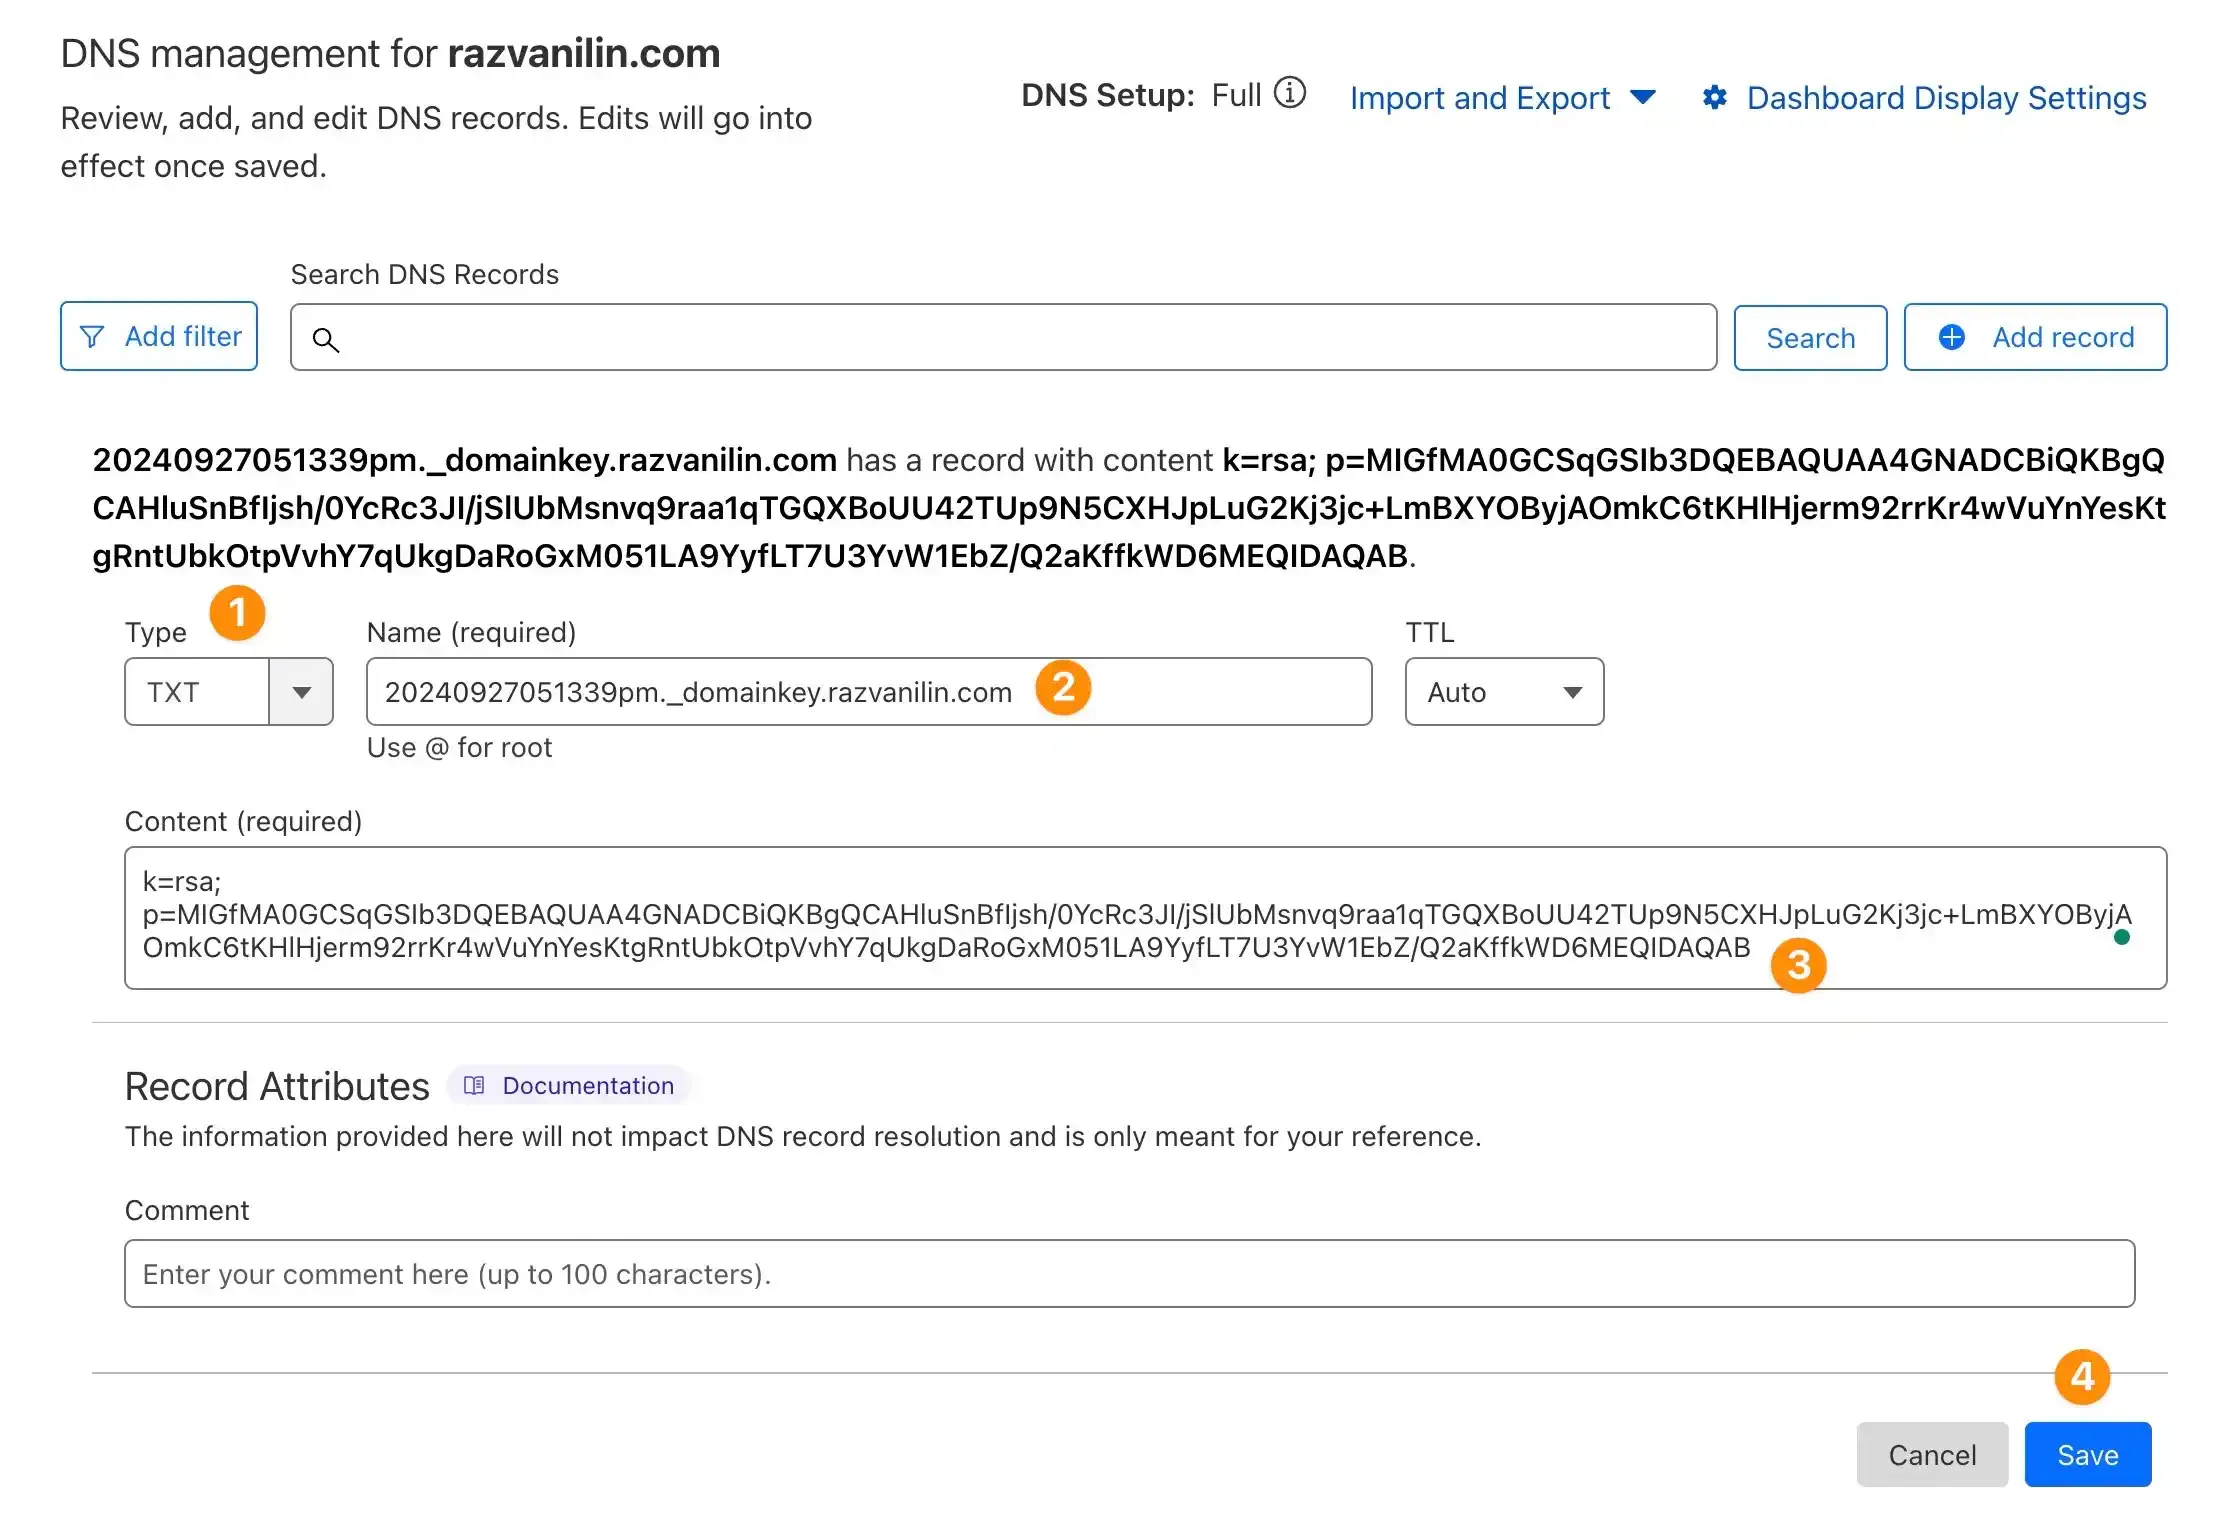
Once you’re in the DNS settings screen, you will see the DKIM and Return Path records. Next, we are going to add them to your DNS records in Cloudflare.
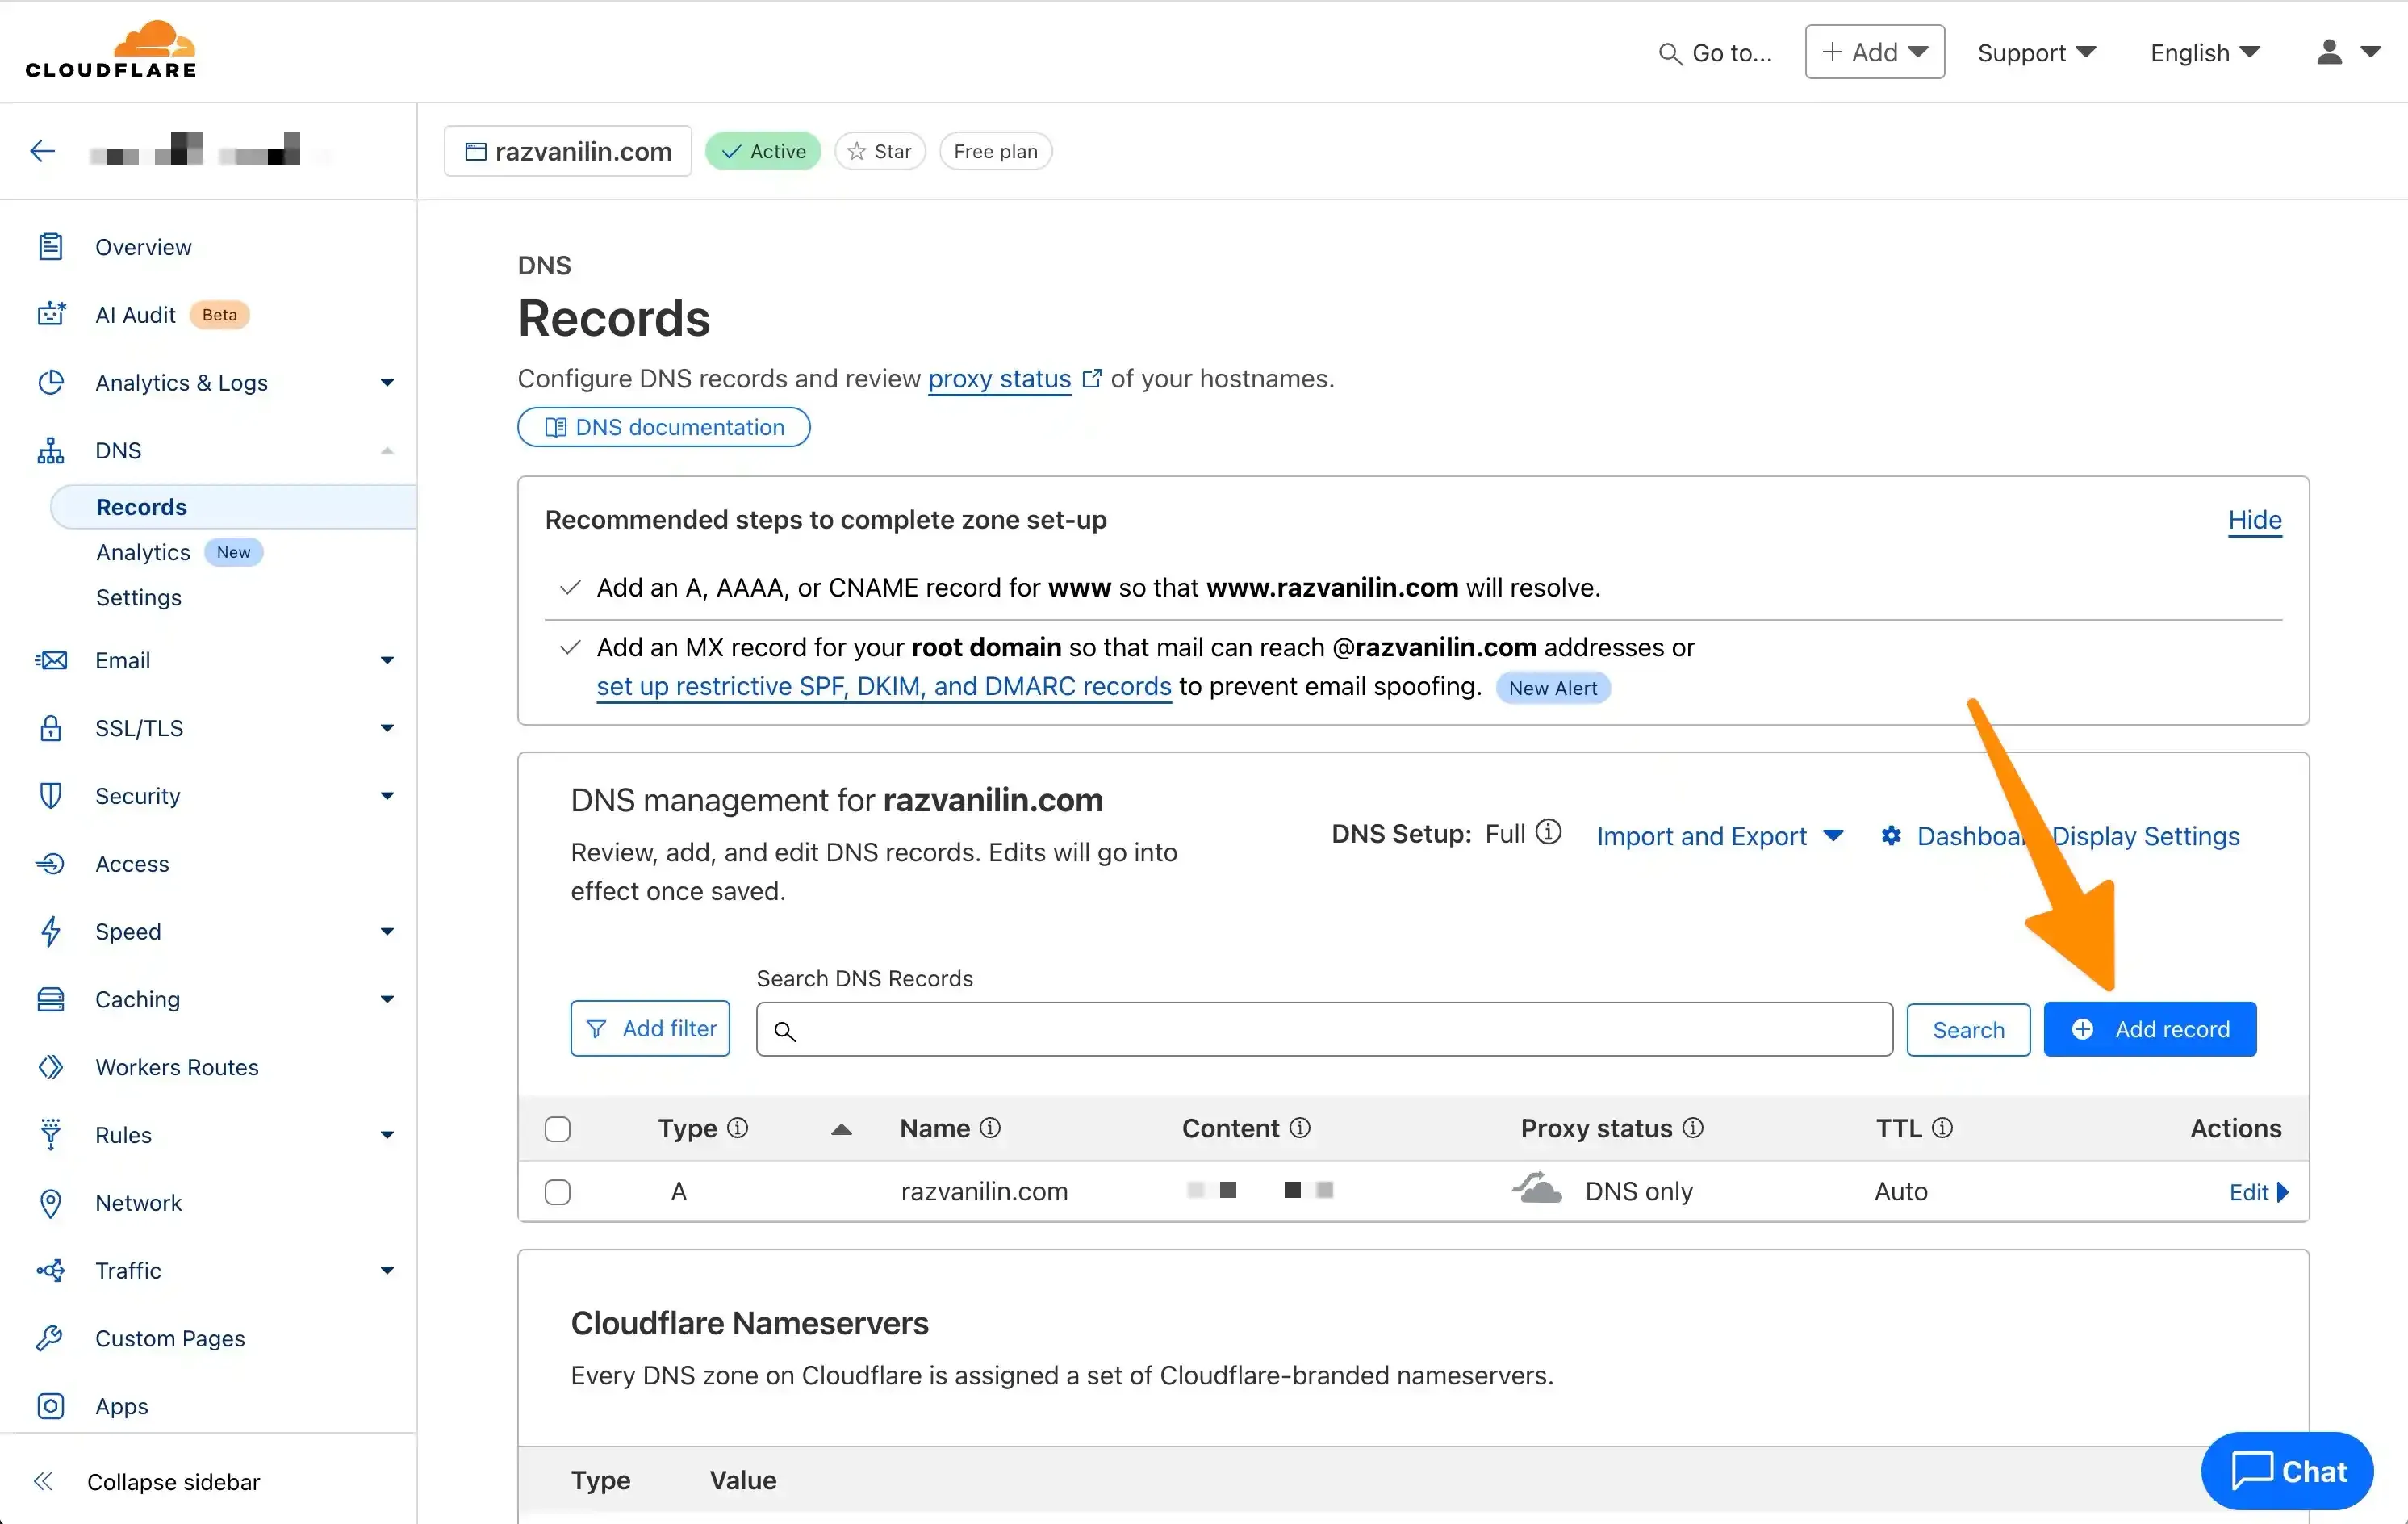
Log in to your Cloudflare account and go to the Overview screen to select your domain. Click on the DNS tab on the left side of the screen to access all your DNS records. To start adding the records, click on the Add record button as shown below.
You will need to fill in and copy the values from Notocat into the following fields:
Once you have filled in the fields, click on the Save button to add the record.
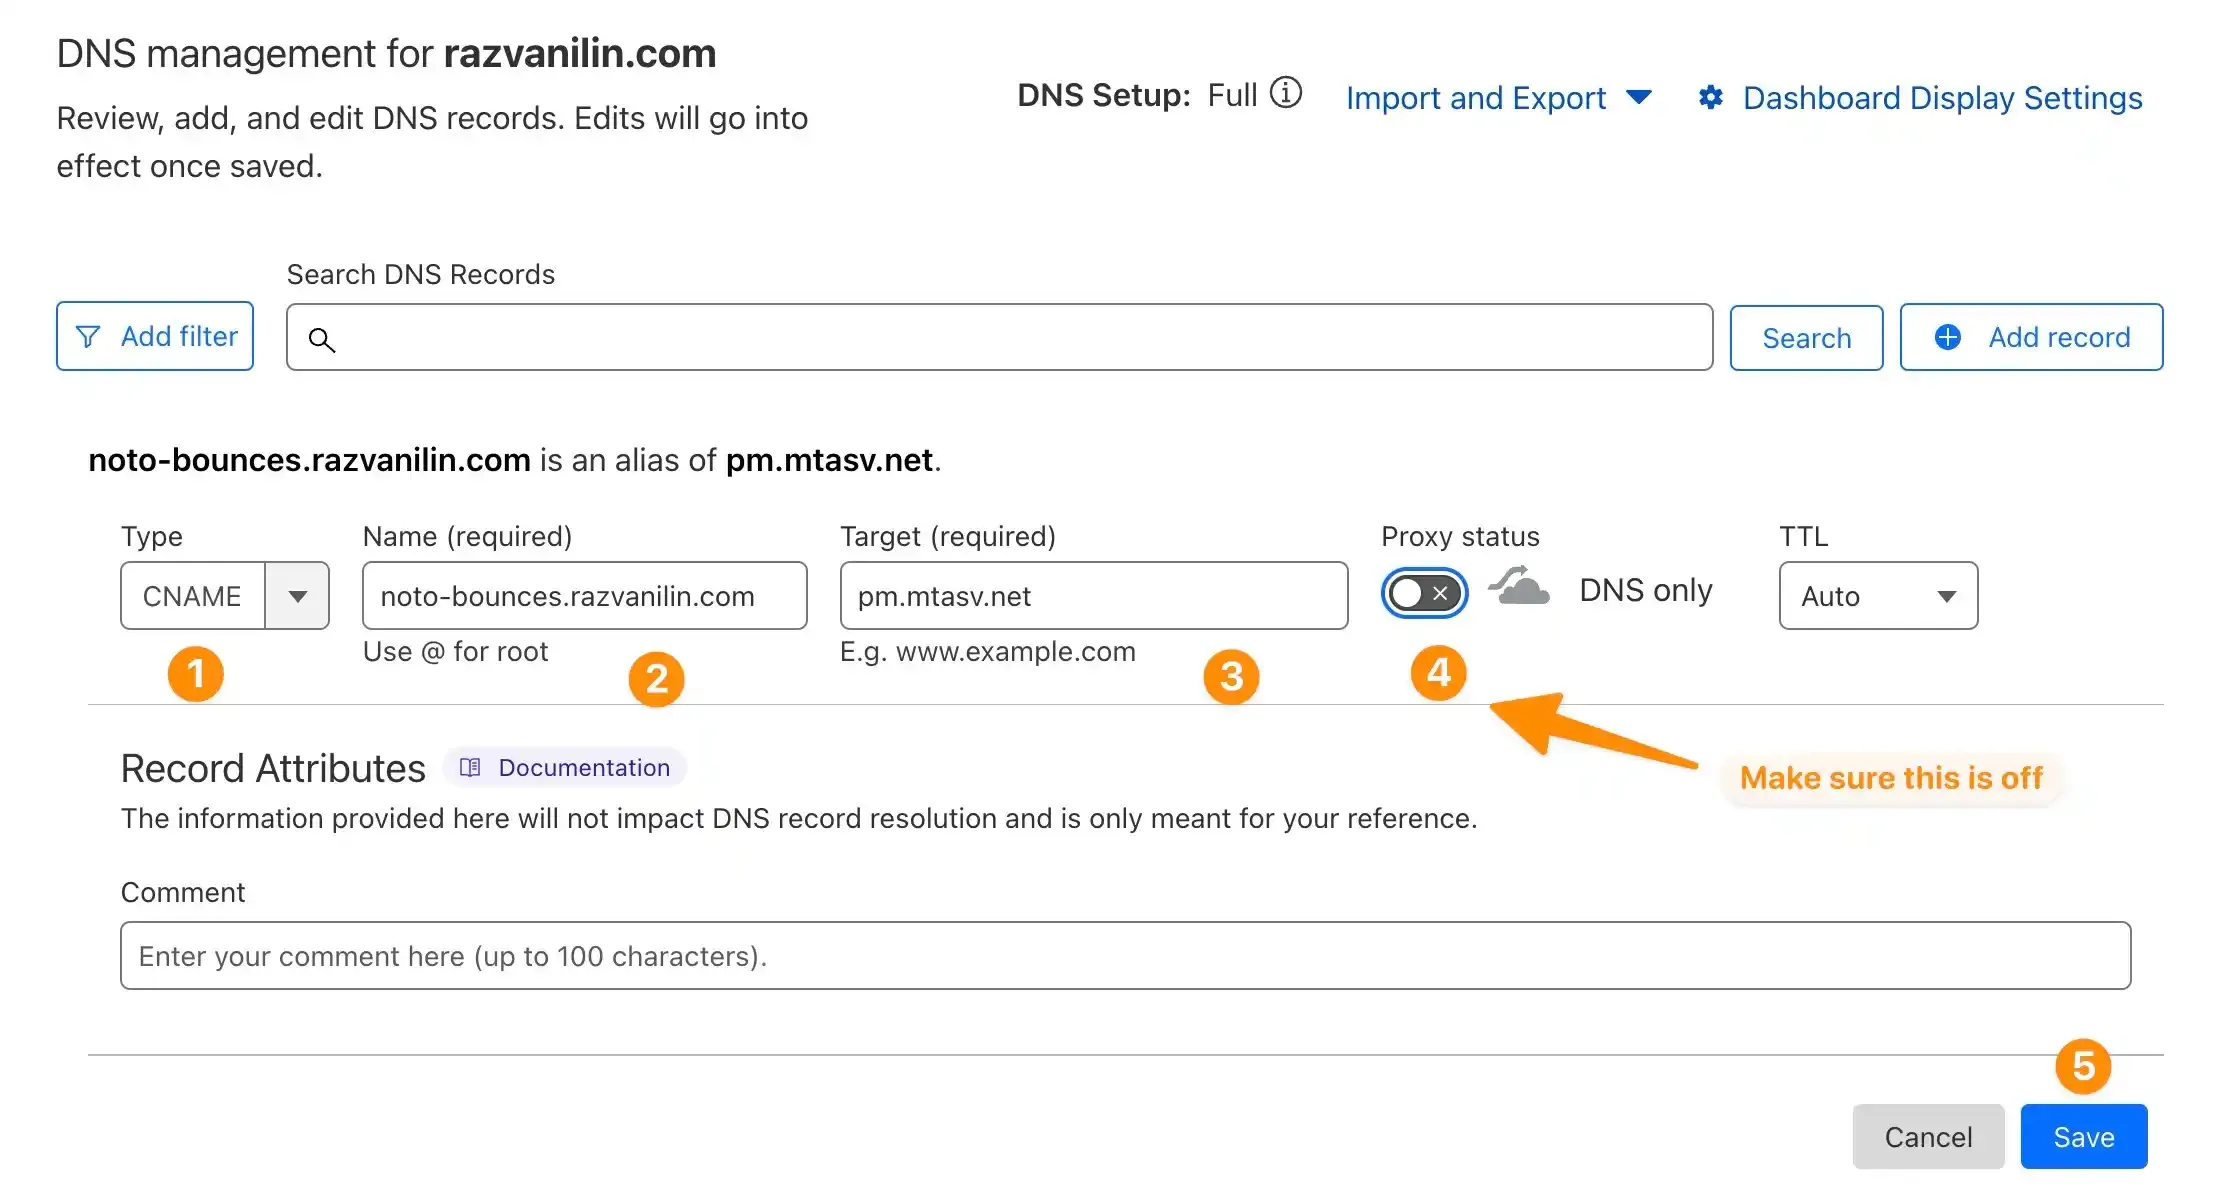
Same as with the DKIM record, you will need to click on the Add record button, but this time you will need to select the CNAME type. Also, make sure the Cloudflare proxy status is set to Off as shown below.
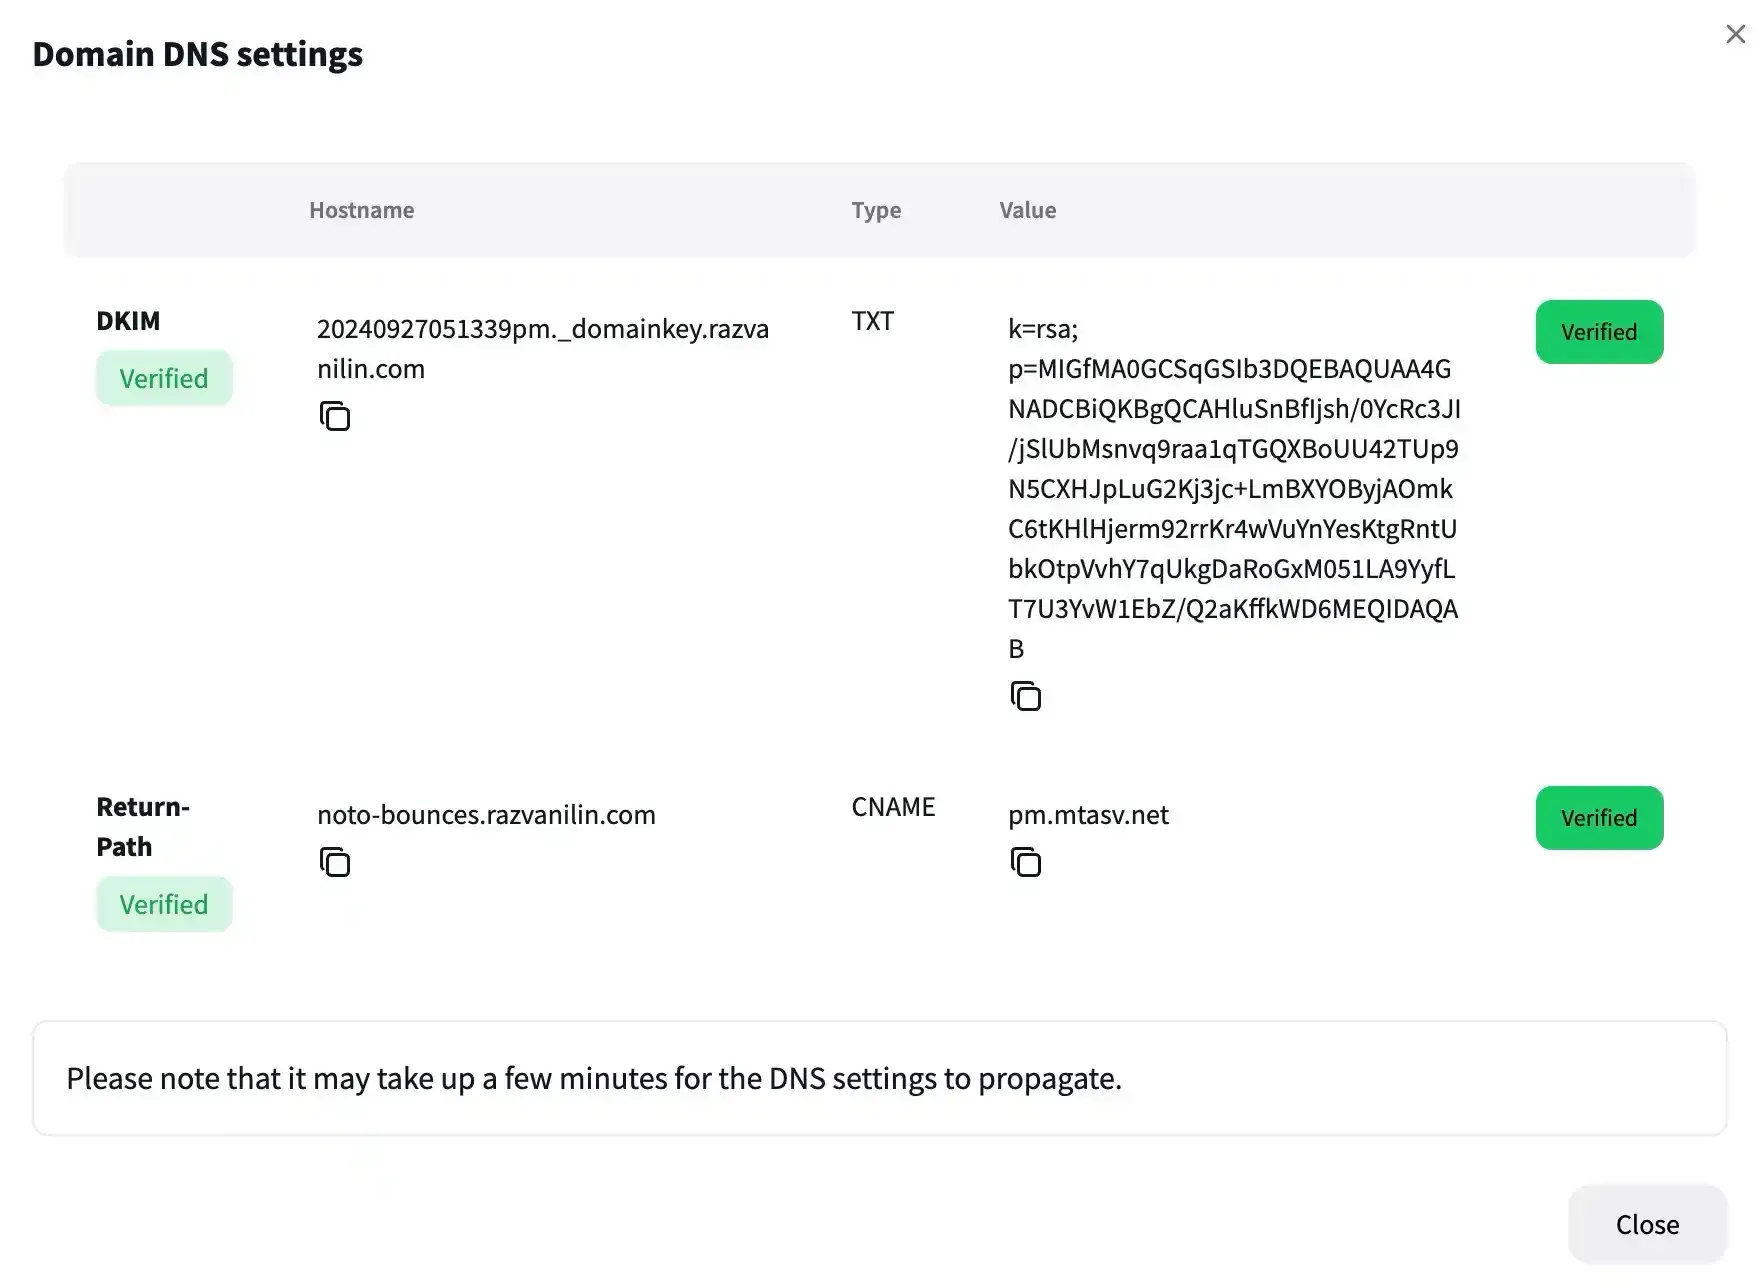
After you have added the records, you will need to verify them. Return to Notocat and click on the Verify button next to both DKIM and Return Path. If everything went well, you will see that both records are now verified as shown below.
Now that you have added the DKIM and Return Path records to Cloudflare, you can safely send your emails from your domain. Add at least one sender address to your Notocat account and start sending emails. You can add as many sender addresses as you wish.
If you have any questions, please feel free to contact us at [email protected].
Happy sending!

Razvan Ilin
Notocat founder
Create beautiful newsletters from your Notion pages with Notocat, an online newsletter platform. Easily send, track, and grow your audience.
We will contribute 1% of your purchase to remove CO₂ from the atmosphere.

© Copyright 2026, All rights reserved.
Have a question? 📧 [email protected]
