Back to blog
How to import your contacts from Airtable to Notocat
This guide will show you how to import your contacts from Airtable to Notocat using our Make.com custom app.
Oct 20, 2024
Oct 20, 2024
Airtable is a great way to manage your data and automate workflows. Some of our users hold thier contacts data in Airtable, but that doesn’t mean they cannot use Notocat to send emails.
In this guide, we will show you how you can import your contacts from Airtable to Notocat using our Make.com custom app. More than that, you can even keep your contacts in sync, so you don’t have to worry about updating them manually.
If you haven’t already, you can set up your Notocat newsletter by following the steps:
When the account is fully set up, you can copy your Notocat API key from your account settings page. This will be used later when creating the Make scenario.
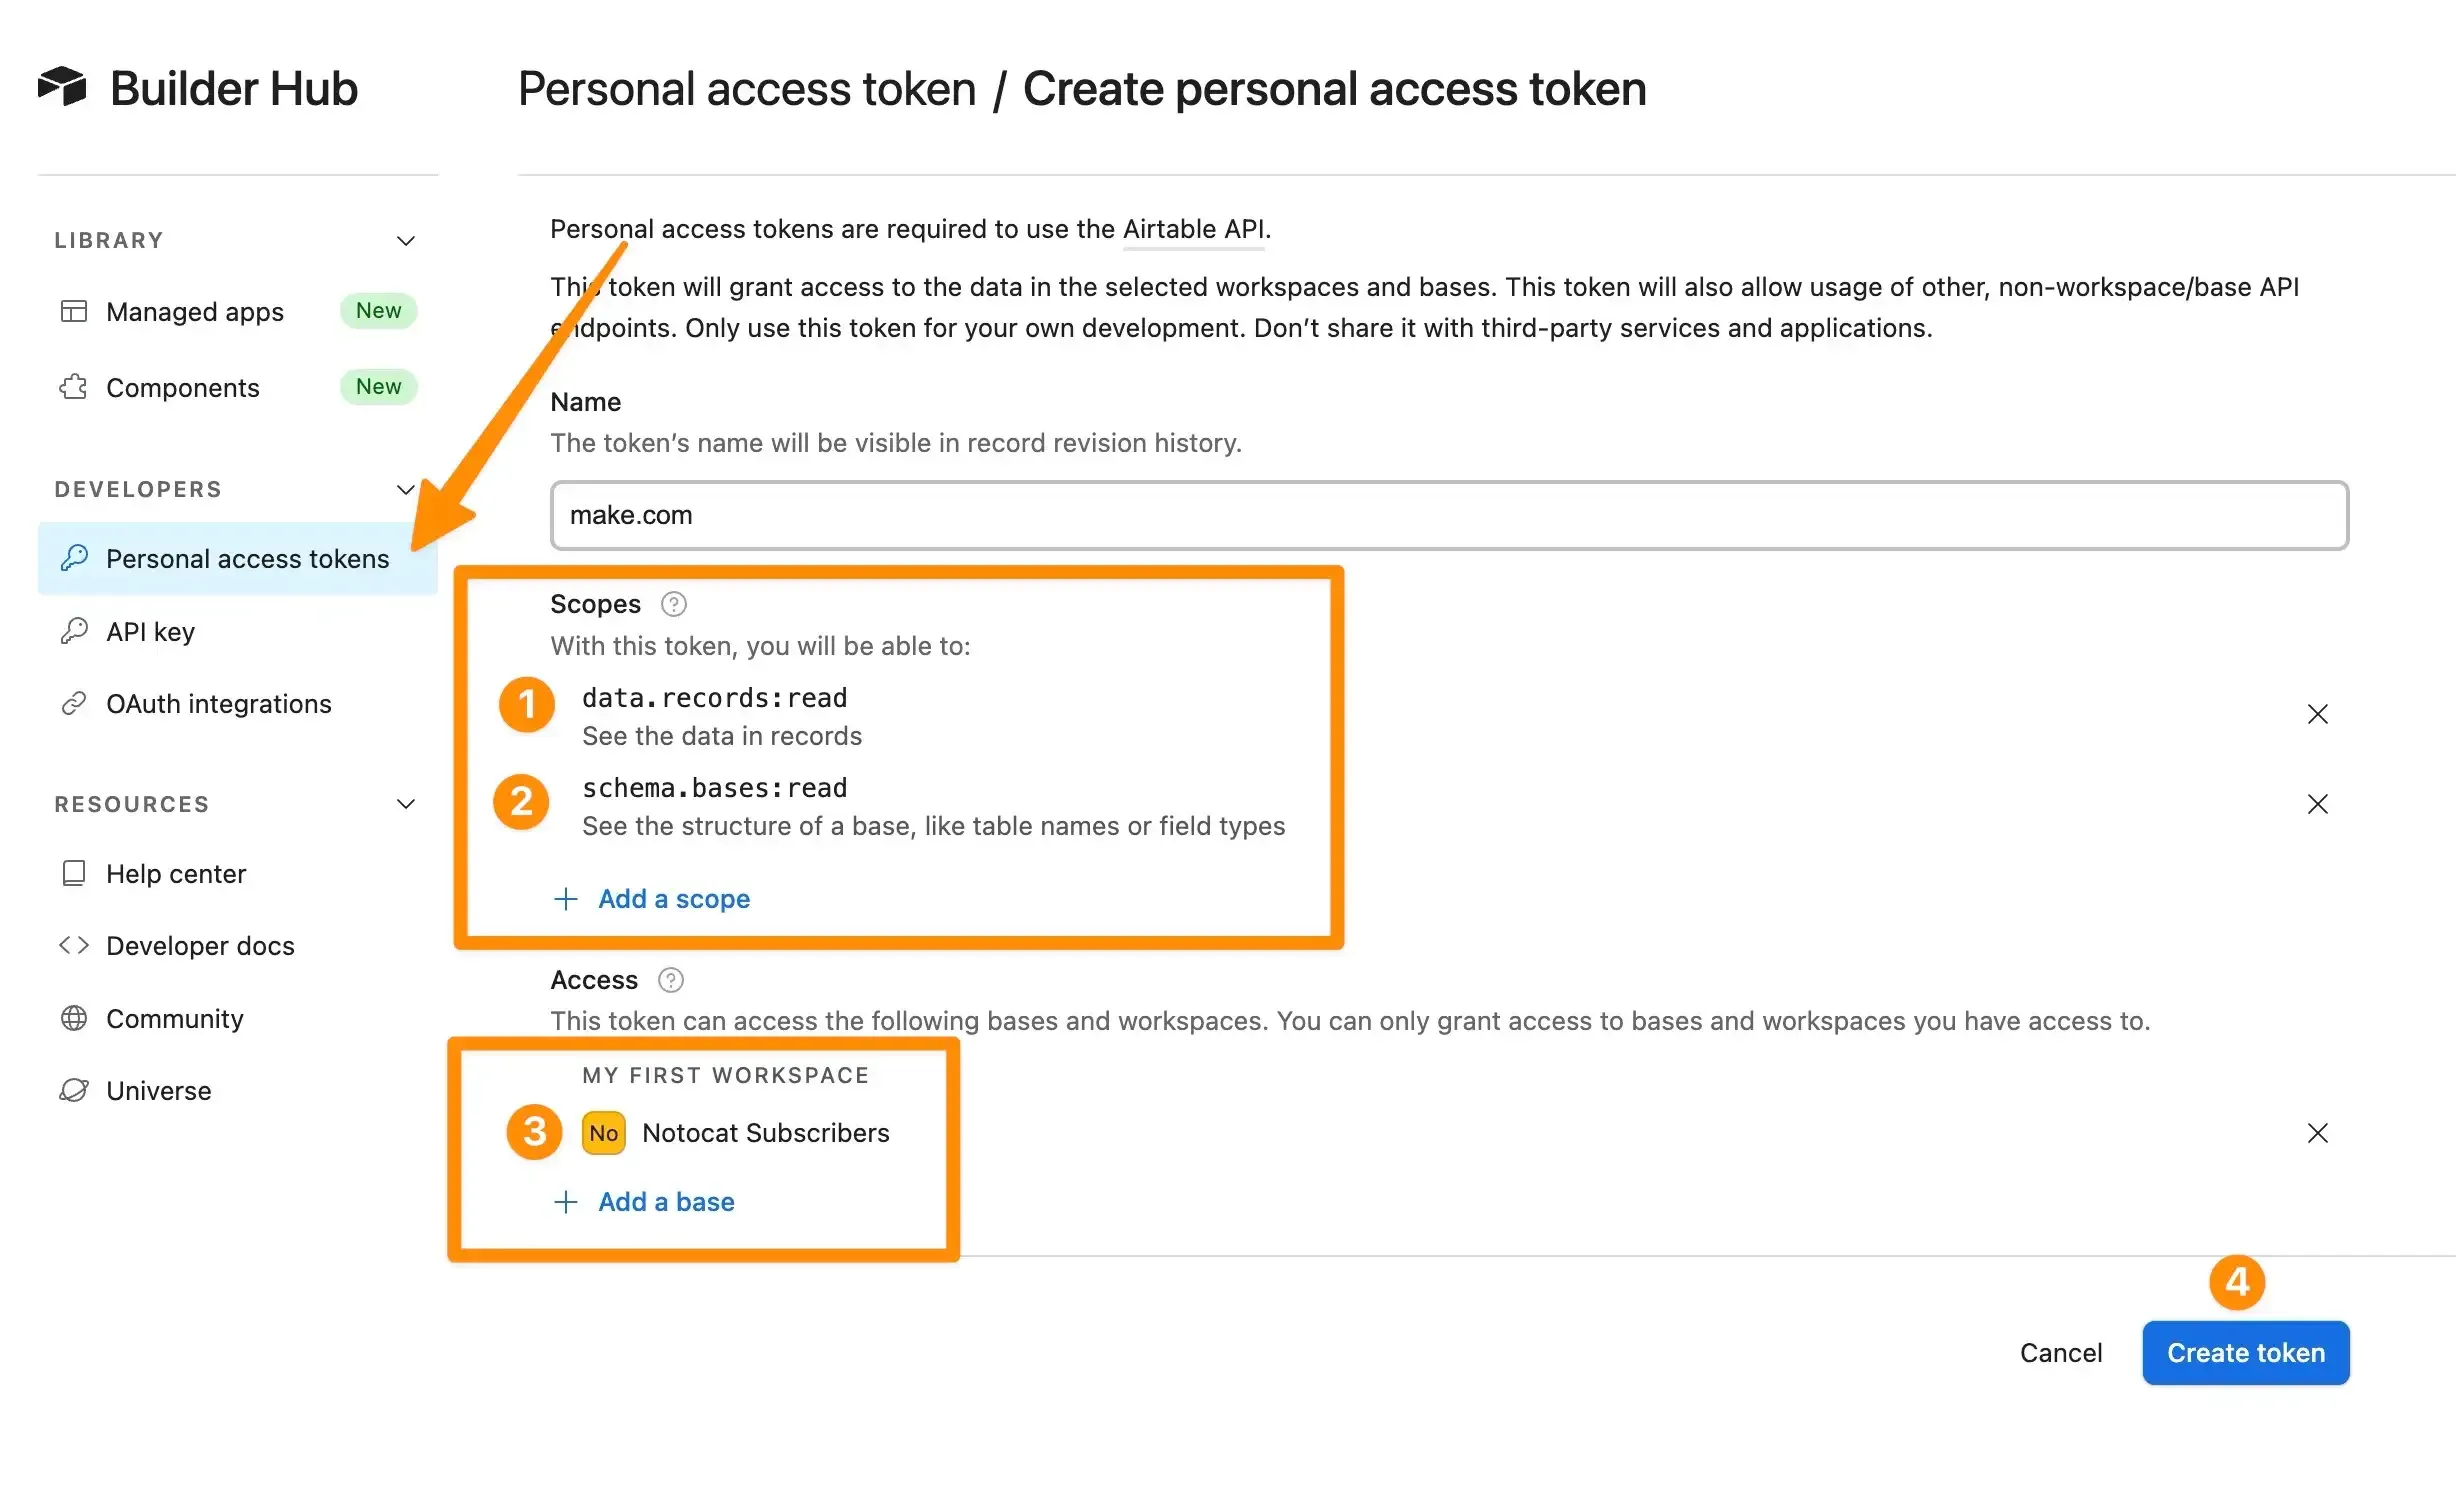
To authenticate the Airtable module, we need to create a token with the right
permissions to access your table data. Head over to the Airtable builder hub
and click on the Create new token button.
When creating a new token, you will have to select the following options:
When you create the token, you will get code. Copy this token code, as you will need it in the next step.
Now it’s time to hea The get started with Make, ensure you have an account at make.com. At the moment of writing this guide, the Notocat app is not publicly available, so you have to install it with our private link.
Once you click the link, you will be redirected to Make.com. If you are not logged in, you will be asked to log in with your Make.com account.
After you log in, you will be redirected to the Notocat app page. Click on the Install
button.
The Make scenario will can be configured in a multitude of ways, but for the purpose of this guide, we will create a simple scenario that will fetch all your Airtable contacts and add them to your Notocat newsletter.
We will cover two types of imports:
Create a new scenario in Make and select the Airtable - Search Records module.
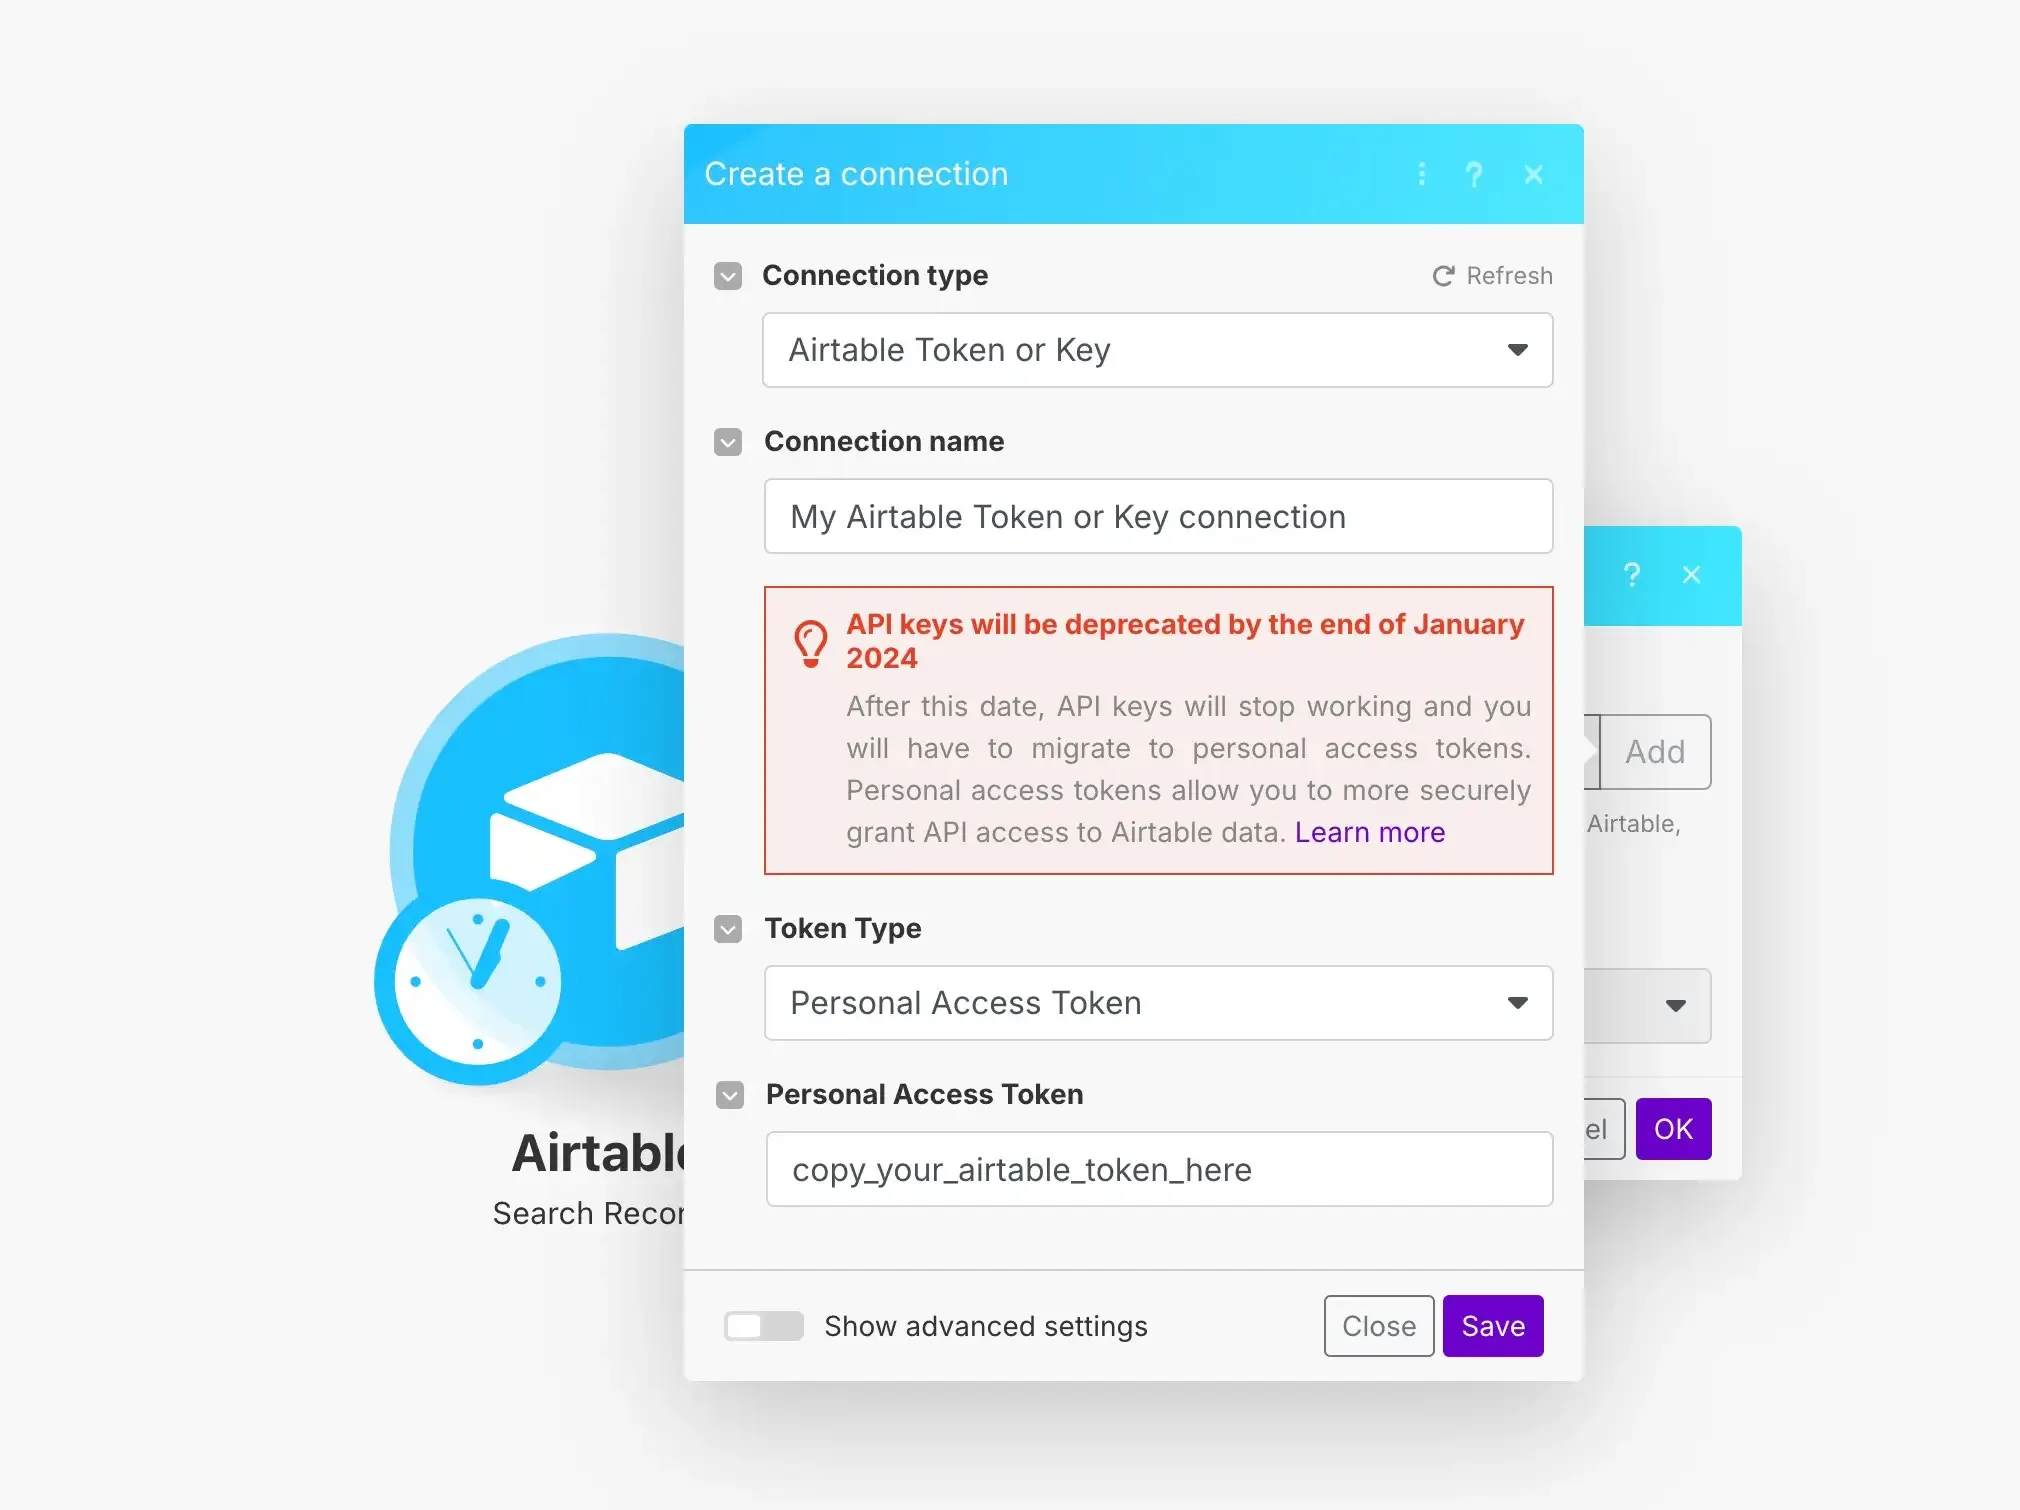
From the new window, select the Create new connection option. This will open a new
window where you have to configure your connection to Airtable. Select the Airtable Token or Key
option from the dropdown list. The Token Type should be Personal Access Token.
Finally, paste your Airtable token that you created earlier inside the last field.
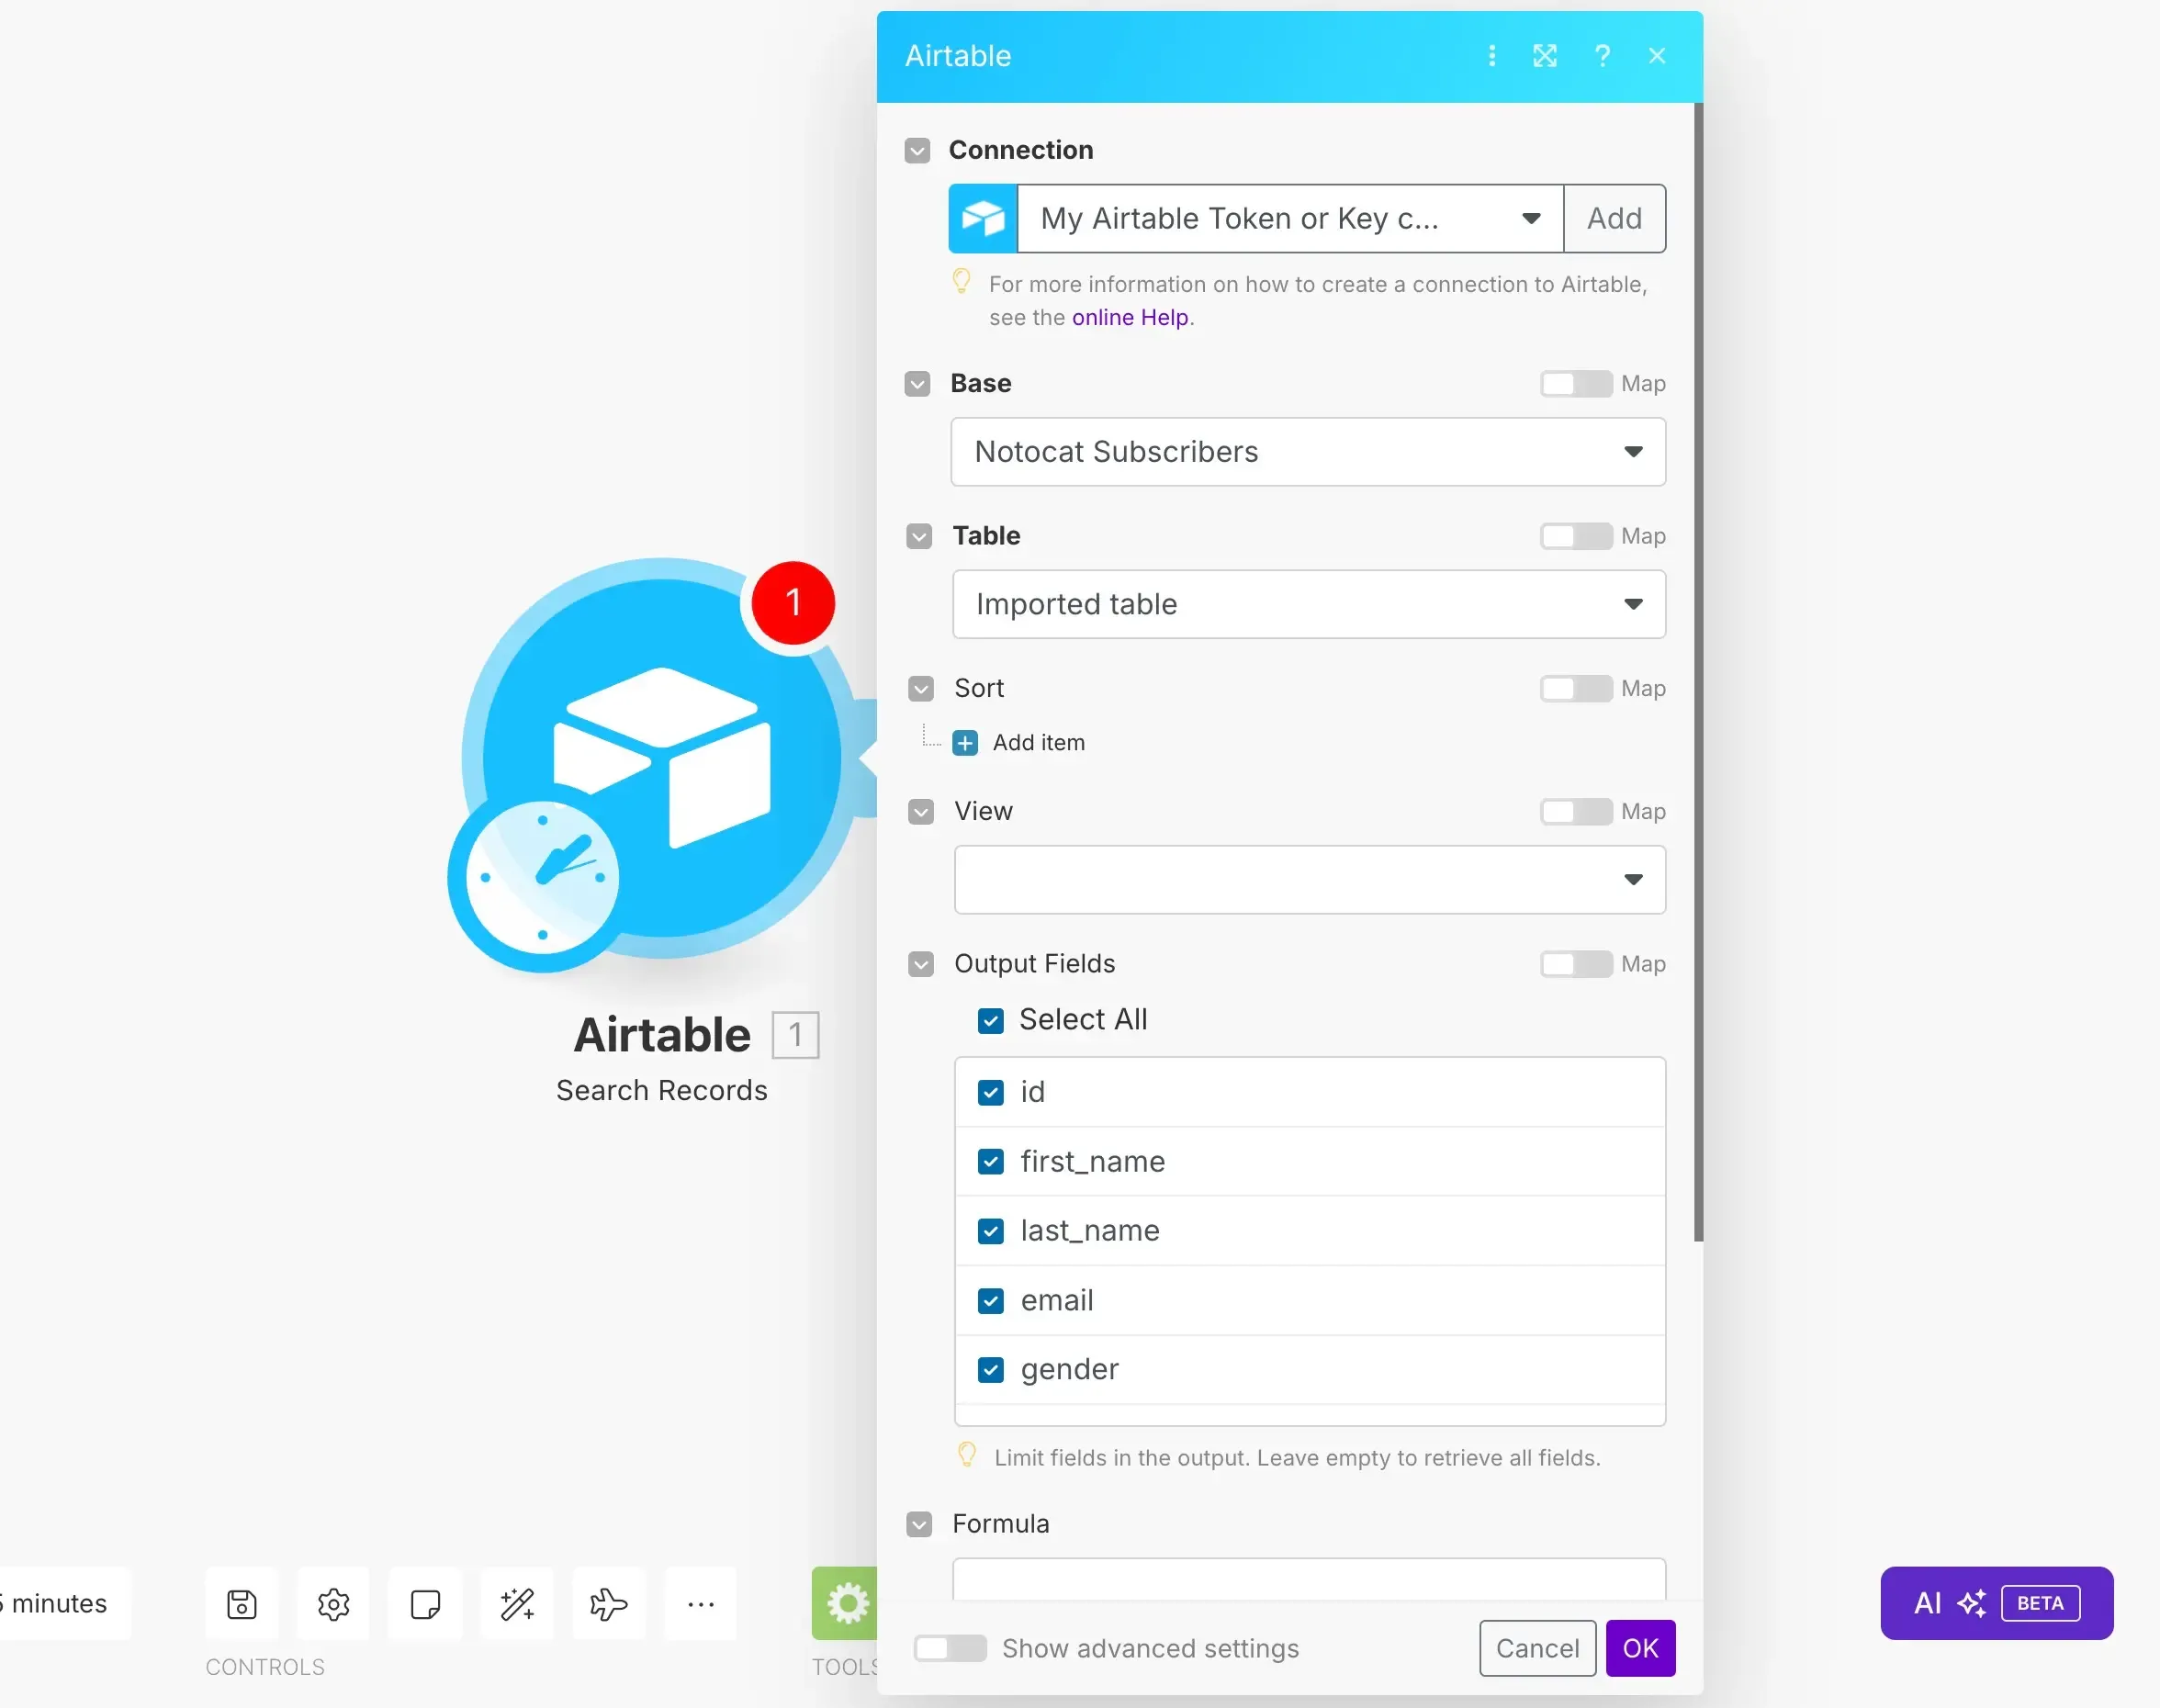
Using the new connection, you can now configure the Airtable - Search Records module. Select the Base where you have your contacts data. Then, select the Table where your contacts are stored. You can select which columns to include in the import by checking the Output fields checkboxes. Finally, adjust the Limit to the number of contacts you want to import. Leaving it empty will get all the contacts from the table, but bare in mind that you can only import up to 1000 contacts at a time in Notocat.
If you want to import more than 1000 contacts, check the next section for a more complex scenario that splits the data into smaller chunks.
For now, let’s keep the Limit to a small number, like 10. This will make it easier to follow the guide and make sure you are not using your Make credits. We will also need to run the module once to get the output fields.
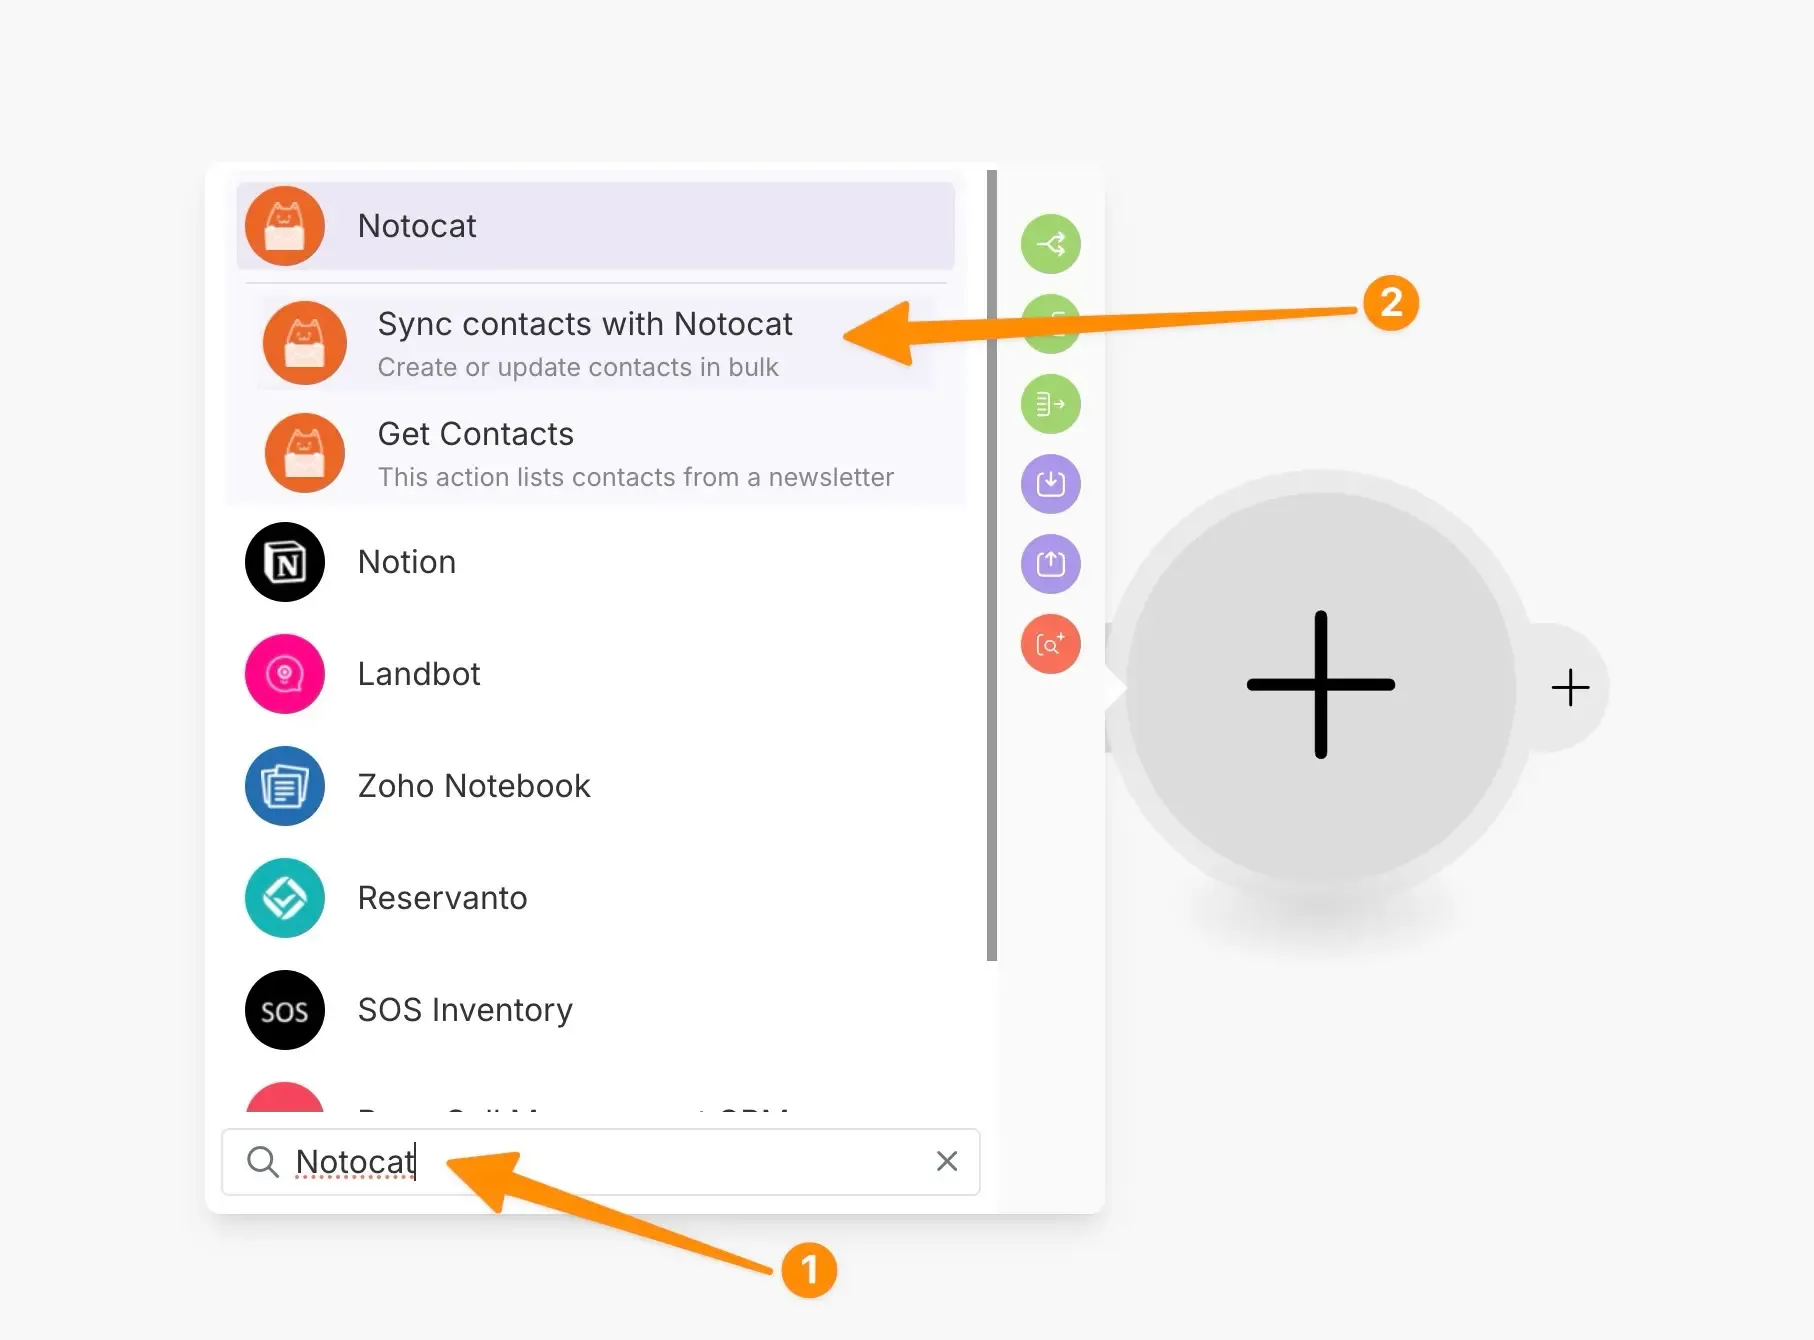
After you configure the module, run the scenario to get the output fields from Airtable. Now it’s time to direct the output to the Sync contacts with Notocat module. Add a new module and search for Notocat to find it.
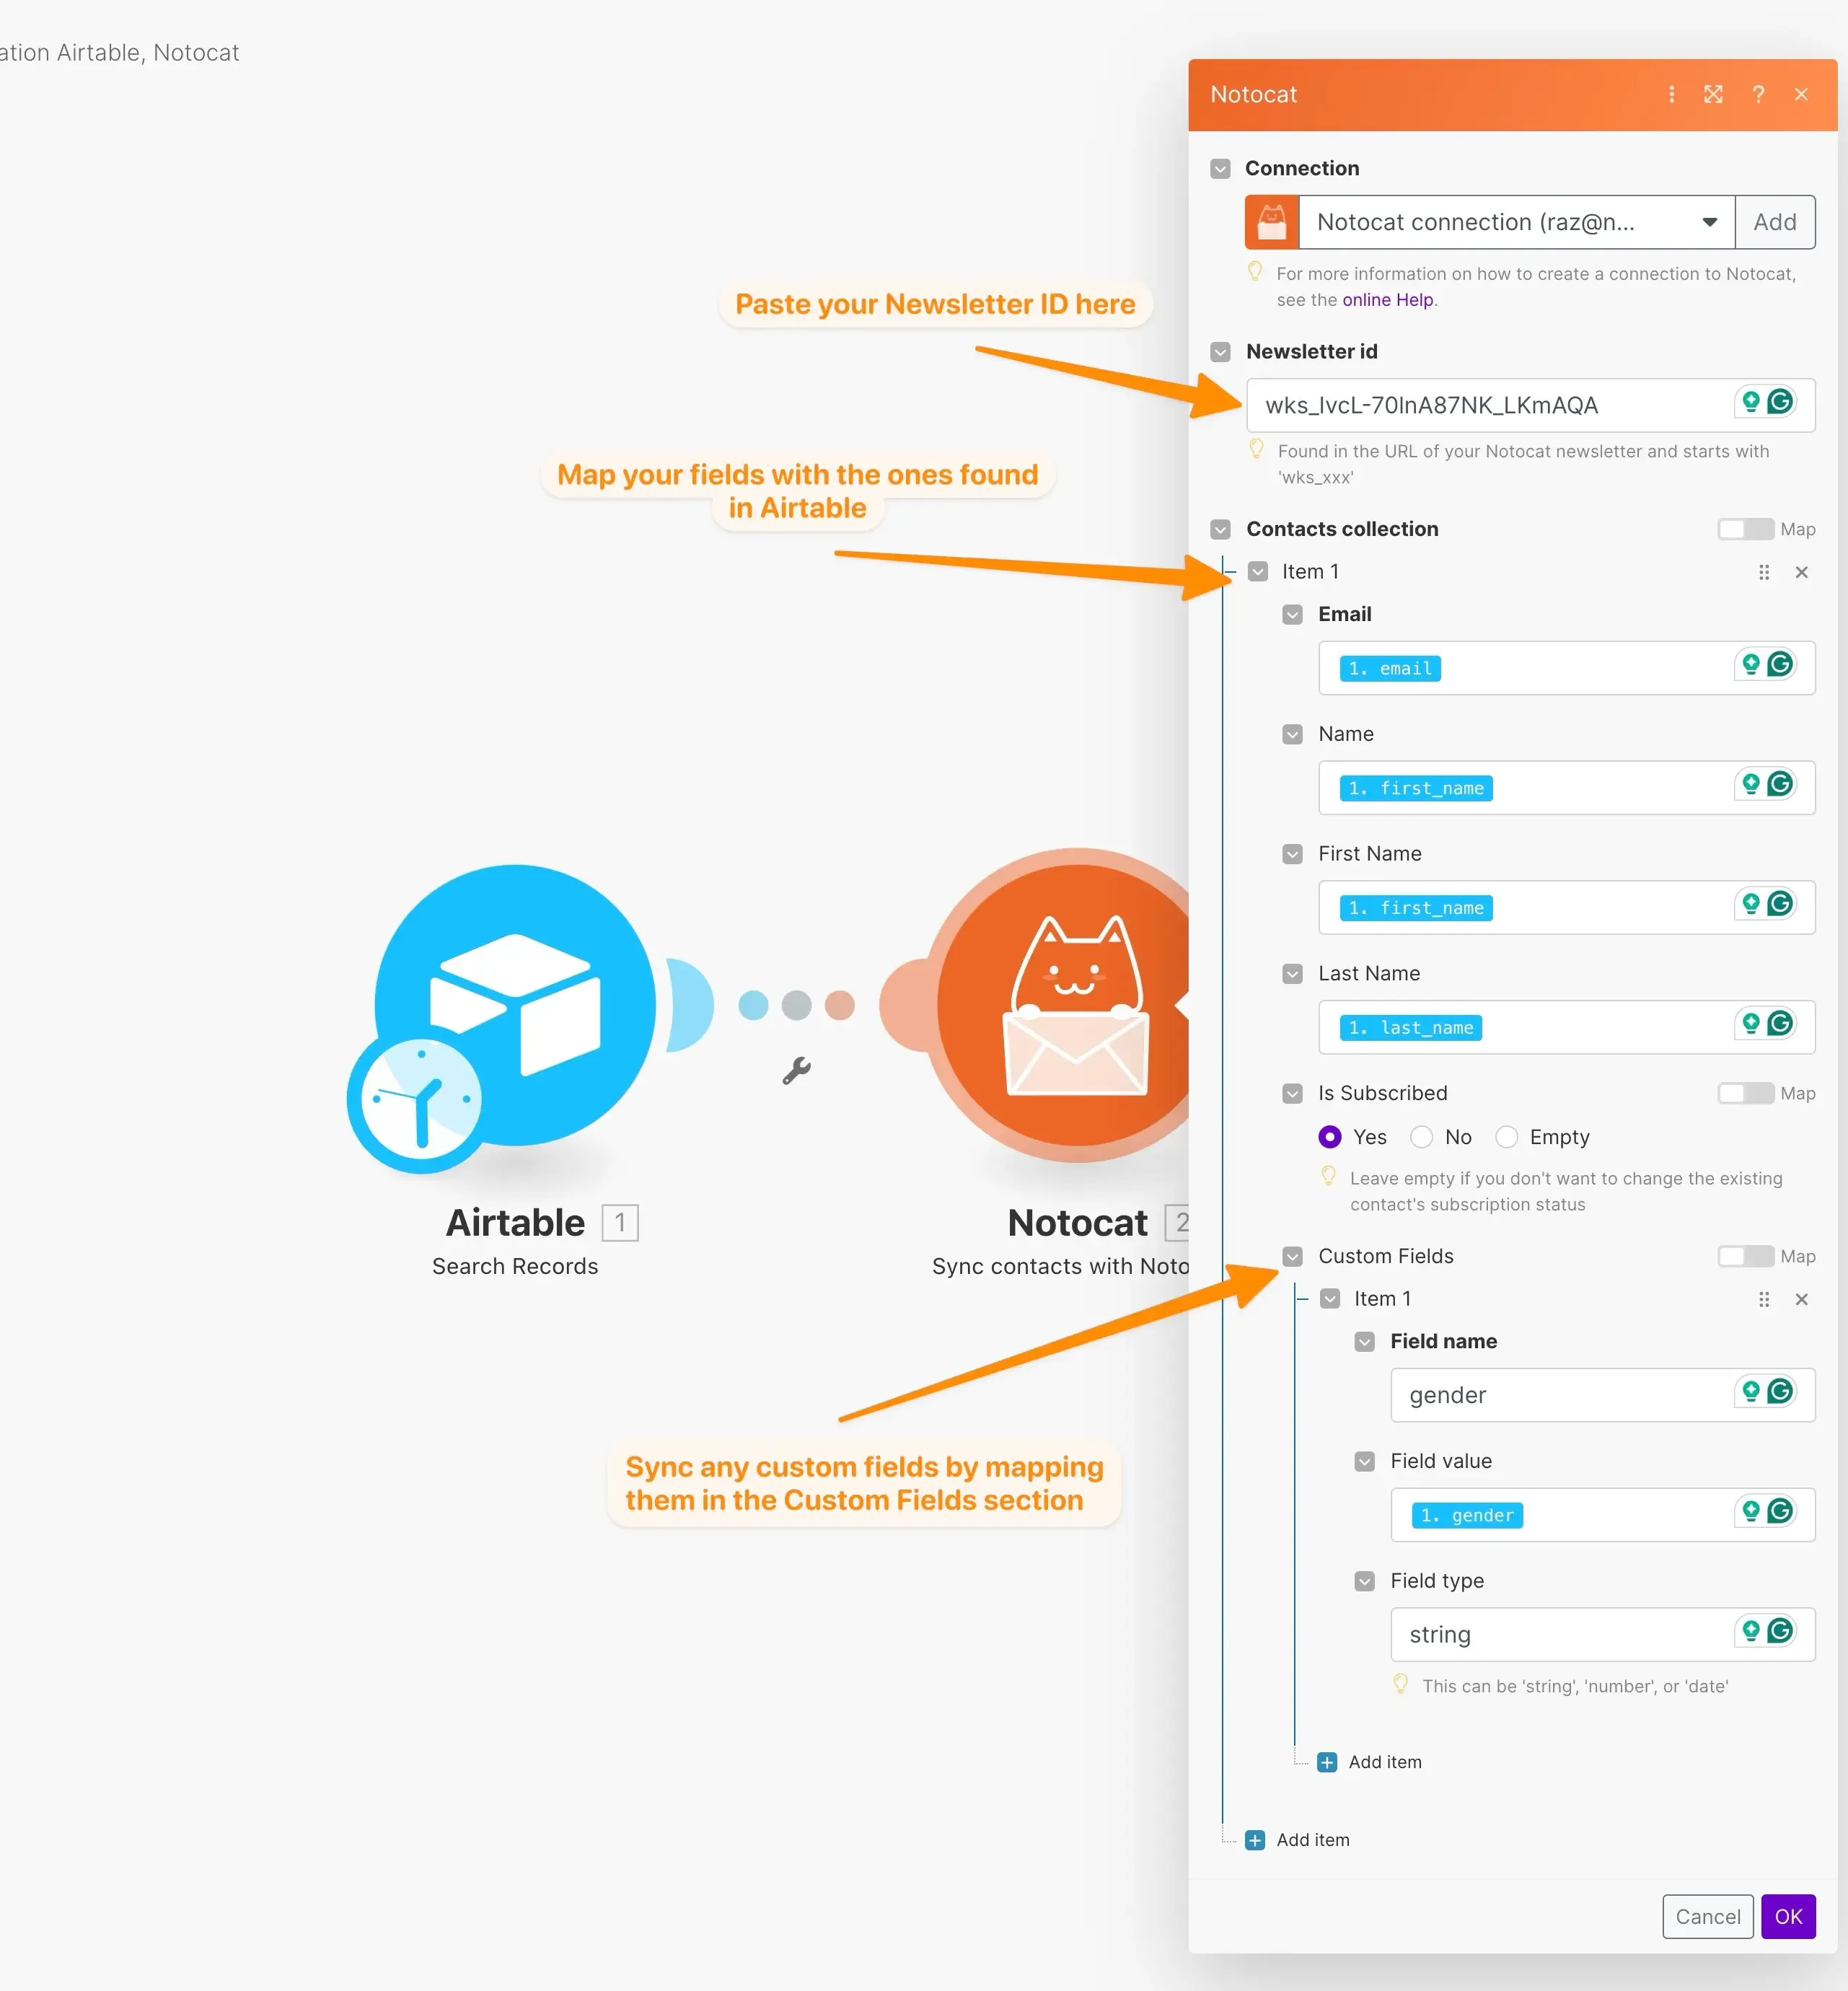
In the module settings, add a new connection, give it a name and paste your Notocat API key found in your accounts settings page (click here to open the page in a new tab). After you add the connection, Make will load a bit to authenticate with Notocat.
Next, we need to add the right newsletter ID where we want to import the contacts. To find
your Newsletter ID, head back to Notocat, open the newsletter dashboard and find the ID
in the URL. It is the part that starts with wks_.

Copy and paste the newsletter ID in the Notocat make module. Next, we need to map the output fields from Airtable to the required fields in Notocat. Click on the Add item button to create a new mapping. The only required field is the Email field, but feel free to map the other fields as well. You can even map custom fields to Notocat. If you do this, click on Add item in the Custom fields section.
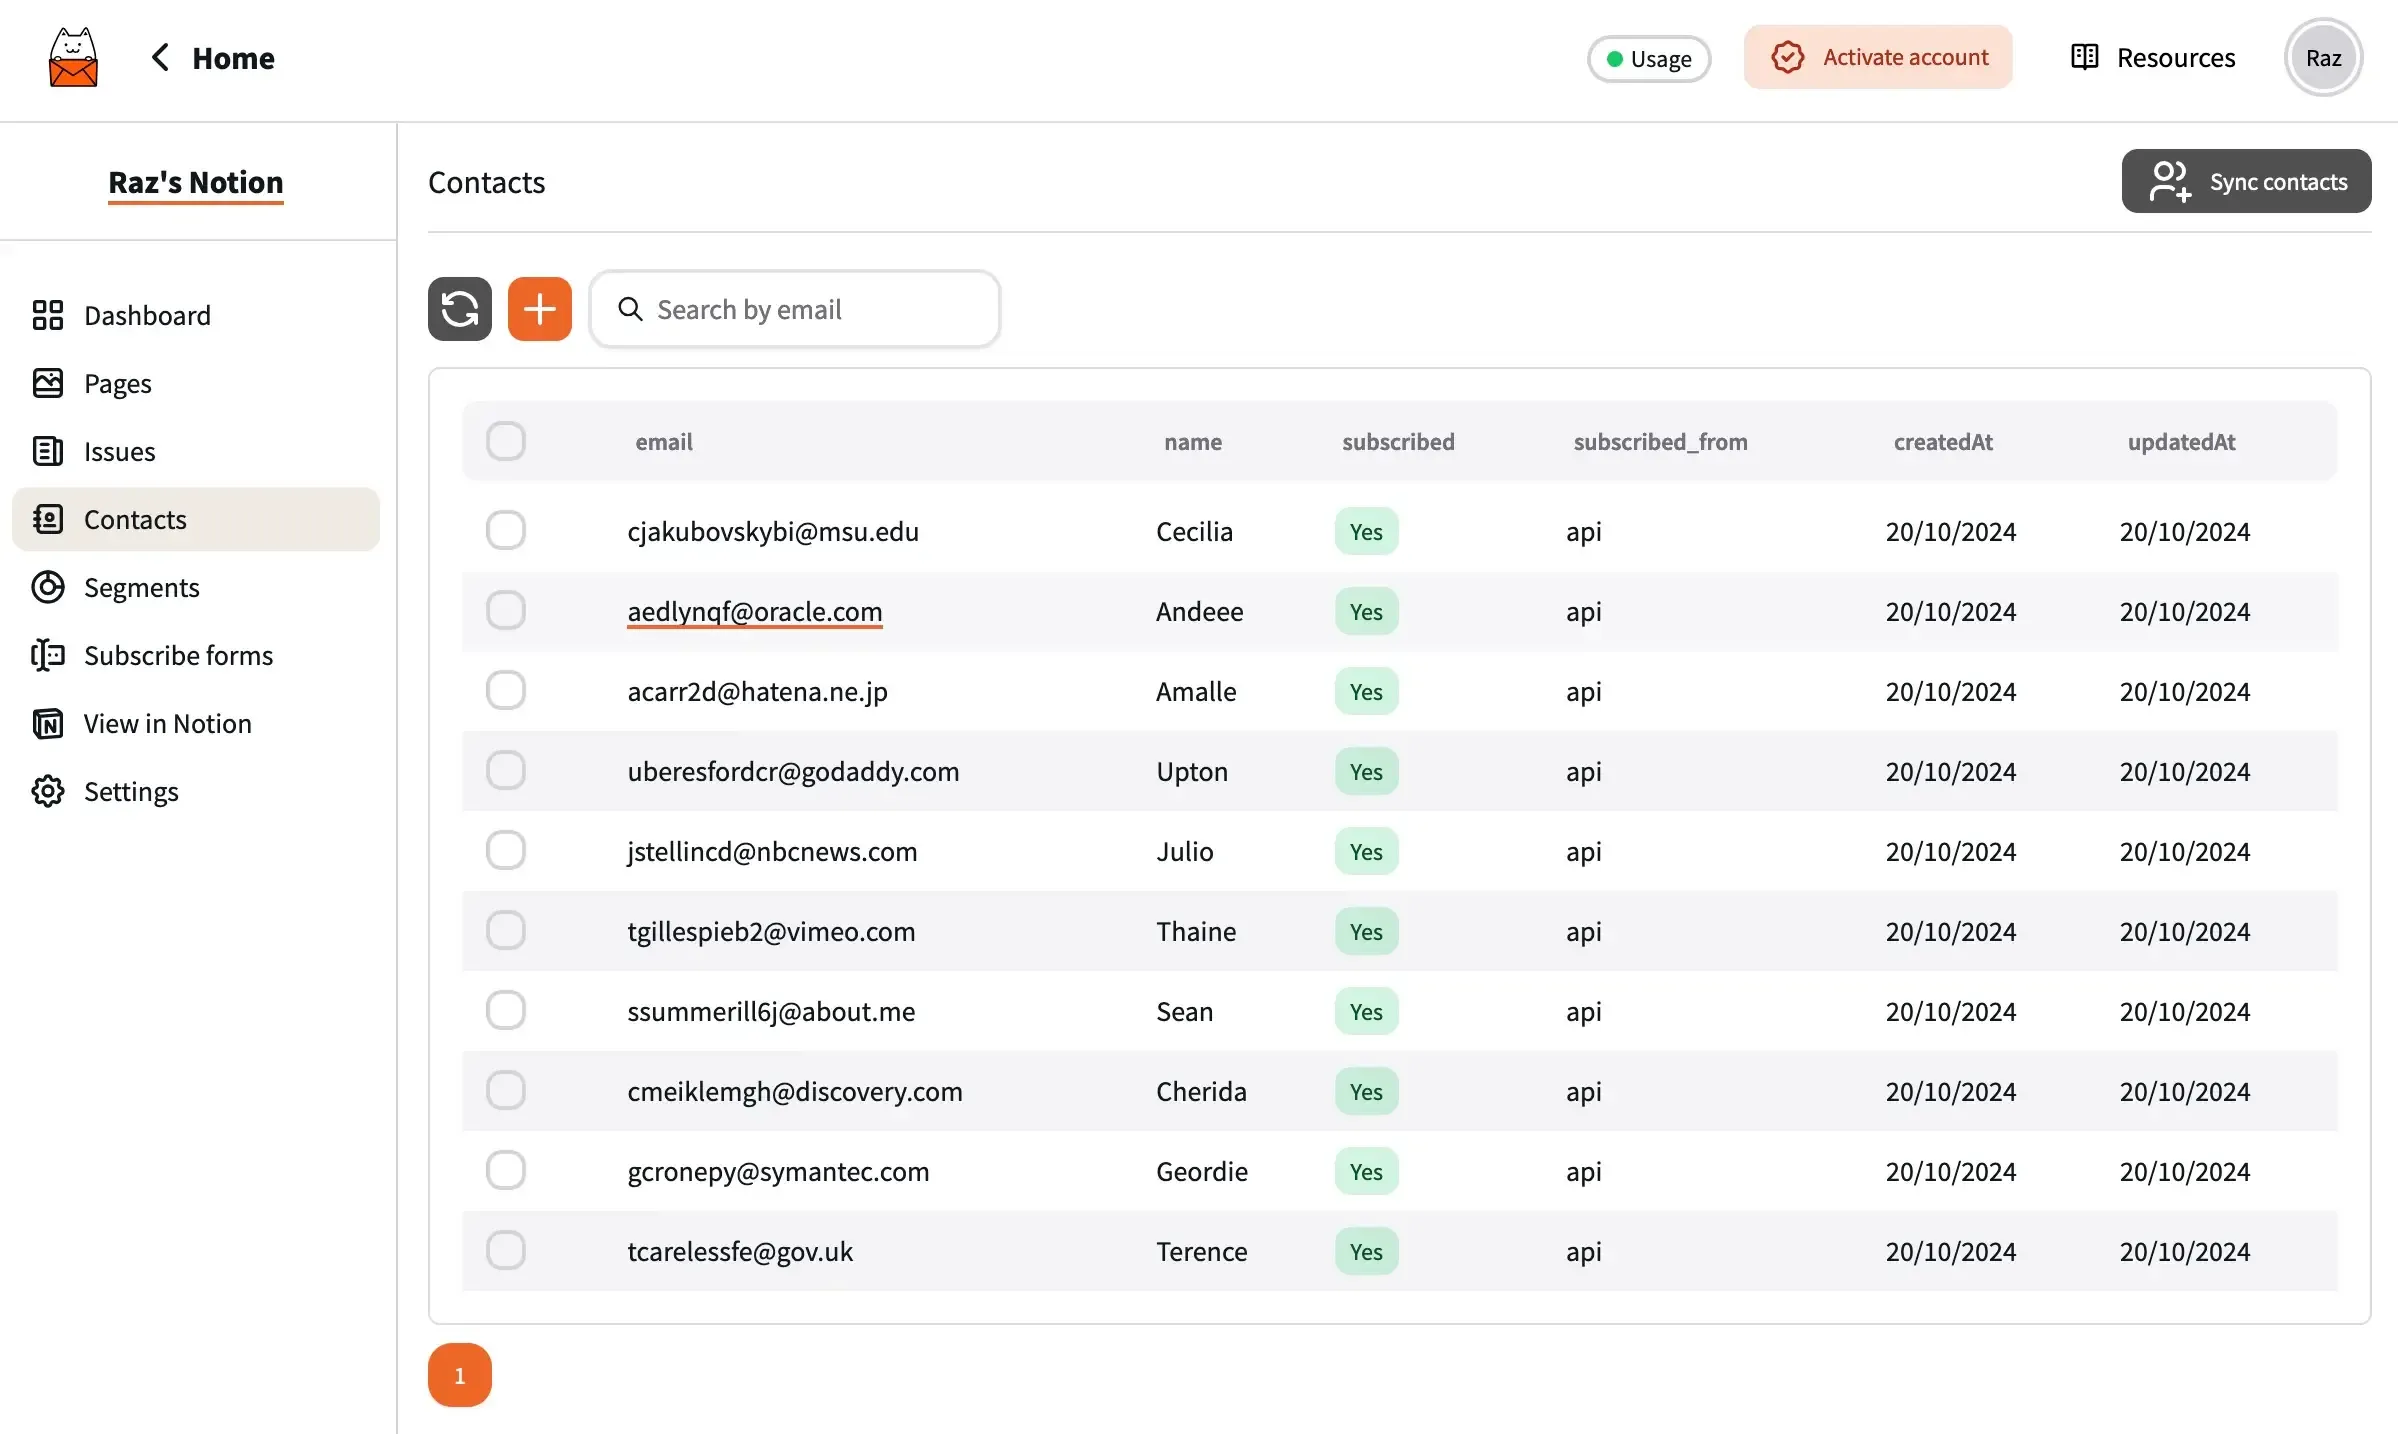
And that’s it! Save your scenario, run it, and check your Notocat contacts list to make sure the contacts were imported correctly.
For importing a large number of contacts, we need to create a more complex scenario that splits the data into smaller chunks. This is necessary because Notocat does not allow importing more than 1000 contacts at a time.
The scenario setup will look the same for the Airtable and Notocat modules, so we will quickly cover the other steps with the required settings. As a high-level overview, the scenario will need the following steps:
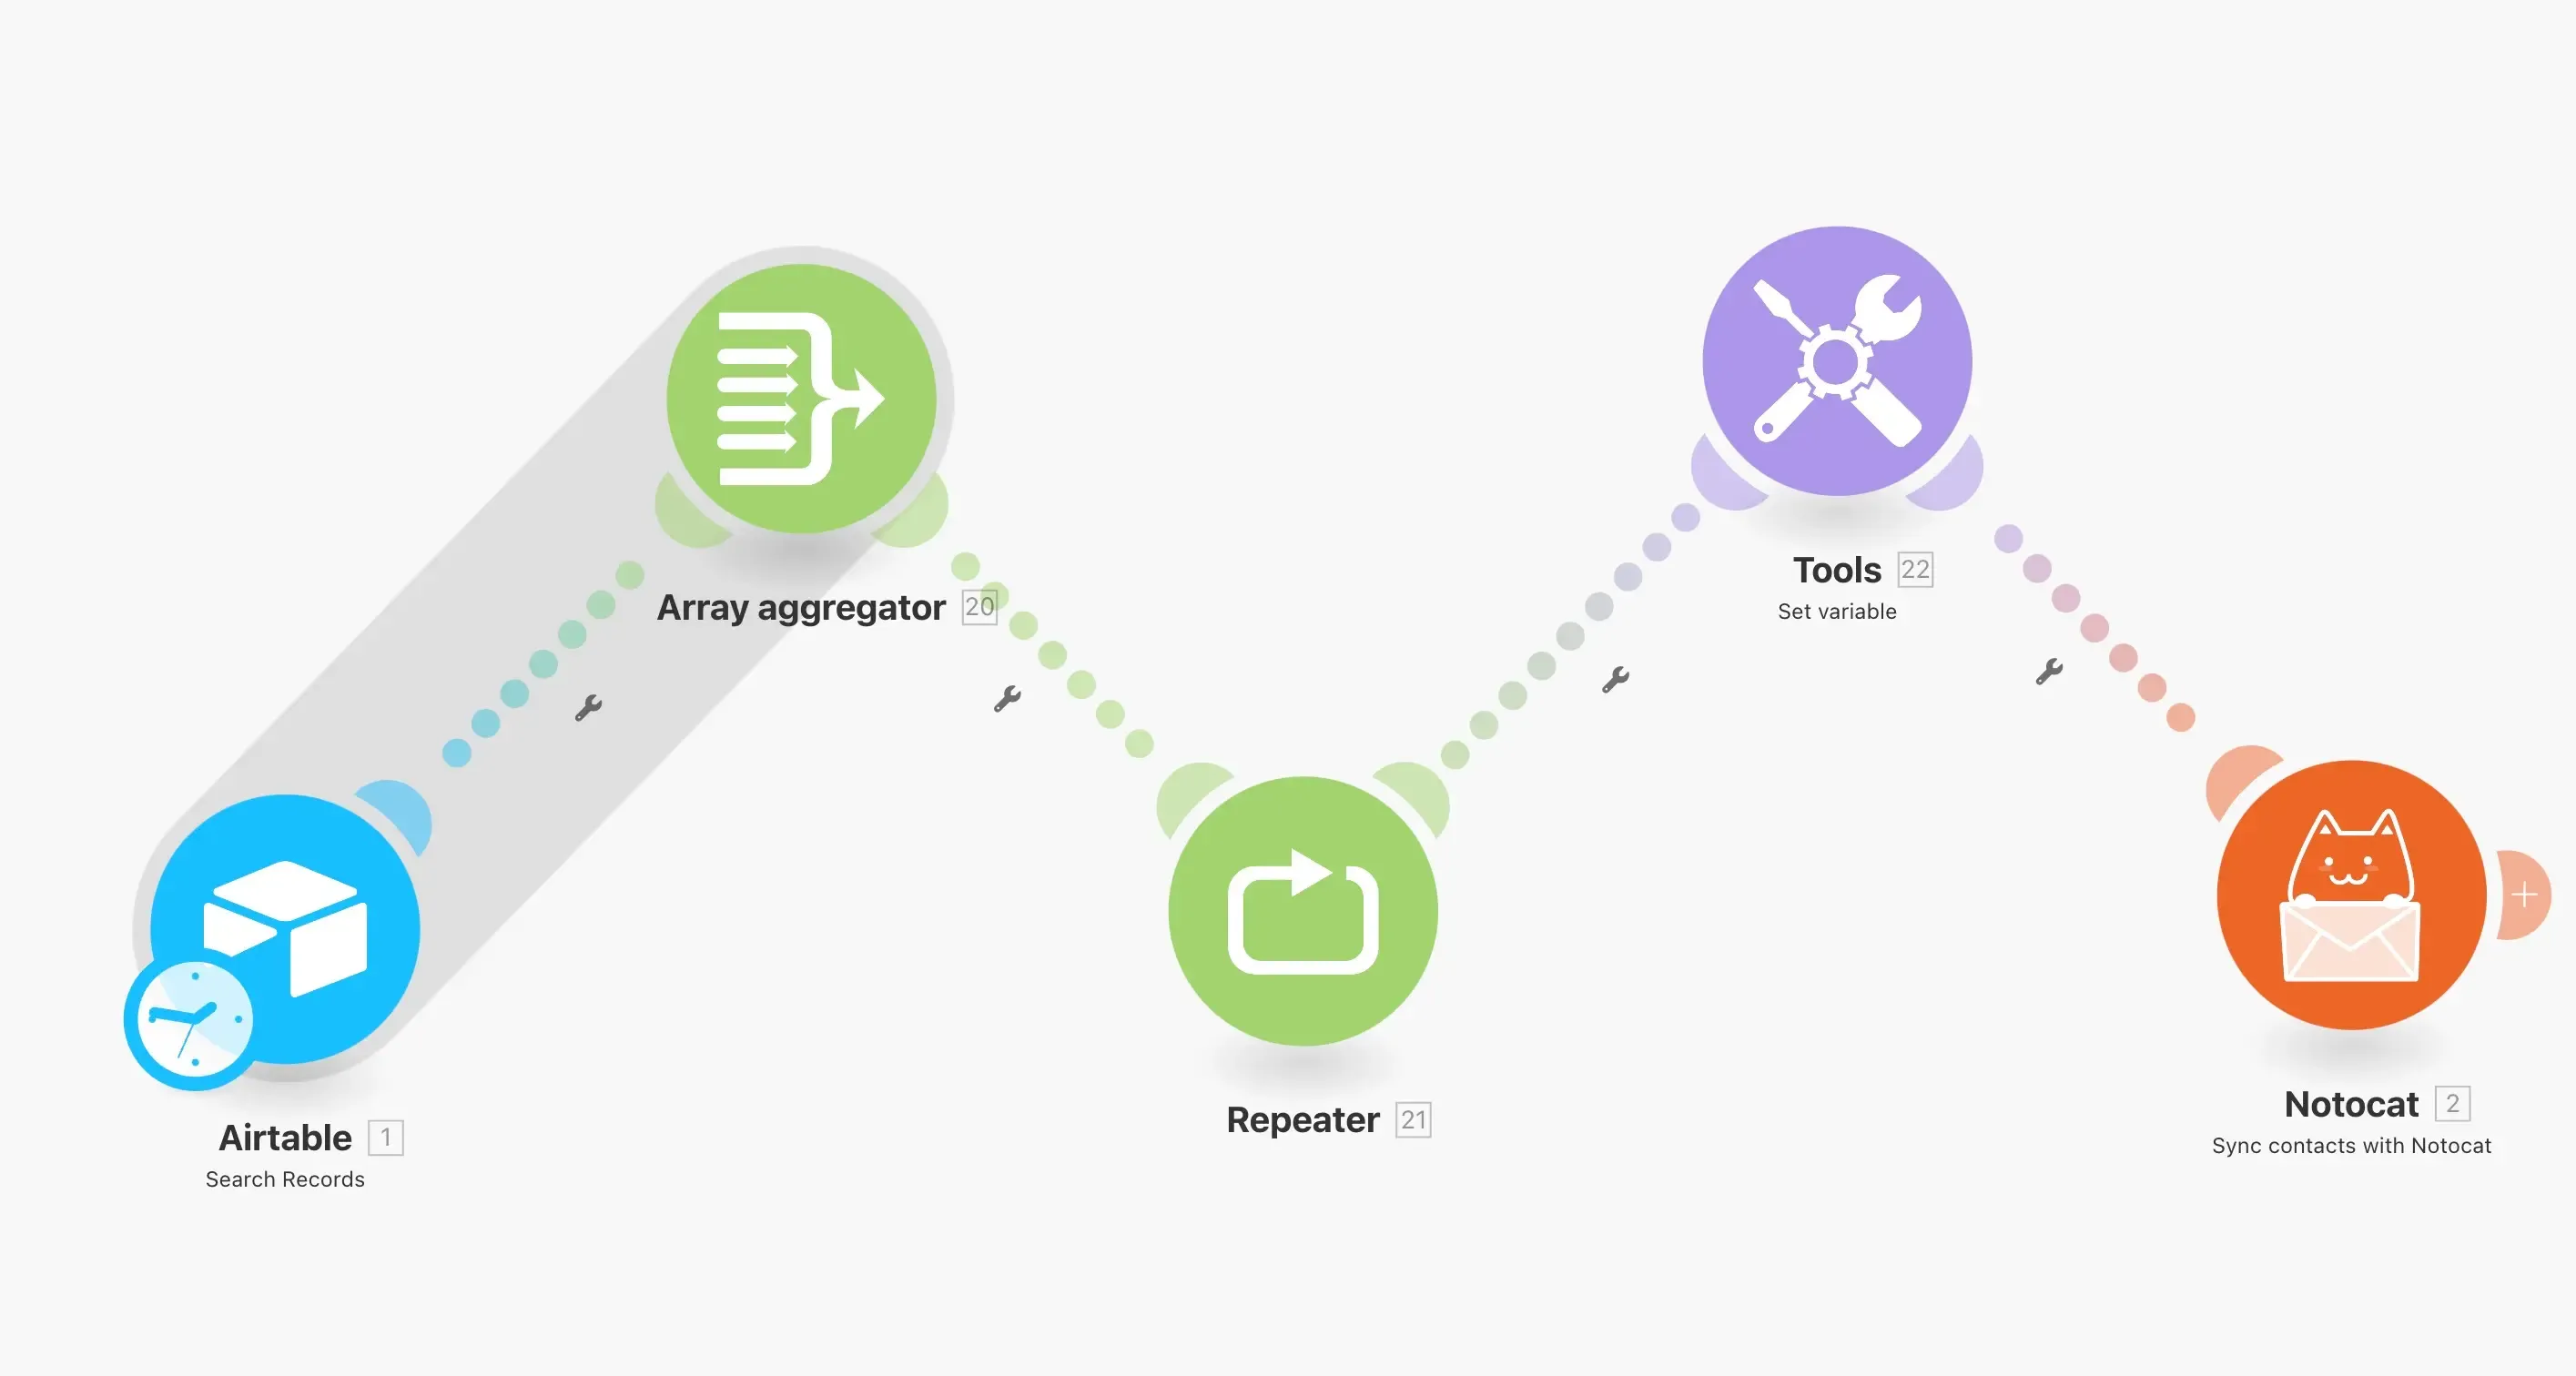
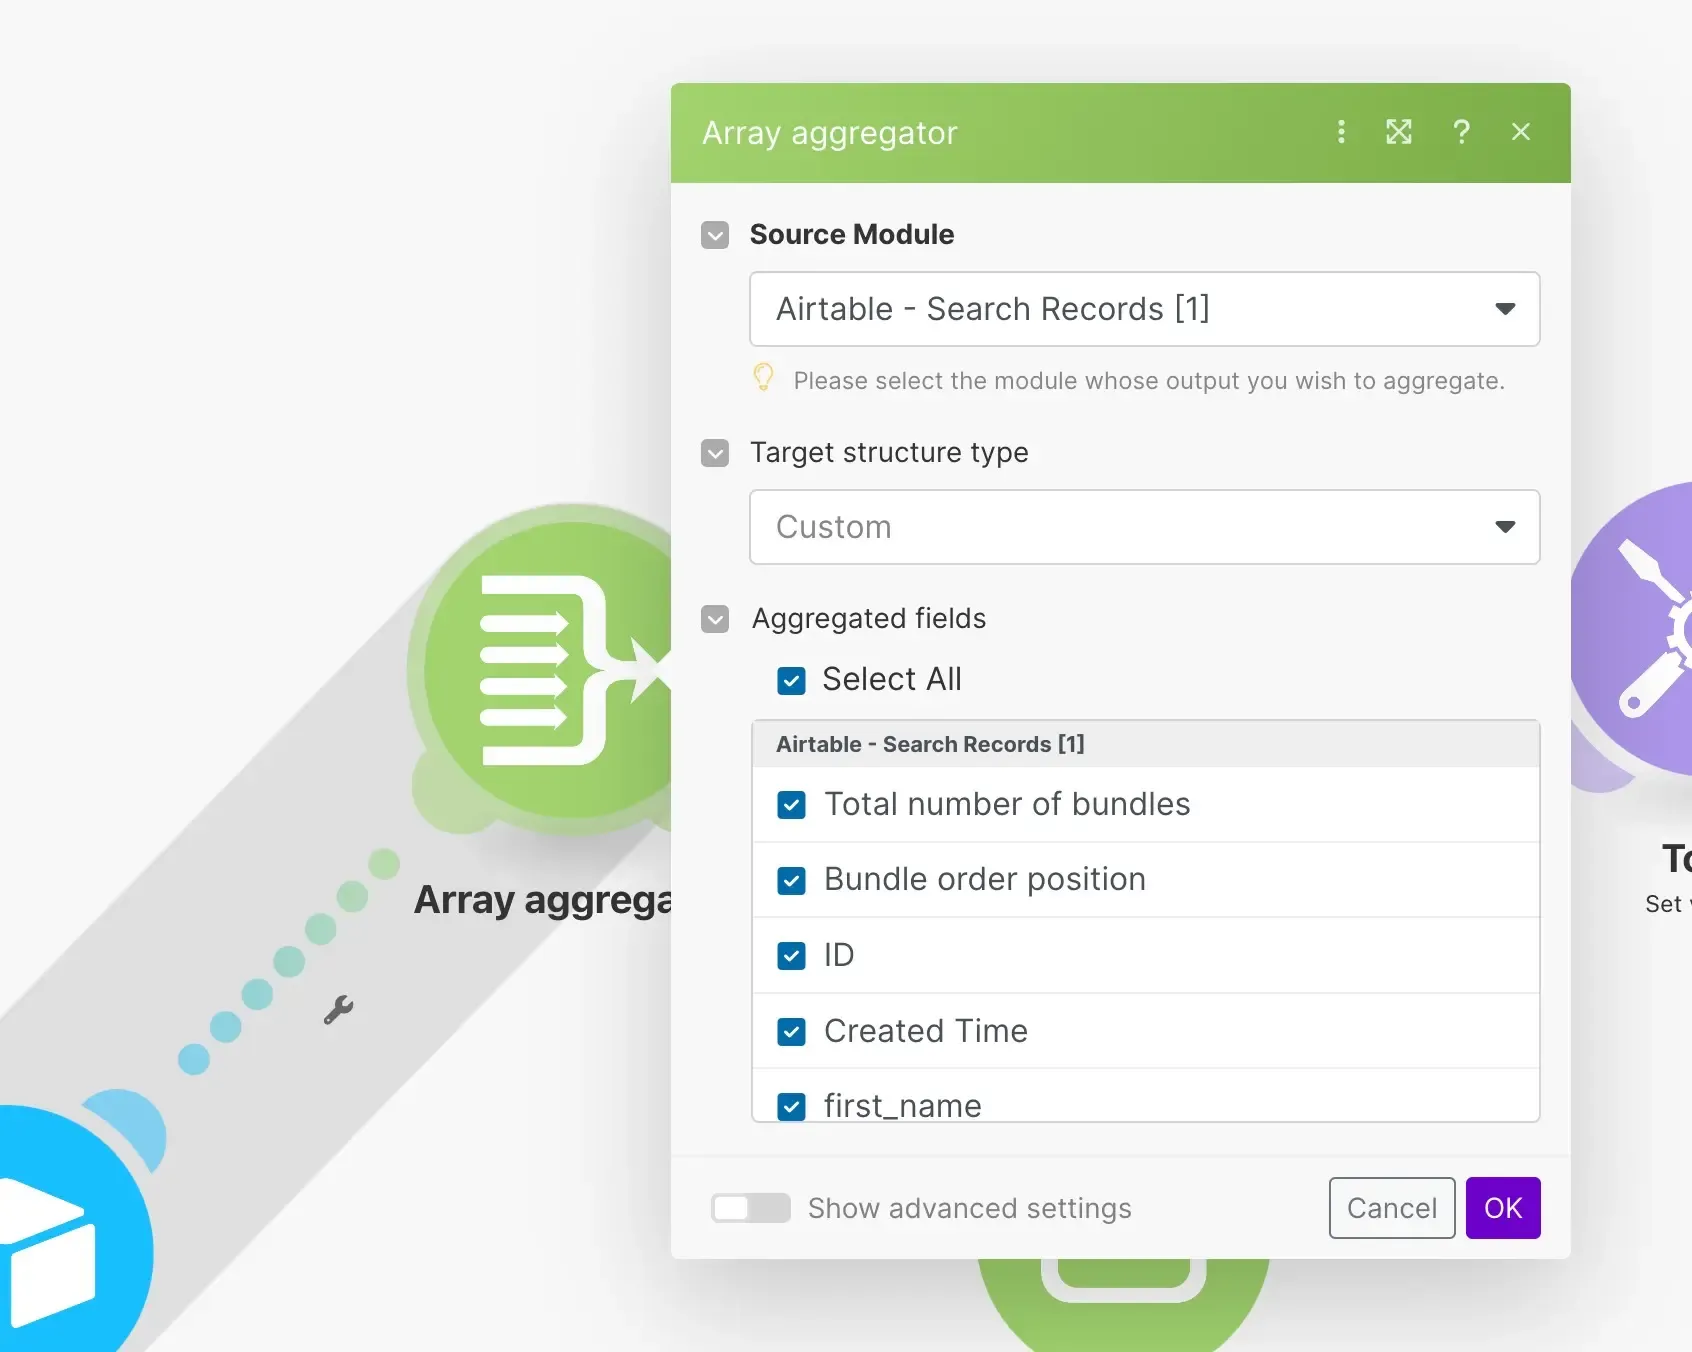
Let’s go through each extra module in more detail. First, we use the Array aggregator module to transform the contacts data into an array. This is necessary because the Repeater module requires an array as input.
Next, we use the Repeater module to repeat the process for each chunk. The Array field should be set to the Array output from the Array aggregator module.

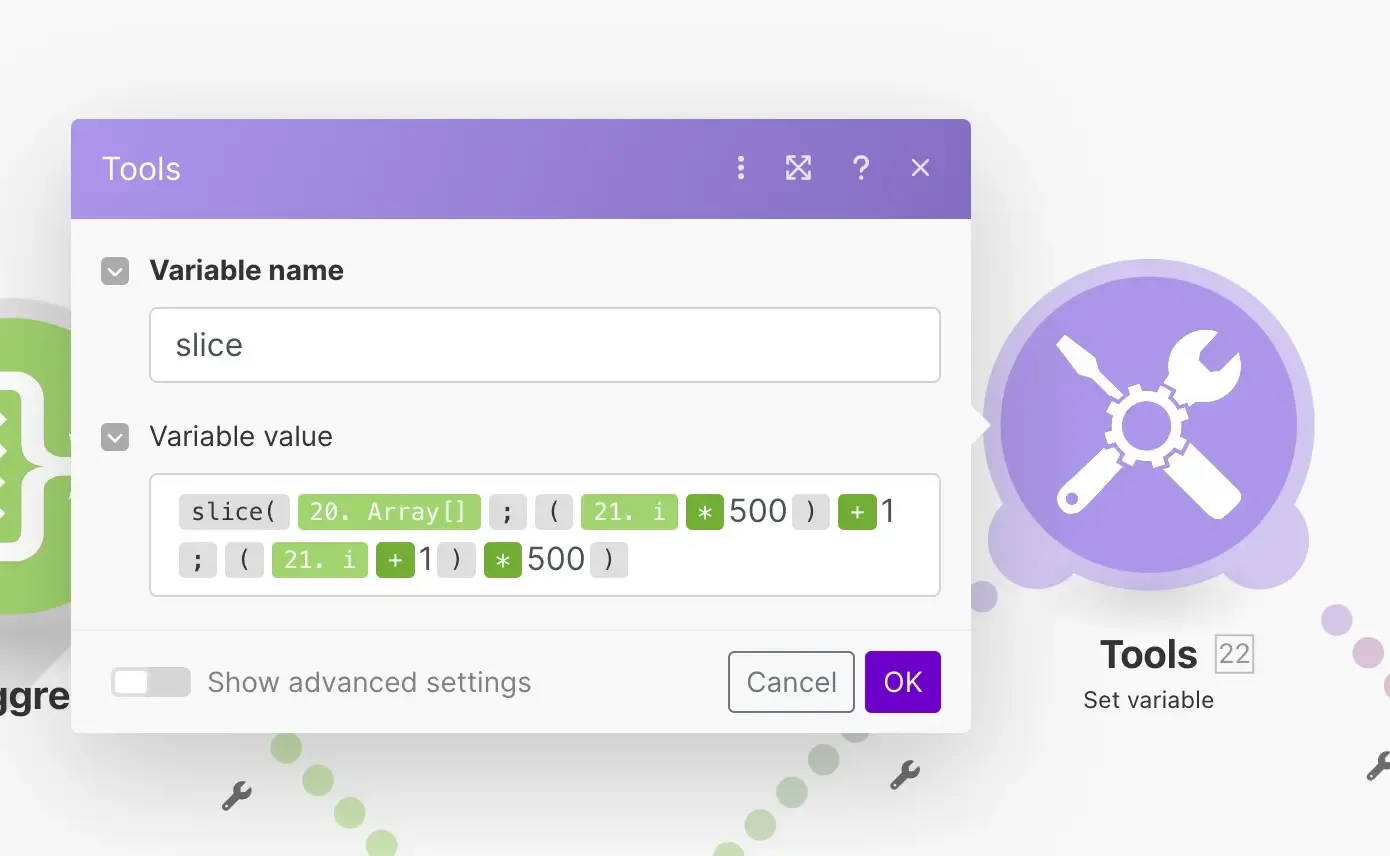
And the last extra module, is the Set variable module. This is used to store the current slice of the array in a variable. The Array field comes from the aggregator module, and the index i from the repeater module.
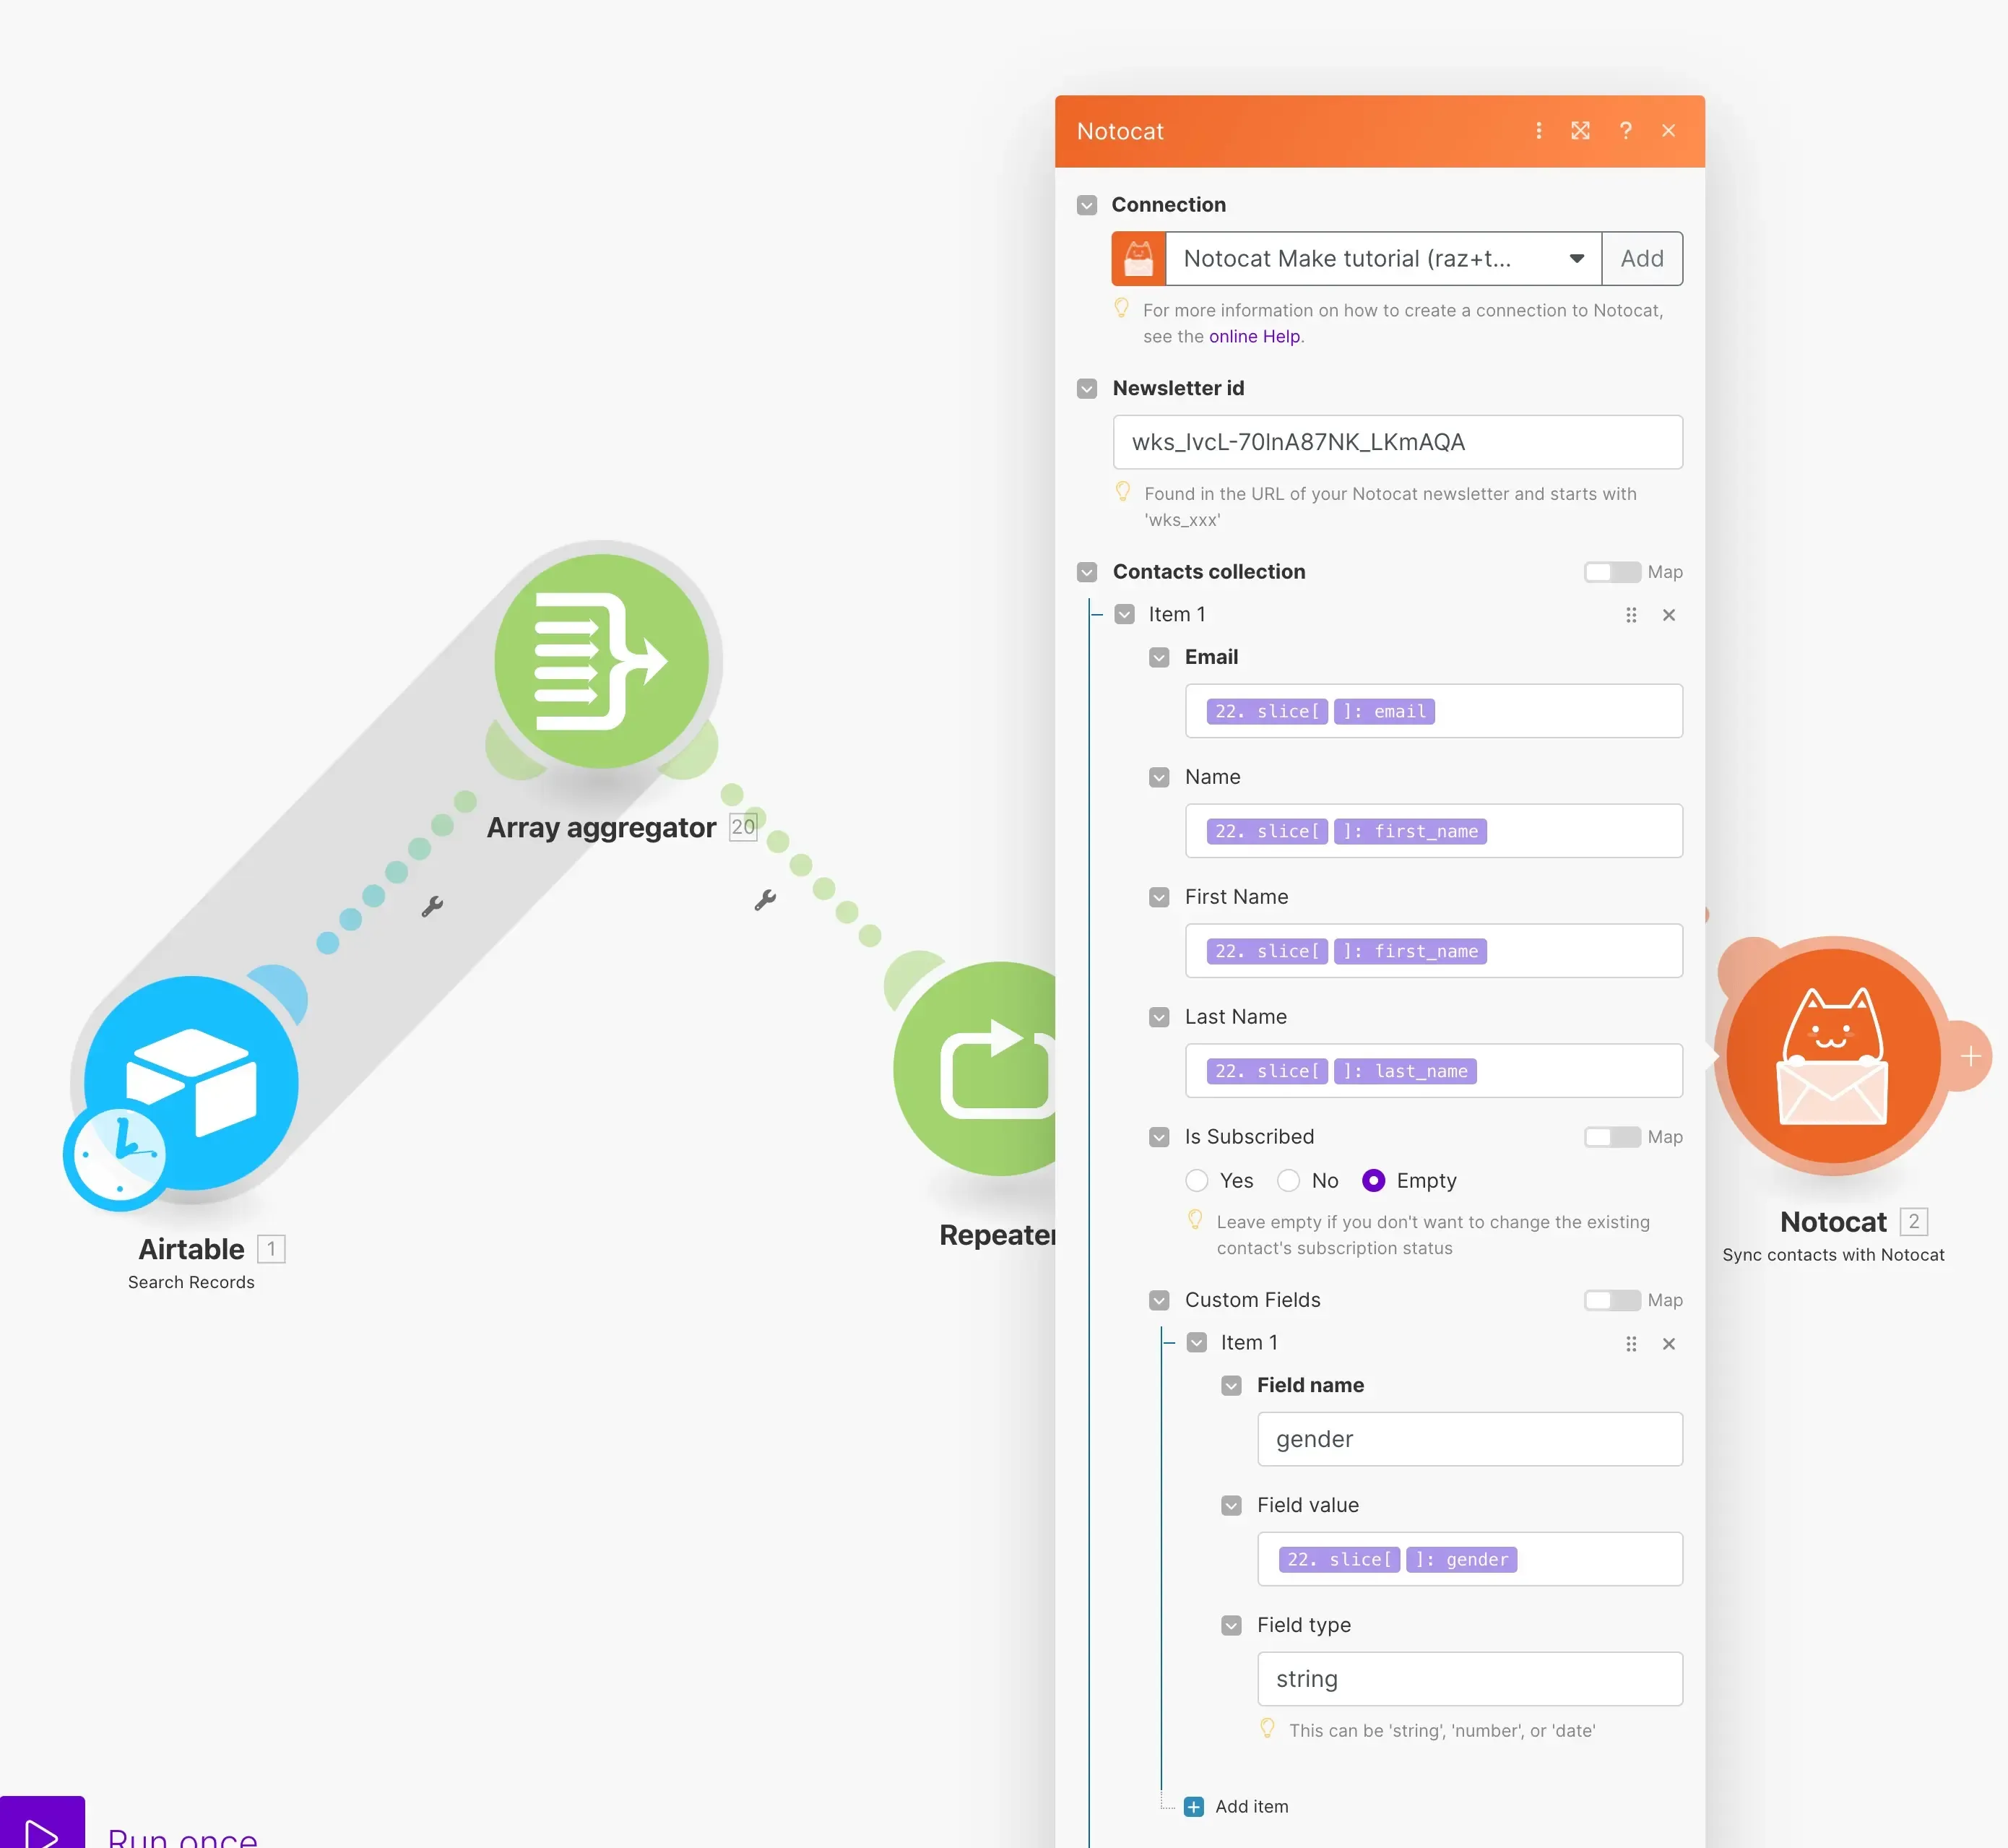
Finally, we map the fields from the current slice to the Sync contacts with Notocat module.
And that’s it! You can now sync a large number of contacts from Airtable to Notocat.
Next up, you can start building your newsletter website with Notocat. Check out our guide on how to do this here. You can then start converting your Notocat pages into newsletter issues and send them out to your audience.
Have any questions? Feel free to reach out to us at [email protected].
Happy sending!

Razvan Ilin
Notocat founder
Create beautiful newsletters from your Notion pages with Notocat, an online newsletter platform. Easily send, track, and grow your audience.
We will contribute 1% of your purchase to remove CO₂ from the atmosphere.

© Copyright 2026, All rights reserved.
Have a question? 📧 [email protected]
